

This is the second tutorial of Edgar Navas in this site. This time, Edgar share his knowledge on on how to model a Terrain in SketchUp from an imported model in Autocad.
First of all in Autocad, I remove anything that does not serve me in SketchUp
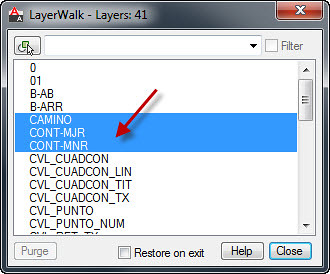
Step 1: Layer Walk
Use the Layer walk in AutoCAD to isolate the contours. See the image toolbar below.
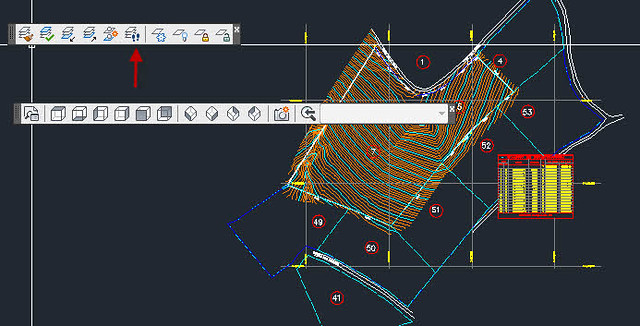
With Layer walk, I manage to identify the layers (road and contours) that I wanted to isolate.
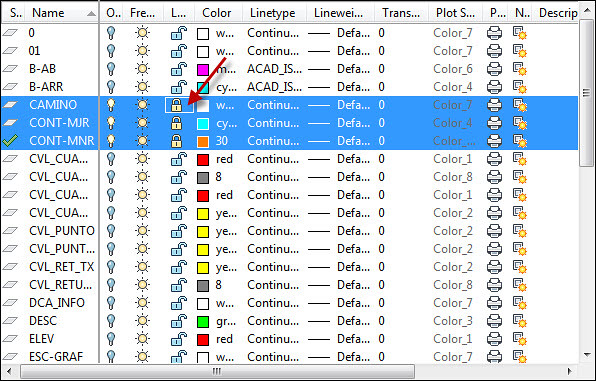
Step 2: Turning off the unwanted layers
All the other unwanted layers that does not serve me were all turned off.
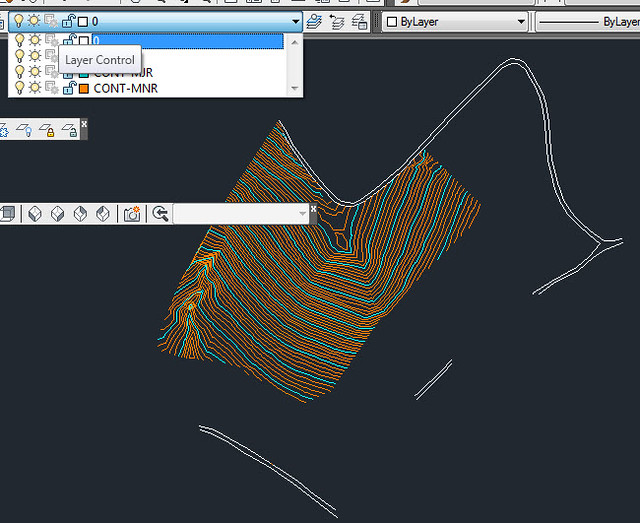
Step 3: Copying and pasting to a new Autocad drawing file
After isolating the layers that I need, I copied them all and pasted them to a new Autocad drawing file and saved.
Step 4: Importing the Contours into SketchUp.
In SketchUp, I imported and loaded the dwg. file. Be sure the Autocad Drawing and SketchUp scale are the same.
Select all the contour lines.
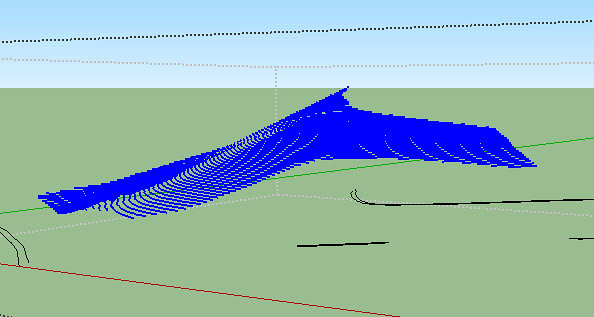
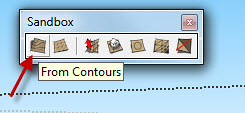
Step 5: Using "From Contours"
Once all the contours were selected, open the sandbox toolbar. Click the icon "from contour" (see below image).
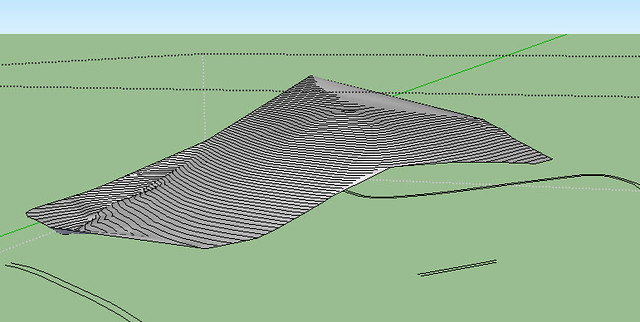
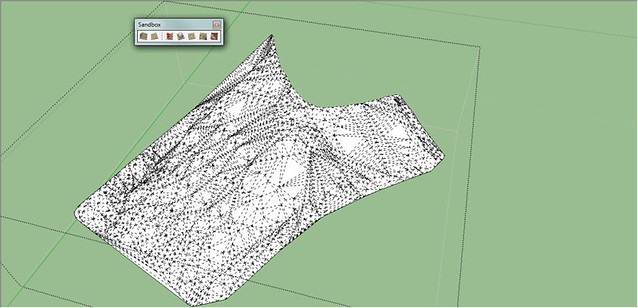
Below shows the progress of terrain surface generation. The time to complete the process depends on the complexity of the contours.

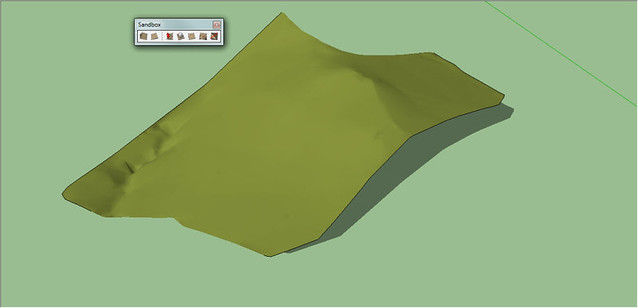
Presto! The terrain surface has been completed.
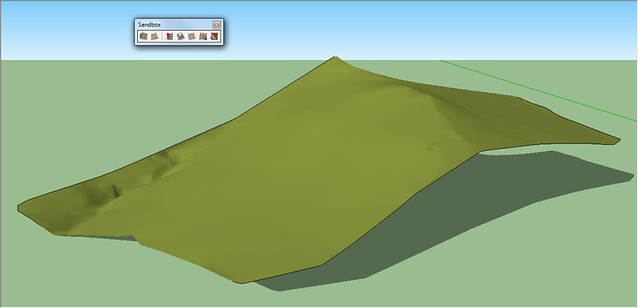
Step 6: Removing Unwanted Geometries
Deactivate the layer of the imported contours in Autocad. Also begin removing some unwanted geometries. To view these geometries, click view..hidden geometry and delete the unwanted lines and faces. (see the unwanted geometries below)
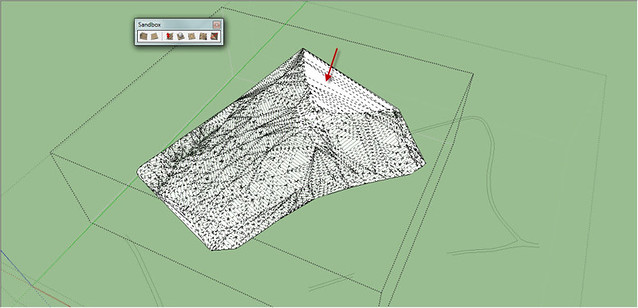
This image shows the deletion of unwanted geometries.
Step 7: Applying Texture Colors
Finally, we will apply texture Color.
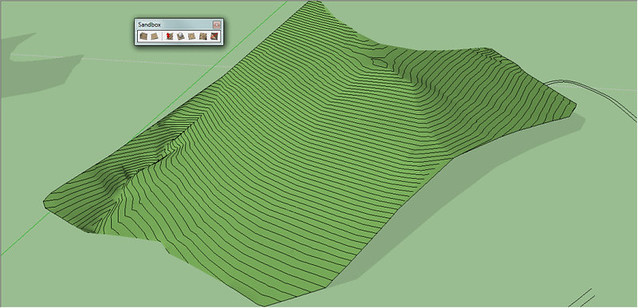
And if I want the contour to display, all I have to do is to activate the layer where they are.
Check out the other tutorial of Edgar Navas HERE. Setting up the DR Spawner
First of all in Autocad, I remove anything that does not serve me in SketchUp
Step 1: Layer Walk
Use the Layer walk in AutoCAD to isolate the contours. See the image toolbar below.
With Layer walk, I manage to identify the layers (road and contours) that I wanted to isolate.
Step 2: Turning off the unwanted layers
All the other unwanted layers that does not serve me were all turned off.
Step 3: Copying and pasting to a new Autocad drawing file
After isolating the layers that I need, I copied them all and pasted them to a new Autocad drawing file and saved.
Step 4: Importing the Contours into SketchUp.
In SketchUp, I imported and loaded the dwg. file. Be sure the Autocad Drawing and SketchUp scale are the same.
Select all the contour lines.
Step 5: Using "From Contours"
Once all the contours were selected, open the sandbox toolbar. Click the icon "from contour" (see below image).
Below shows the progress of terrain surface generation. The time to complete the process depends on the complexity of the contours.

Presto! The terrain surface has been completed.
Step 6: Removing Unwanted Geometries
Deactivate the layer of the imported contours in Autocad. Also begin removing some unwanted geometries. To view these geometries, click view..hidden geometry and delete the unwanted lines and faces. (see the unwanted geometries below)
This image shows the deletion of unwanted geometries.
Step 7: Applying Texture Colors
Finally, we will apply texture Color.
And if I want the contour to display, all I have to do is to activate the layer where they are.
Check out the other tutorial of Edgar Navas HERE. Setting up the DR Spawner
I would like to thank you for the efforts you have made in writing this article. I am hoping the same best work from you in the future as well. In fact your creative writing abilities has inspired me to start my own BlogEngine blog now. Really the blogging is spreading its wings rapidly. Your write up is a fine example of it.
ReplyDeleteออกแบบเมนูอาหาร
Hi, Thanks for sharing this information. I am new to Sketchup and not able to do step 7. How to apply texture color on contour plan? Could you please share the method on this.
ReplyDeleteThanks.