Virtual Reality (VR) can be translated simply as "As if Real". When it comes to Virtual Reality, I imagine someone wearing a special helmet with monitors on both eyes attached to a computer with thick cables. I also visualize "Neo" and "Morpheus" in the Matrix movie. The hunger to simulate reality using computer seems a hard to believe fiction in the past; but this idea is already happening. Pilots use flight simulations in aviation; likewise soldiers are being trained using war simulations and VR games. Today, were more likely to hear someone use the words virtual environment (VE) to refer to what the public knows as virtual reality. We'll use the terms interchangeably in this article. Whether we use VR all VE, these simulations needs an environment codified and rendered using computers. V-RAY and Google SketchUp could also create and render virtual environment (VE).
Four months ago, I have created a detail tutorial on how to do this in the interior and posted it in my main blogsite. You can access this tutorial using the below links:
Four months ago, I have created a detail tutorial on how to do this in the interior and posted it in my main blogsite. You can access this tutorial using the below links:
One of our online friend Edgar Navas, co-creator and co-administrator of http://foro.sketchando.net/ and contributor in this site, shared an exterior version of virtual reality using V-RAY and Google SketchUp. I would like to recognize Edgar in this tutorial and thank him for allowing me to share this tutorial here. I also would like to thanks him for sharing me an html code in embedding the VR output in this site.
Here is Edgar Navas tutorial: Exterior Panorama with V-Ray + Pano2VR
Software: Sketchup 8.0, V-ray 1.49.01, Pano2VR http://gardengnomesoftware.com/pano2vr.php
Others: Spherical HDRI file as Image base light source
Spherical HDRI image converted to jpeg. file
Others: Spherical HDRI file as Image base light source
Spherical HDRI image converted to jpeg. file
First here is the Panorama
We will start with a simple model for the purpose of practicality with render time.
Step 1: Use Position Camera Tool
Use Position camera tool and click the exact location were you want to place the camera.
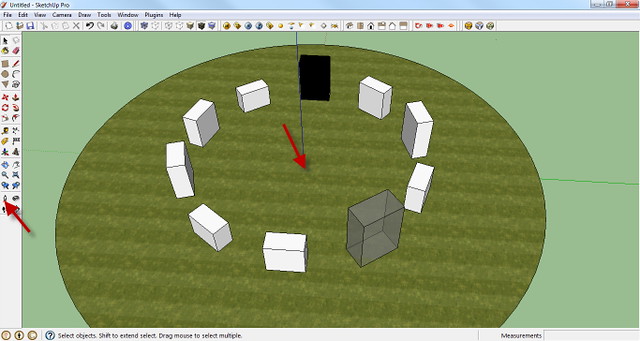
Once clicked, the camera view will be updated.
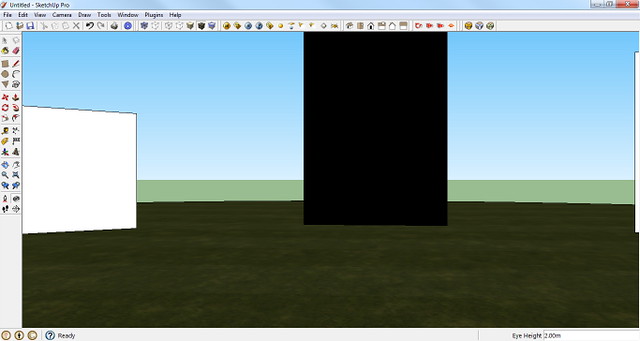
Step 2: Camera Height Position
We can change the Eye height in the "measurement box". Here I used 2.00m. The height will depend on you.
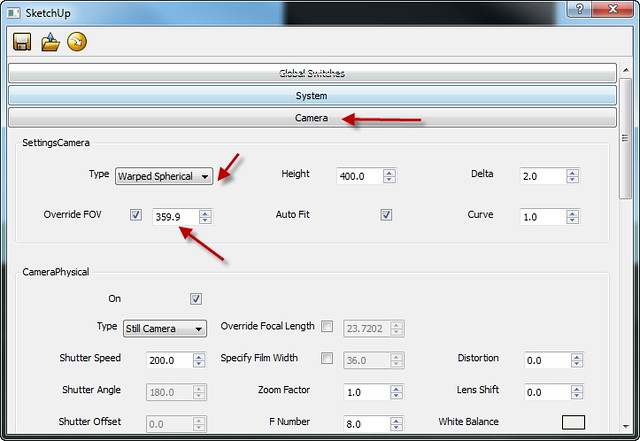
Step 3: V-RAY Camera Option
Open V-RAY Camera Option. Under Type, choose Warped Spherical. Tick Override FOV and enter 359.9 degrees.
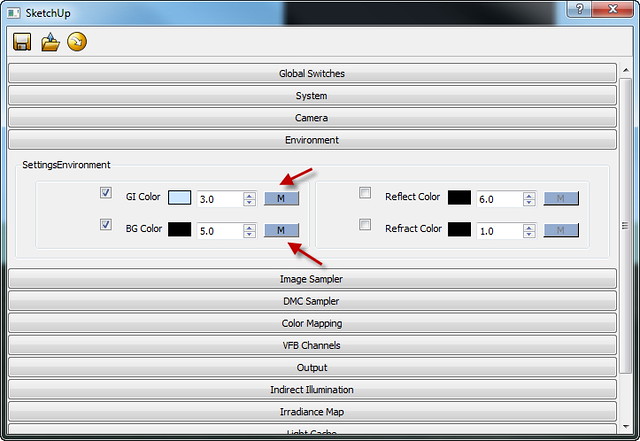
Step 4: Environment Setting.
Load the HDRI files for both GI and BG map options. In this example I use a visopt by ArqEstevez but with modification so that the shadows are consistent with the background I am using. You can use your own settings here.
Step 5: UVW Mapping Type
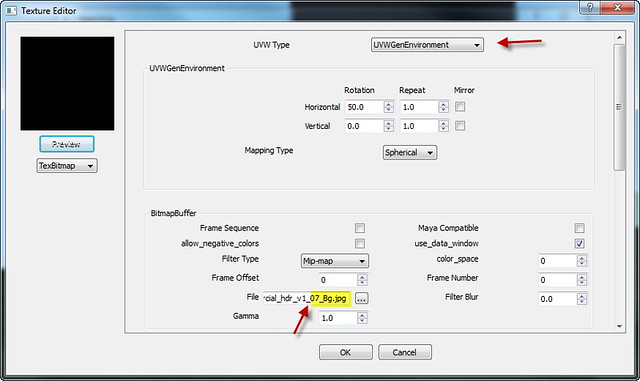
Once the maps were loaded, you need to change the UVW mapping type for both GI and BG HDRI map to "Spherical"
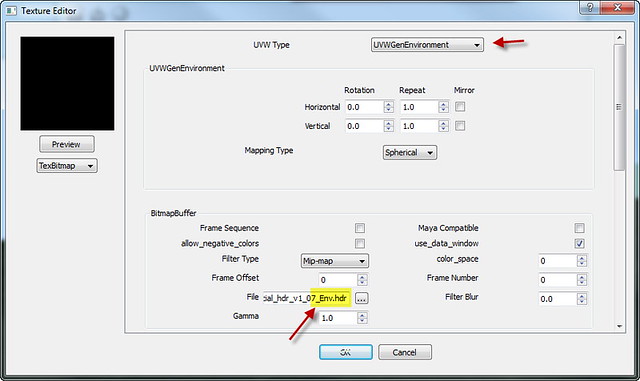
Note: The map for GI color is "hdr" file, while thee map for BG color is "jpg" file converted from original hdri file
Step 6: Render
Now we can click the render button.
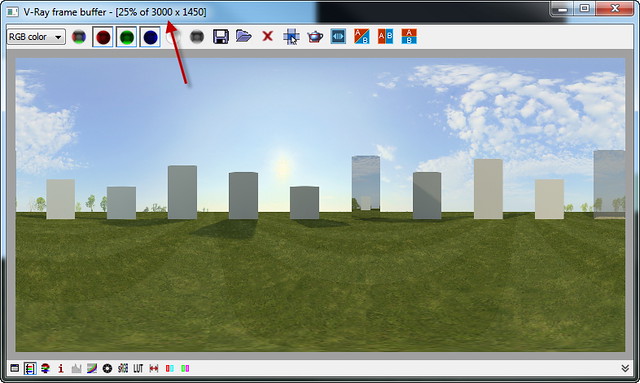
Clicked the render button. Below is the rendered panorama image with an output image size of 3000pixels X 1450 pixels
Step 7: Creating the VR image
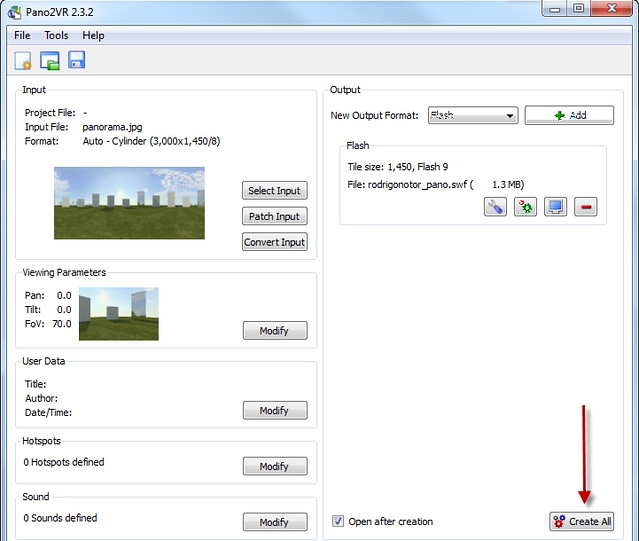
Open Pano 2VR software and choose "Select Input"
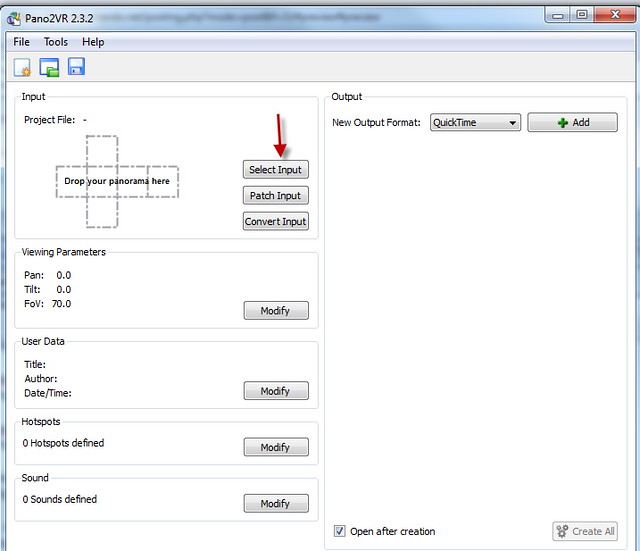
Under input, select "Auto"
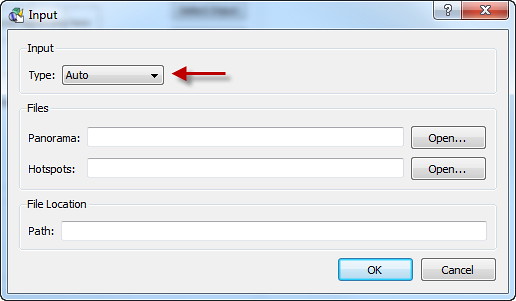
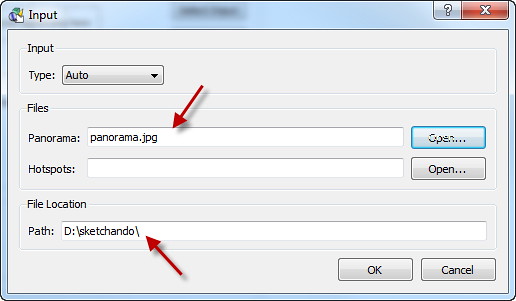
Then Open the rendered image that we have saved and done with V-RAY SketchUp
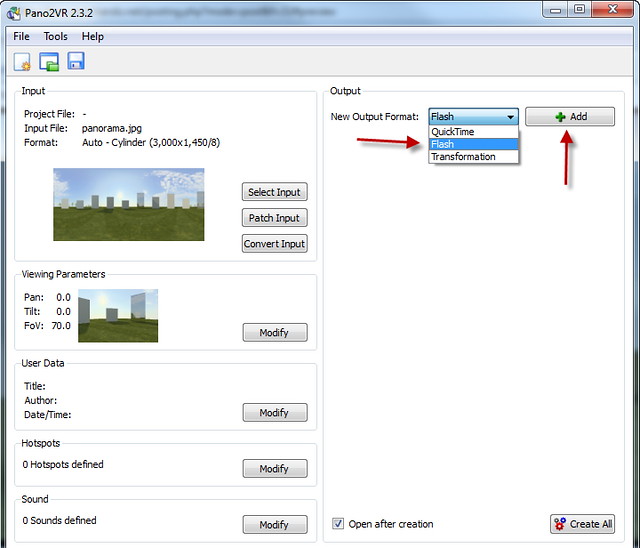
Under the output, choose your output size and click "Add". In this example, I used Flash output format.
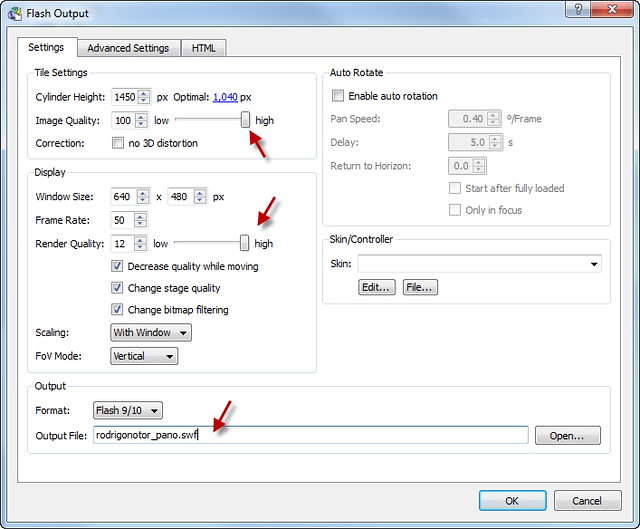
Under the output options, in my case Flash Output, choose the settings. In my case again, I choose High for both Tile and Display settings.
Then click create all.


Thanks Nomer, is a honor to be here.
ReplyDeleteRegards
Edgar "Rodrigonotor" Navas
It's also an honor that we share your knowledge here. Thank you very much again..
ReplyDeleteVery useful for me. Thank you.
ReplyDeleteas flash or html file upload to the web? for q other to see!
ReplyDeleteHi
ReplyDeleteIs there a way of adding population and effects to the final image in photoshop?
Thanks
Tom
mukti
ReplyDeletegood aritical & usager friendly.thank .
Hello Sir!
ReplyDeleteGreat tutorial! Thanks for it and I tried out and it turned out very fine.
Recently I came across the use of Google Cardboard which can let the user has some immersive experience. Do you know if there is any other tutorial / ways to do this with our pano2vr?
Thanks!
CF
Any info if we can use easly Pano File with VR glasses in future? what format files it gaves us?
ReplyDeleteThis comment has been removed by the author.
ReplyDeleteThank you for this! I have been trying to find resources for how to begin learning code for virtual reality & this has been easy to understand and use!
ReplyDeletehttp://bit.ly/1J6v6Ok
3d projection mapping is growing in popularity and demand each day. Unlimited possibilities of projection mapping have overcome the challenges of the extreme creativity involved in projects.
ReplyDeleteVirtual reality booth