This will be a series of curviloft tutorial from Karlheinz Hauser of Germany. In this tutorial he will show us how he uses Curviloft (Loft and Skinning) script developed by Fredo. Get the download link of this script HERE.
Note: Be sure to also download the lates LibFredo script which is a must to make Fredo's scripts work in SketchUp.
What is Curviloft?
Curviloft is still in its beta phase. It is a script created by Fredo and dedicated to Loft and Skinning; generation of surfaces from contours. It has three main aspects:
Modeling Ring using Curviloft and SketchUp
We would like to thank Kalheinz Hauser for allowing us use his images and to post them here. I will be adding some further explanations to each image made by Kalheinz to elucidate the different steps.
Introduction:
I want to show some basic techniques with "Curviloft. So far I have not explored all the parameter changes. I used mainly the Twisting function. For the basic shape I used the tool "Perpendicular Faces". Basically, almost all Faceprofiles are possible. The selection of the faces should always happen in a consecutive way. Otherwise it is difficult due to unforeseeable results. The possibilities are almost no limits set. "Kalheinz Hauser"
Curviloft twisting behaviour
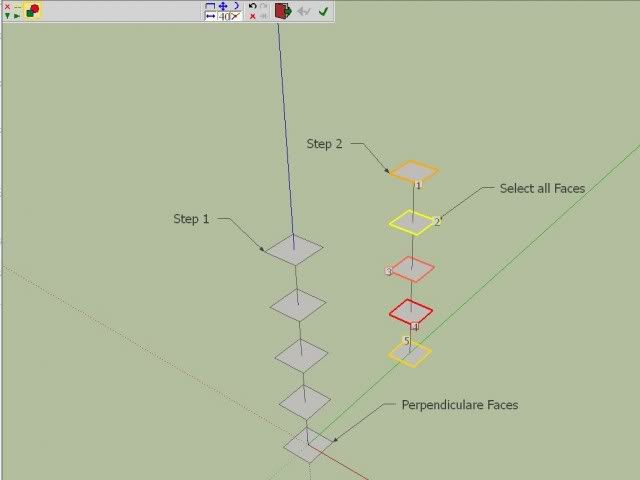
Step 1: Create different faces along the Z axis.
Step 2: Select each faces one by one as shown
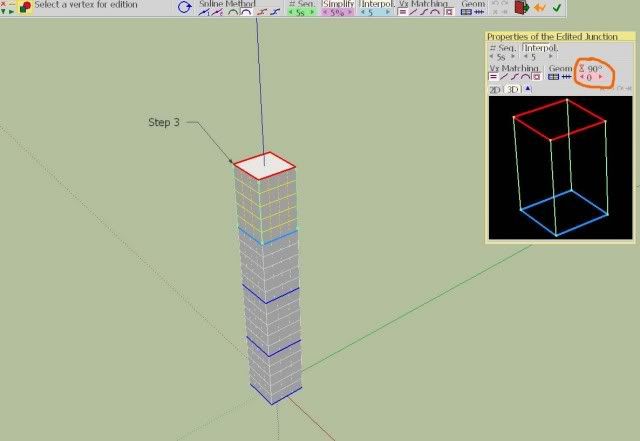
Step 3: Open curviloft toolbar and click "Create Loft Junction". Then click the upper part. Properties of the Edited junction will pop-out.
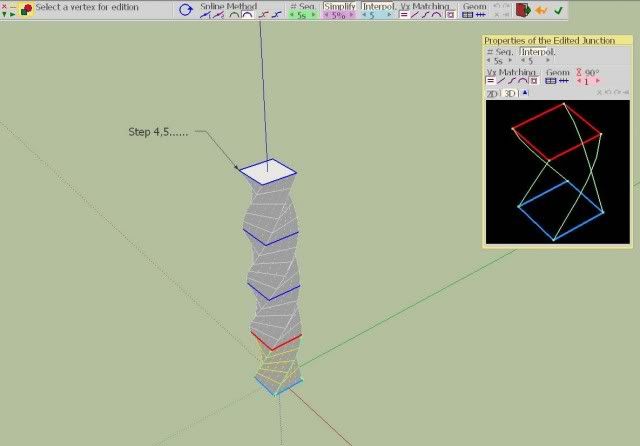
Step 4 and 5
Select each loft face and change the increment value of 1. The face will be twisted 90 degrees. Then click the check icon to finish and generate geometry.
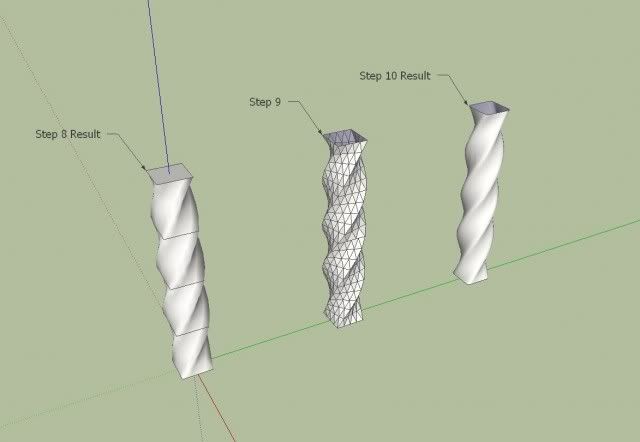
Unsoften the edges. Click window/soften edges to access "soften edges" move the slider to the left to "0 degrees" to unsoften the surface.
![]()
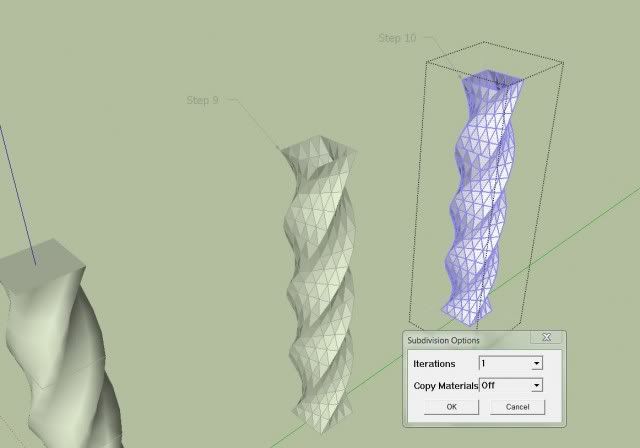
For a much better looking model, you can add subdivision. Subdivide and Smooth script by Dale Martens can be used to add subdivision. I am using 1 iteration here. See the results.
Now from that we can make the model a bit complicated. From simple square, I am using the profile below. You can also play by rotating the faces. This will give you different result.
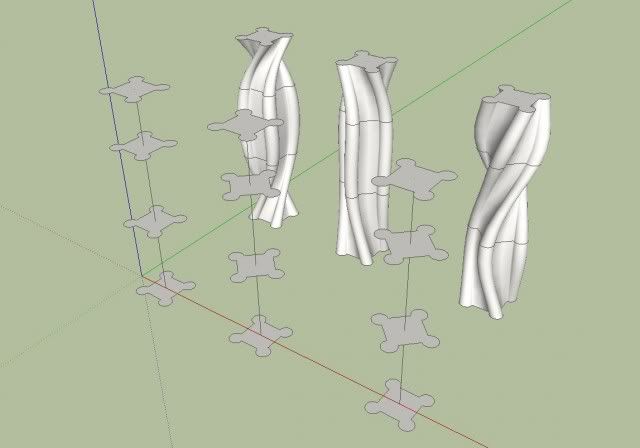
The same profile, I am now arranging all the elements along the path of a quarter circle.
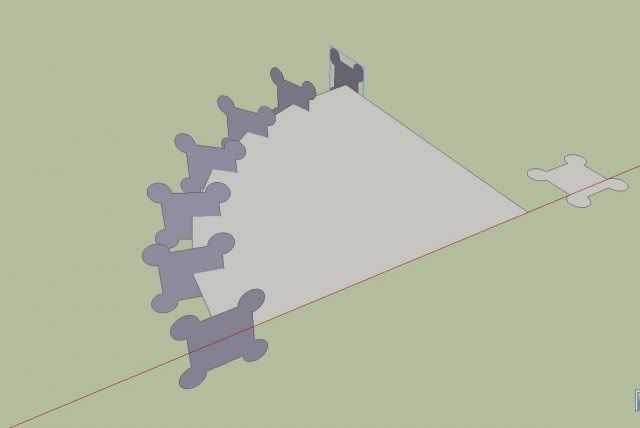
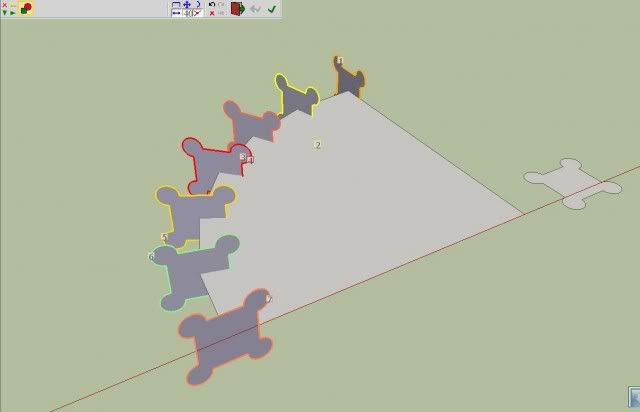
From the previous exercise, select all the the faces, and click "create loft junction".
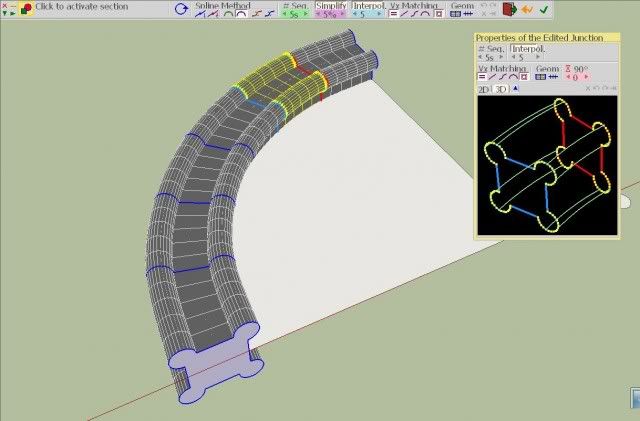
Changing the increment value to 1.
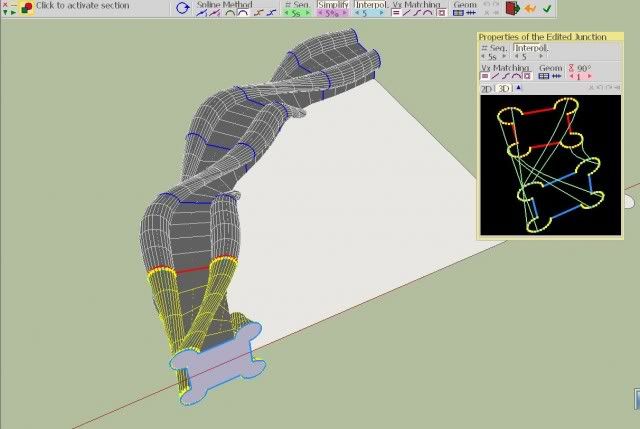
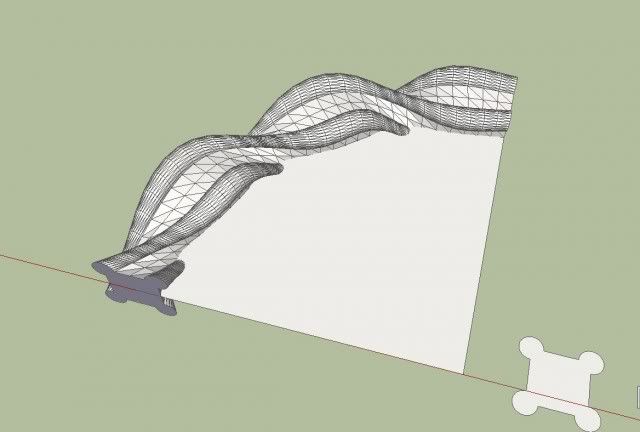
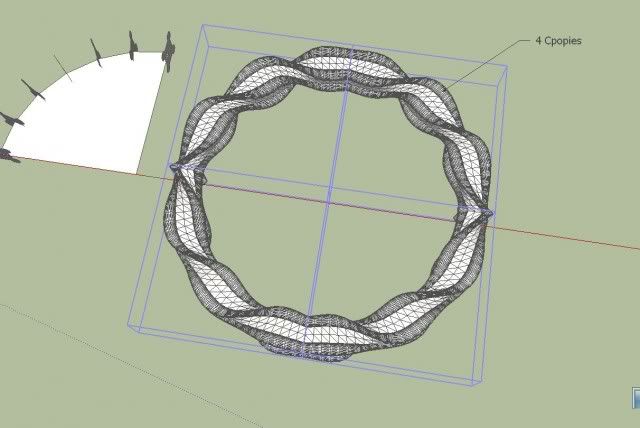
I made four more copies using the copy rotate tool. I made a simple ring.
Note: Be sure to also download the lates LibFredo script which is a must to make Fredo's scripts work in SketchUp.
What is Curviloft?
Curviloft is still in its beta phase. It is a script created by Fredo and dedicated to Loft and Skinning; generation of surfaces from contours. It has three main aspects:
- Loft by Spline - joins separate contours, open or closed, by smooth splines
- Loft along Path - joins contours, along a given rail curve.
- Skinning - create surfaces bounded by 4 or 3 contiguous contours
Modeling Ring using Curviloft and SketchUp
We would like to thank Kalheinz Hauser for allowing us use his images and to post them here. I will be adding some further explanations to each image made by Kalheinz to elucidate the different steps.
Introduction:
I want to show some basic techniques with "Curviloft. So far I have not explored all the parameter changes. I used mainly the Twisting function. For the basic shape I used the tool "Perpendicular Faces". Basically, almost all Faceprofiles are possible. The selection of the faces should always happen in a consecutive way. Otherwise it is difficult due to unforeseeable results. The possibilities are almost no limits set. "Kalheinz Hauser"
Curviloft twisting behaviour
Step 1: Create different faces along the Z axis.
Step 2: Select each faces one by one as shown

Step 3: Open curviloft toolbar and click "Create Loft Junction". Then click the upper part. Properties of the Edited junction will pop-out.

Step 4 and 5
Select each loft face and change the increment value of 1. The face will be twisted 90 degrees. Then click the check icon to finish and generate geometry.

Unsoften the edges. Click window/soften edges to access "soften edges" move the slider to the left to "0 degrees" to unsoften the surface.
For a much better looking model, you can add subdivision. Subdivide and Smooth script by Dale Martens can be used to add subdivision. I am using 1 iteration here. See the results.


Now from that we can make the model a bit complicated. From simple square, I am using the profile below. You can also play by rotating the faces. This will give you different result.

The same profile, I am now arranging all the elements along the path of a quarter circle.


From the previous exercise, select all the the faces, and click "create loft junction".

Changing the increment value to 1.


I made four more copies using the copy rotate tool. I made a simple ring.


very nice tutorial...
ReplyDeletethanks Zernan
ReplyDeleteamazing!
ReplyDeletewoow i like tut
ReplyDeletewhat the seri/tipe version of curvi loft for that modeling
ReplyDeletecan anybody send a link where to download curviloft for sketchup 2013?
ReplyDelete