Pages
COPYRIGHT
All resources offered by this blogsite are shared by the authors themselves. Some of them were rewritten with permission and some were collected throughout the internet and exchanged between peers for personal study. Use of any resources offered for commercial purposes is prohibited. Otherwise you need to responsible for any consequences produced! Any profitable behavior of utilizing the resources downloaded from this site is condemned and disdained sternly.
Some of the resources, and data here were shared by the authors freely and we don't have all the capacity to know, if the components, materials inside the scenes were copyright protected. If you feel some resources have infringed your copyright, please contact us. We will delete them as quickly as possible. We won't bear any legal responsibility for the resources. Thanks.
Custom Search
Custom Search
Welcome to SketchUp, Vray and other Resources
Everyone is capable of learning. Learning is part of life. It is a social process of living and bringing everyone to share their inherited resources and discoveries. All of us can influence the life of others through sharing and caring. It is our belief that everyone should be a lifelong learner.
I am putting very important visualization resources and series: tutorials, tips, tricks, VRAY materials and settings, and mini-the-making (MTM) processes.
Yours,
Nomeradona
I am putting very important visualization resources and series: tutorials, tips, tricks, VRAY materials and settings, and mini-the-making (MTM) processes.
Yours,
Nomeradona
Showing posts with label tutorial. Show all posts
Tuesday, 27 August 2013
Mini the making of H Hauz by J Trenonce
Tuesday, 21 May 2013
New Vray Sketchup 1.6 Video Tutorials
Here are some of the video tutorials for the new beta Vray SketchUp 1.6
VRAY Dome Light
VRAY Proxy
VRAY RT (Real Time)
Sunday, 27 January 2013
Water pool and Caustics Tutorial
First of all big thanks to Deo Saputra for sharing to us the materials on this tutorial.There are very few tutorials when it comes to caustics and we believe you will really get from this one.. Enjoy reading it.
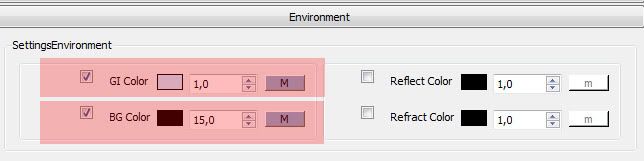
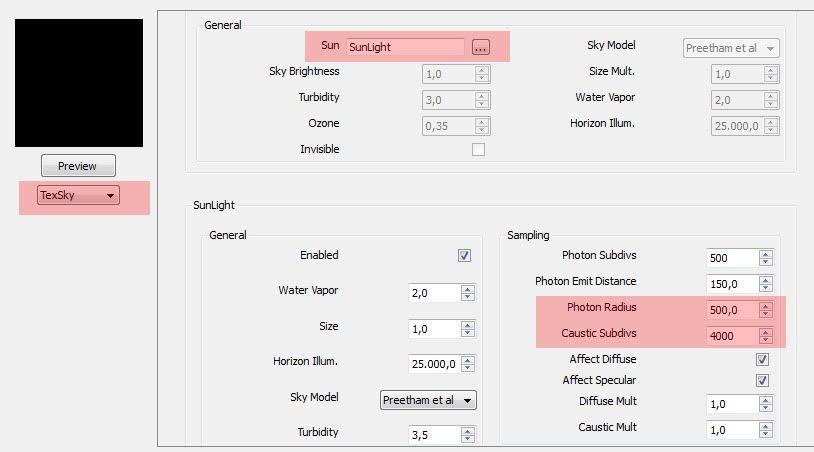
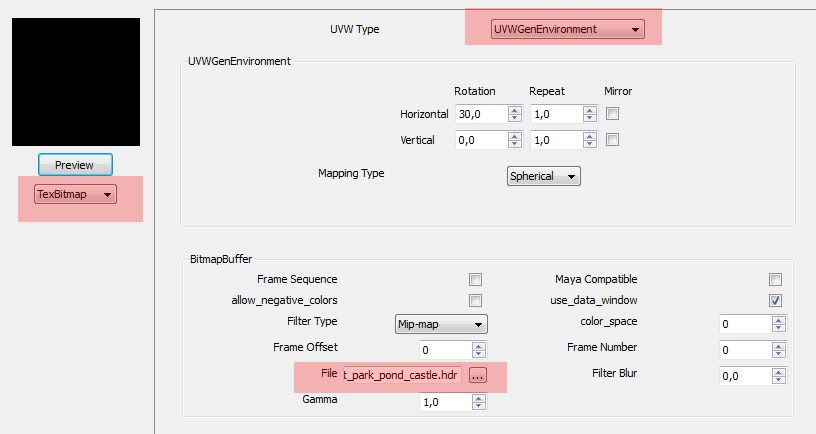
1. important Set Up Global Illumination Environment: Use Text Sky Map with the following settings
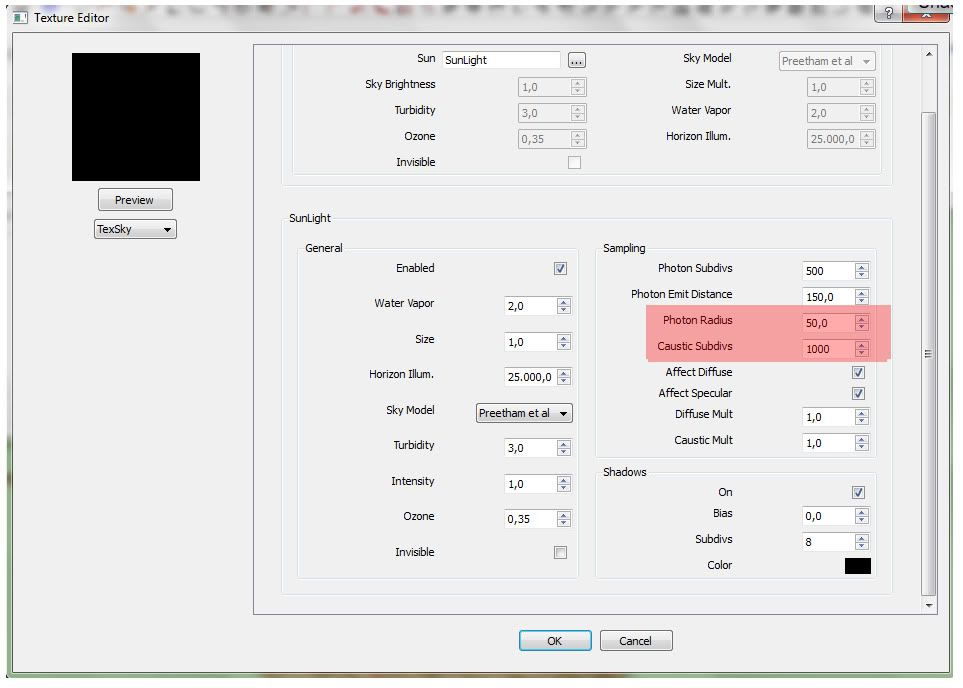
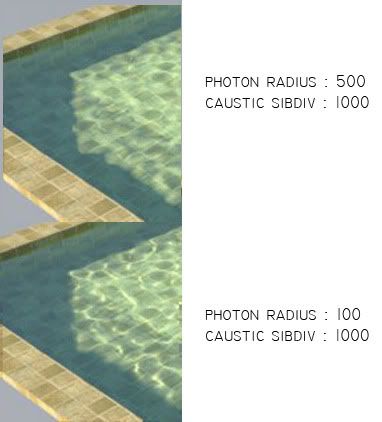
Photon Radius: Used to control the caustics' radius. This value depends on the size of the scene.
Caustics Subdivision: This parameter controls the amount of photons that VRAY traces to estimate caustics. Large numbers means better quality but more memory needed, thus slowing down the calculation process.
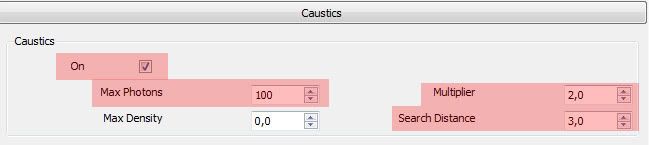
2. Caustics Parameters
Maximum Photons: This is the maximum number of photons that will be considered when rendering the caustics effect on a surface. Smaller values cause less photons to be used and the caustics will be sharper, but perhaps noisier. Larger values produce smoother, but blurrier caustics. The special value of 0 means that V-Ray will use all the photons that it can find inside the search area.
Multiplier: this allows you to control the brightness of the photon map
Search distance. It allows you to specify the photon search distance manually. * Keep in mind that this value depends on the size of your scene. Lower values will speed up the rendering but may produce more noisy results. Larger values will slow down the rendering but may produce smoother results.
3. The Water Material
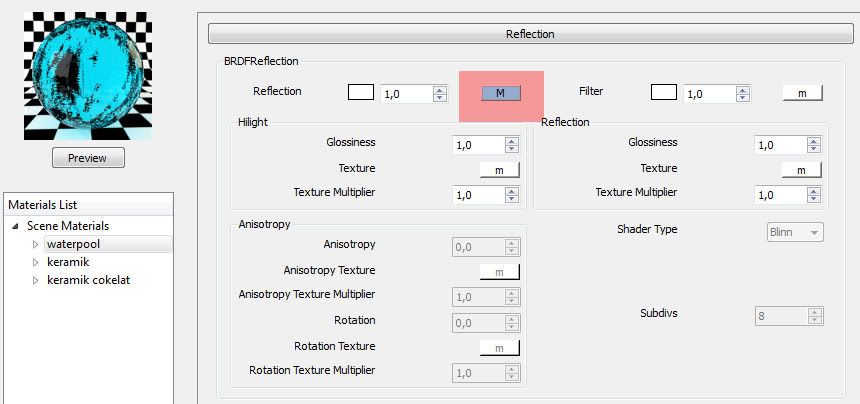
Reflection Layer
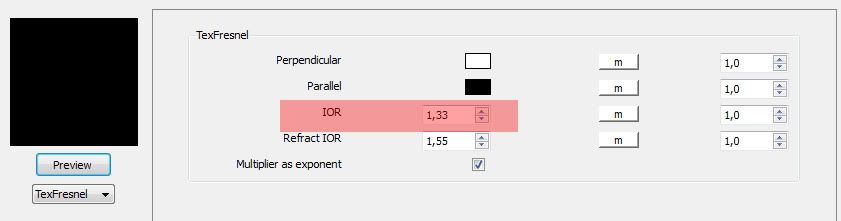
IOR value
Diffuse Layer
Refraction Layer
Fog Color
Displacement Map
You can download the Vismat together with the Texture HERE
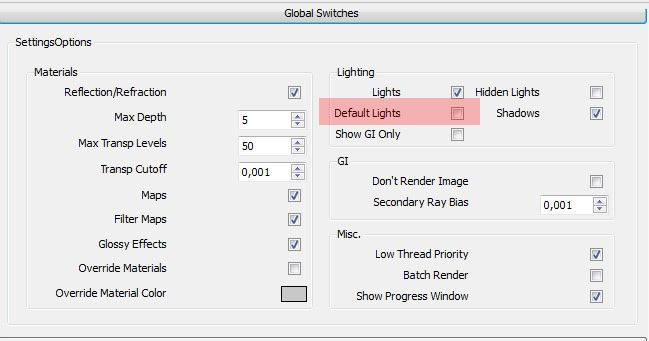
Vray Options
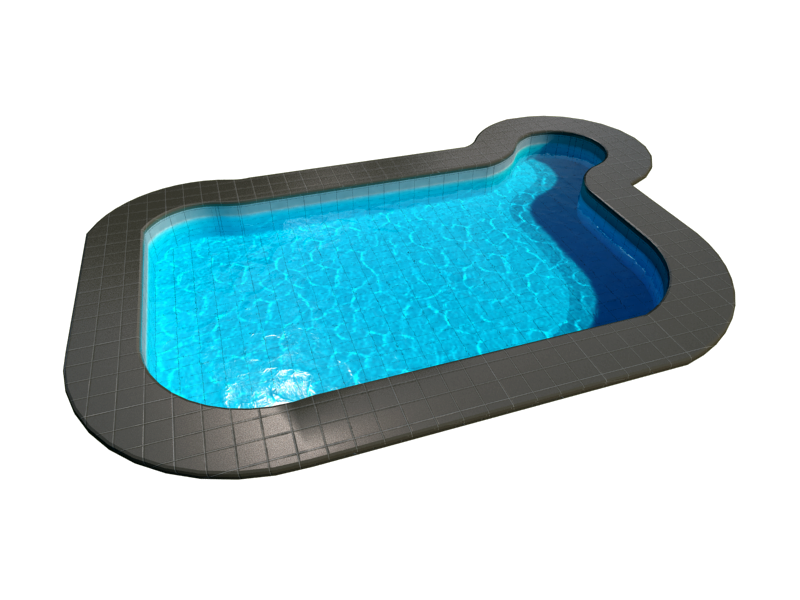
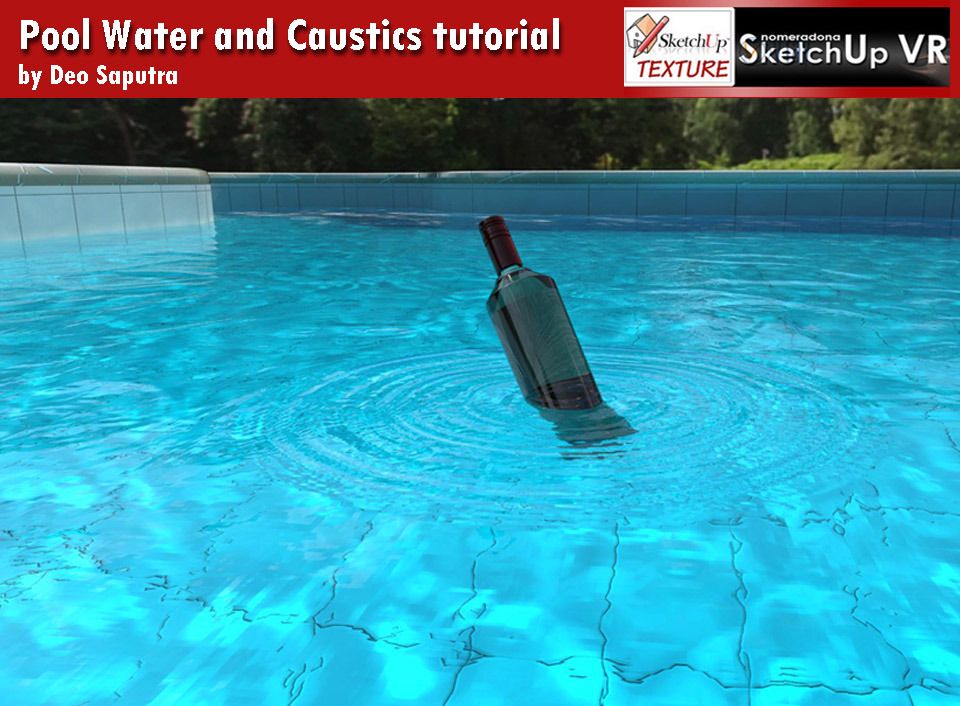
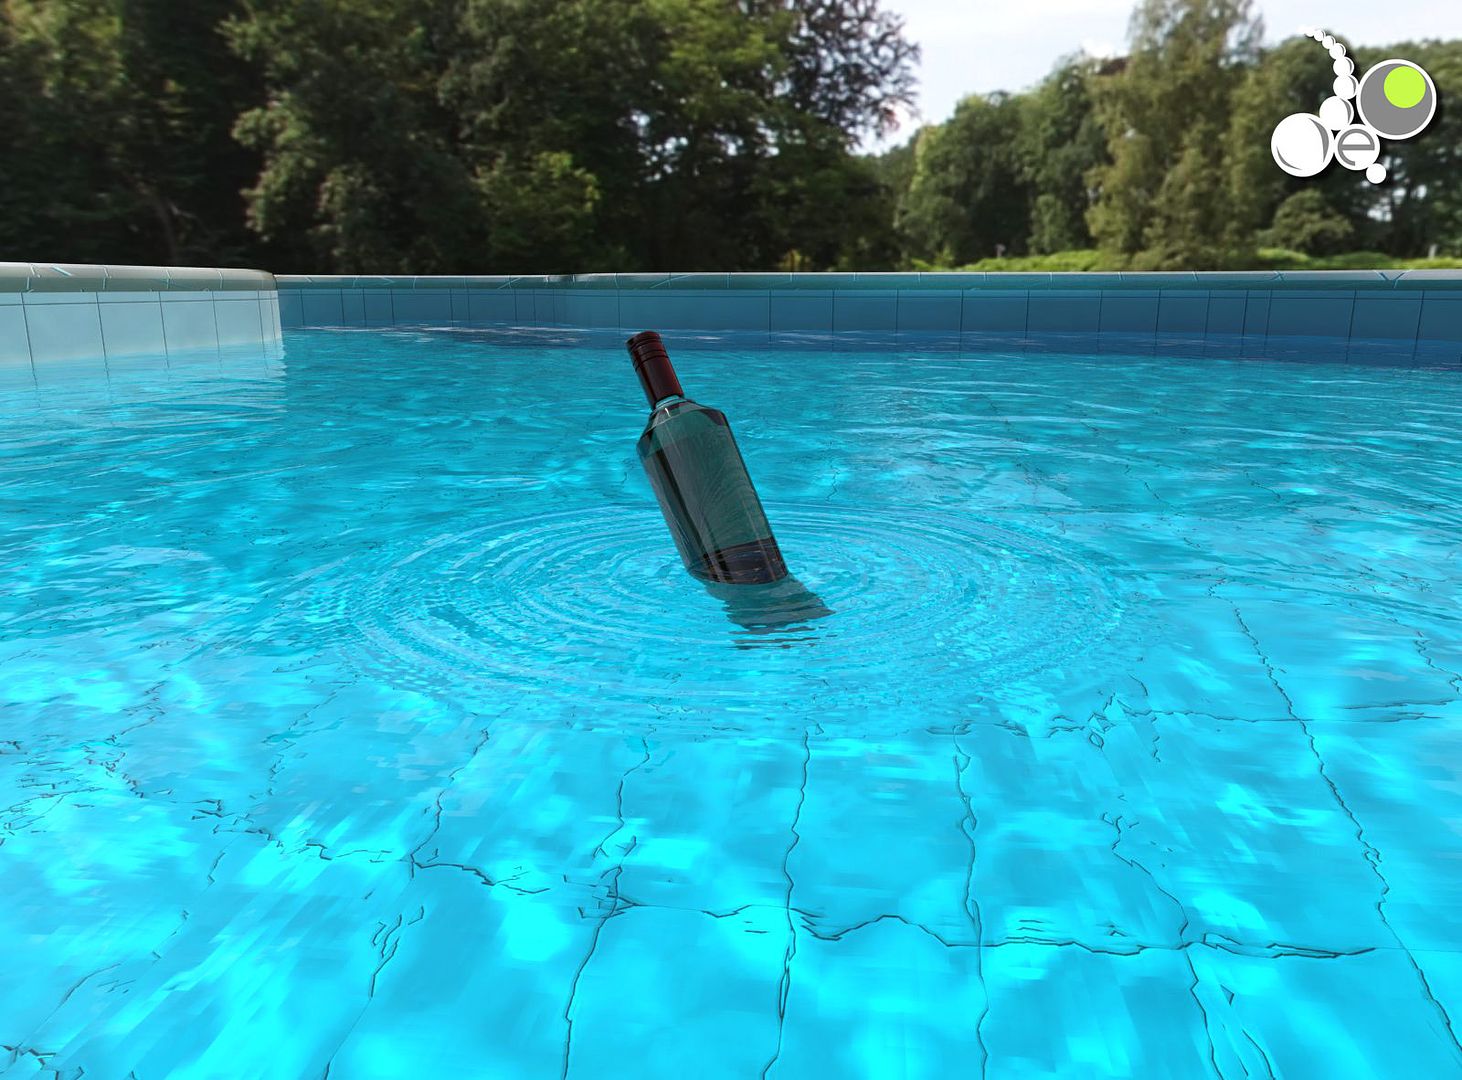
Here is the Final Render using the material.
Tip: Be sure that the face of the water is not negative face. You might also want to apply the material on both side of your water surface.
1. important Set Up Global Illumination Environment: Use Text Sky Map with the following settings
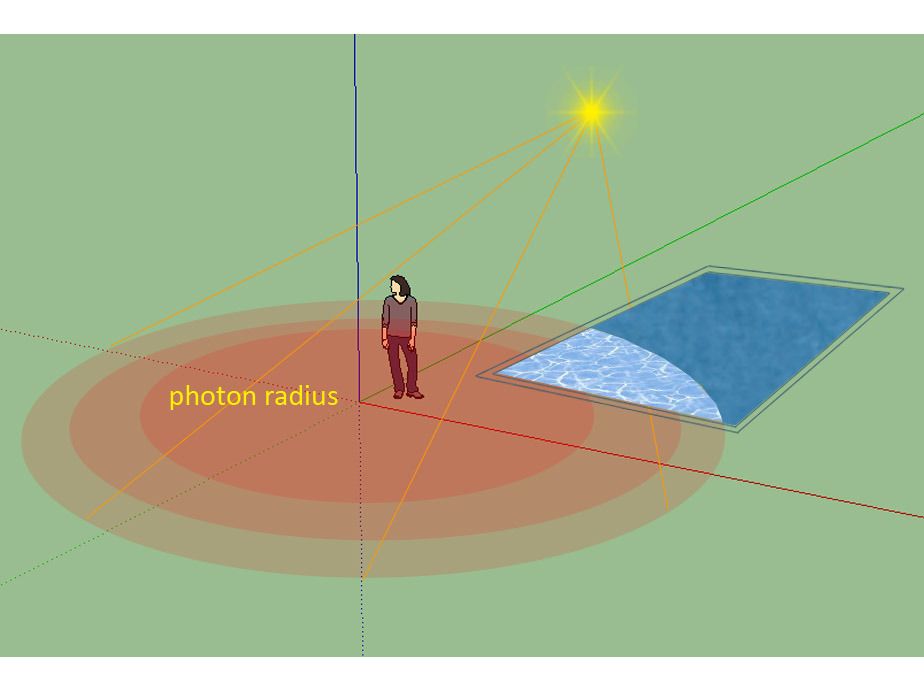
Photon Radius: Used to control the caustics' radius. This value depends on the size of the scene.
Caustics Subdivision: This parameter controls the amount of photons that VRAY traces to estimate caustics. Large numbers means better quality but more memory needed, thus slowing down the calculation process.
2. Caustics Parameters
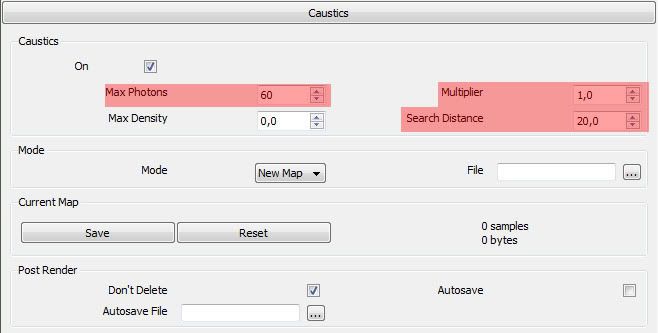
Maximum Photons: This is the maximum number of photons that will be considered when rendering the caustics effect on a surface. Smaller values cause less photons to be used and the caustics will be sharper, but perhaps noisier. Larger values produce smoother, but blurrier caustics. The special value of 0 means that V-Ray will use all the photons that it can find inside the search area.
Multiplier: this allows you to control the brightness of the photon map
Search distance. It allows you to specify the photon search distance manually. * Keep in mind that this value depends on the size of your scene. Lower values will speed up the rendering but may produce more noisy results. Larger values will slow down the rendering but may produce smoother results.
3. The Water Material
Reflection Layer
IOR value
Diffuse Layer
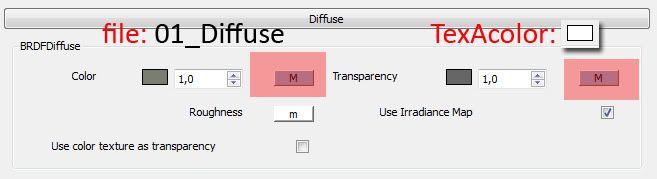
Refraction Layer
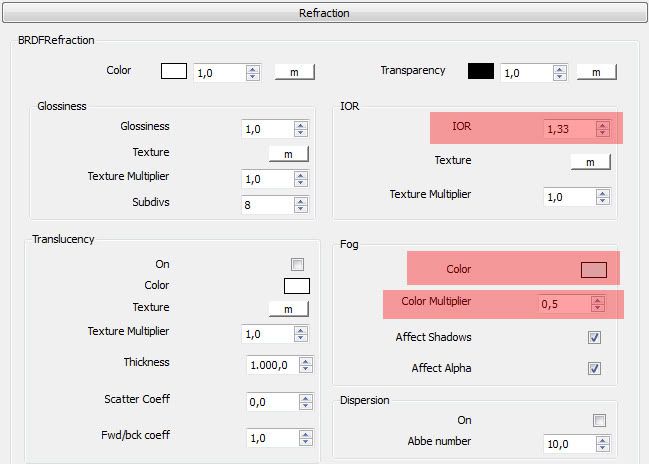
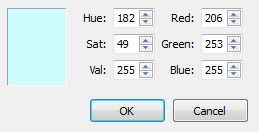
Fog Color
Displacement Map
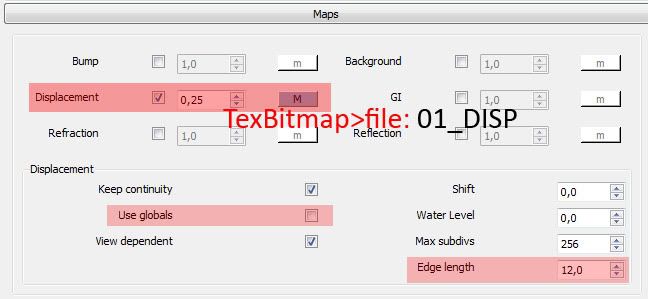
You can download the Vismat together with the Texture HERE
Vray Options
Here is the Final Render using the material.
Tip: Be sure that the face of the water is not negative face. You might also want to apply the material on both side of your water surface.
Wednesday, 16 January 2013
Tutorial: Adding color to Native SU texture in Vray SketchUp
Introduction: The way Sketchup edits the color of its native texture and the way VRAY SU work is different. Editing the color of the native SU material inside SU does not guarantee that VRAY SU recognizes it. VRAY SU will still use the original bitmap material use by SketchUp.
Here is an explanation from Onel Pabico on workaround how you want to do it in VRAY SU.
Wednesday, 14 November 2012
Tutorial: UV Mapping using UV tools for Sketchup and Road Kill
This a tutorial from Edgar Navas 'rodrigonotor"
First download UVTools from Sketchucation. Also download RoadKill
If your Antivirus detected the second file as malicious file, do not worry.
The image below is always the result of jumbled mapping in SU irregular surface most of the times.
Select the whole surface
In the menu->Plugins->UVTools->Export UVs to OBJ
It is very important to remember where the file is being save.
Open Roadkill and load the file
In RoadKIll:
ALT+Click Izq= Rotate
ALT+Click Medio=Pan
ALT+Click Derecho= Zoom
Click letter "E" to selection mode
Using the crossing window selection, select the surface, then adjust the mapping.
With the selection click letter "W" to join all surfaces
Save (in RoadKill) with same name and place, back to Sketchup. In Sketchup go to menu->Plugin->UVTools->Import UVs from OBJ
Import the UV and voila we have correct mapping.
First download UVTools from Sketchucation. Also download RoadKill
If your Antivirus detected the second file as malicious file, do not worry.
The image below is always the result of jumbled mapping in SU irregular surface most of the times.
Select the whole surface
In the menu->Plugins->UVTools->Export UVs to OBJ
It is very important to remember where the file is being save.
Open Roadkill and load the file
In RoadKIll:
ALT+Click Izq= Rotate
ALT+Click Medio=Pan
ALT+Click Derecho= Zoom
Click letter "E" to selection mode
Using the crossing window selection, select the surface, then adjust the mapping.
With the selection click letter "W" to join all surfaces
Save (in RoadKill) with same name and place, back to Sketchup. In Sketchup go to menu->Plugin->UVTools->Import UVs from OBJ
Import the UV and voila we have correct mapping.
Sunday, 21 October 2012
Subscribe to:
Posts (Atom)