

Here is a two part series MTM from Mohd. Izuan Hamsani Izuan. In part 1, Mohd Izuan shows his general workflow and his use of depth of field using Zdepth map. The second part he shows his detail workflow and modeling using Marvelous Designer. We will post this second part later.
Anyhow thanks to Mohd Izuan for this very intuitive Mini-the-Making.

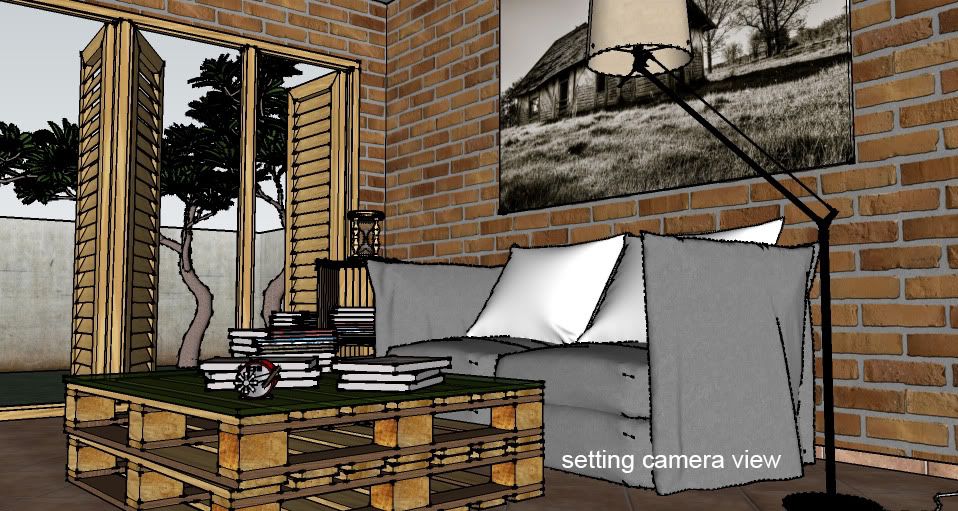
5. SketchUp Scene
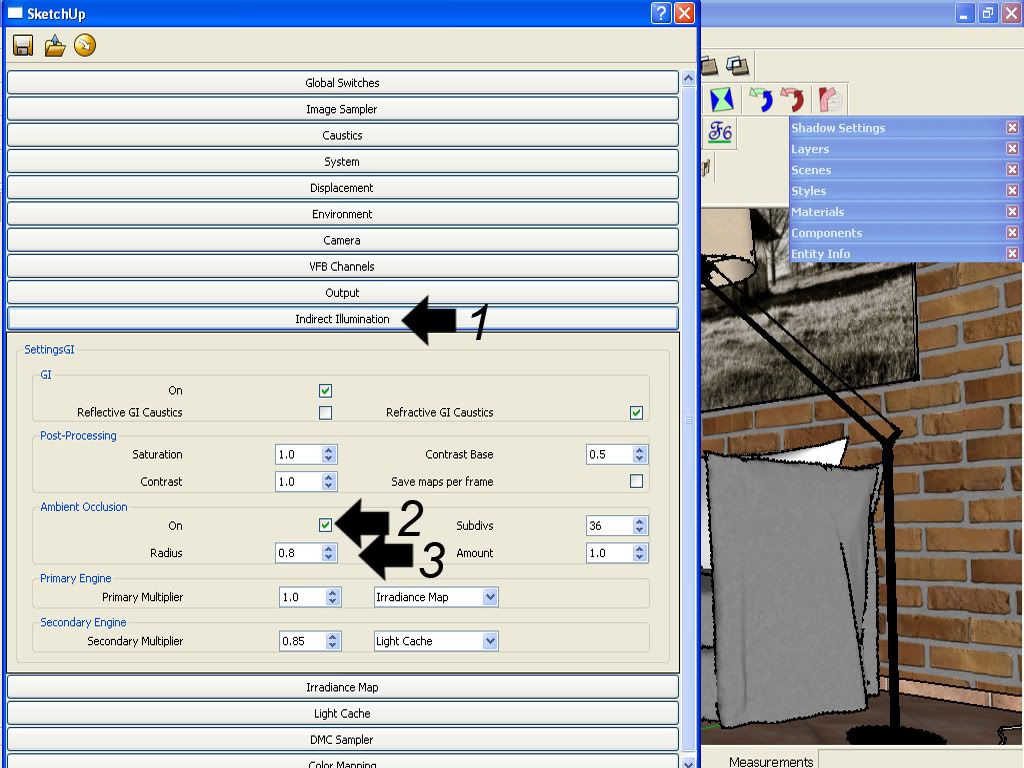
6.Some VRAY SU Settings
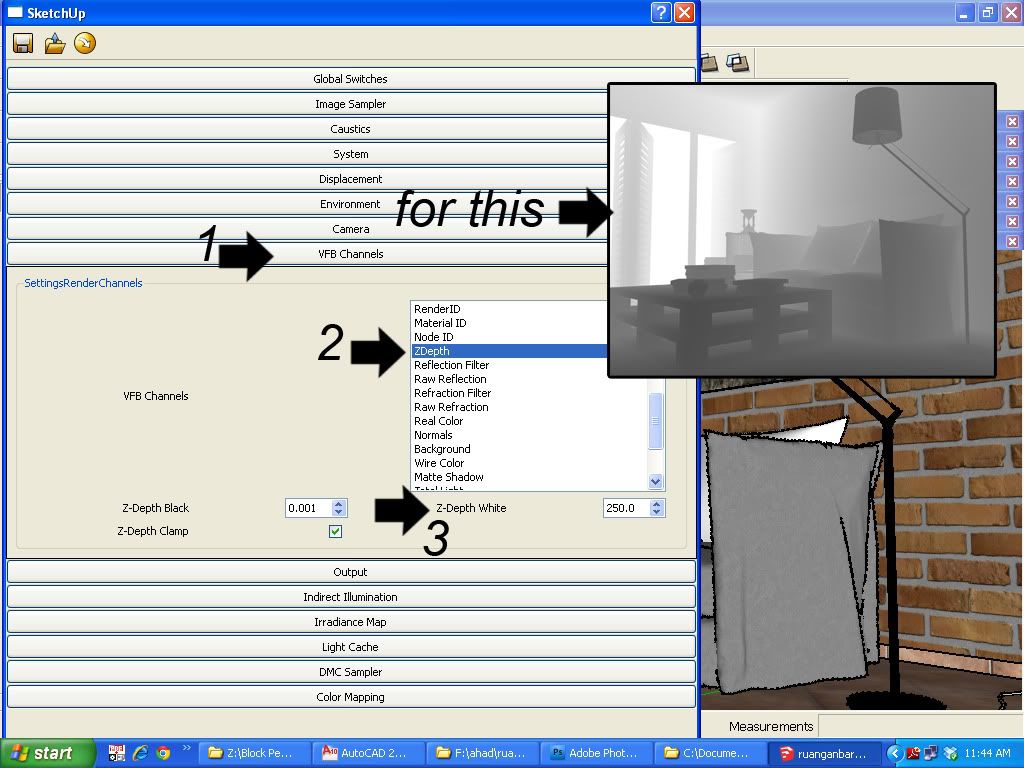
7. Enable "Z depth Channel". This will save the Zdpeth pass. This is quicker way in doing Depth of Field, rather than enabling it which will take longer time to render.
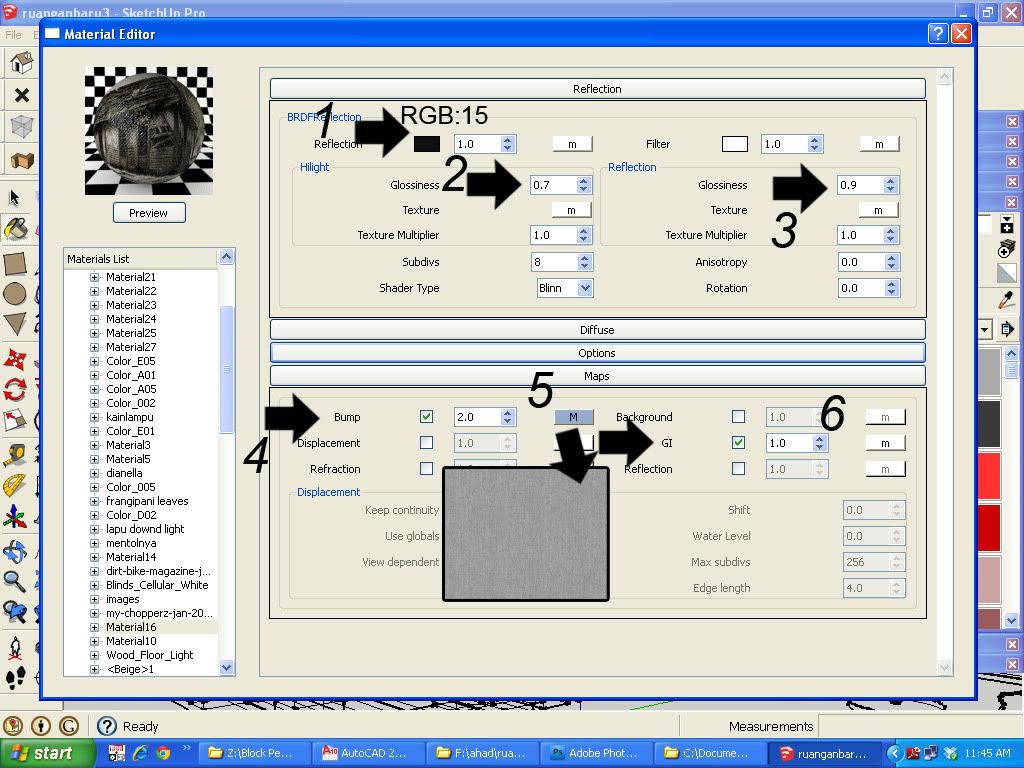
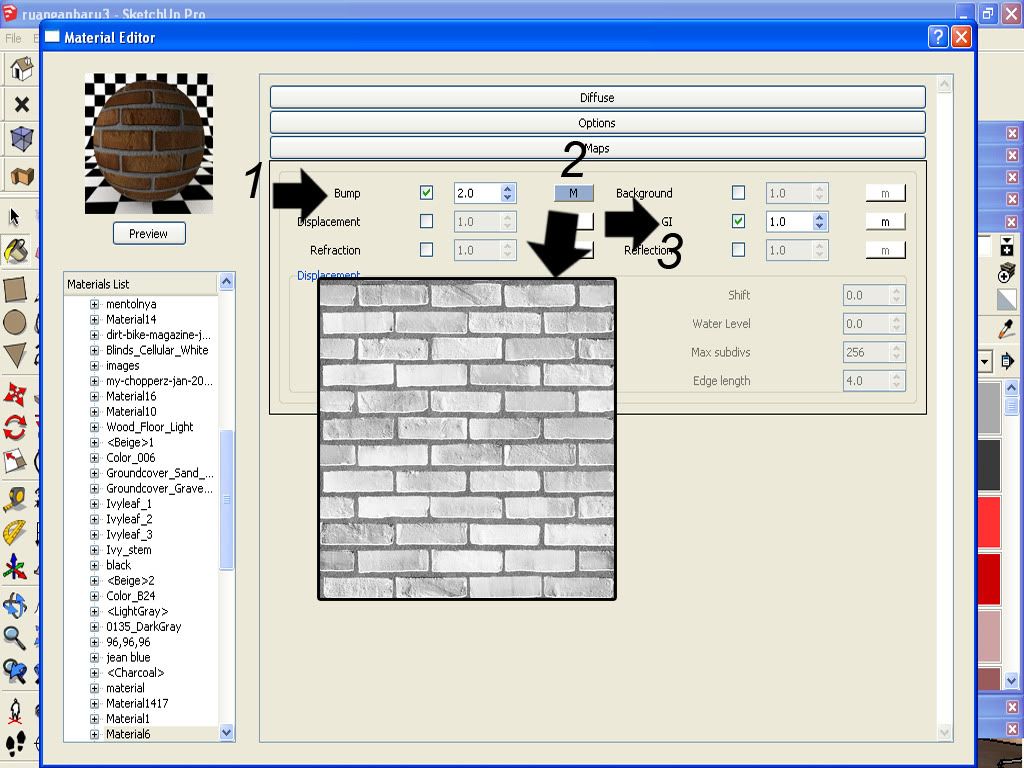
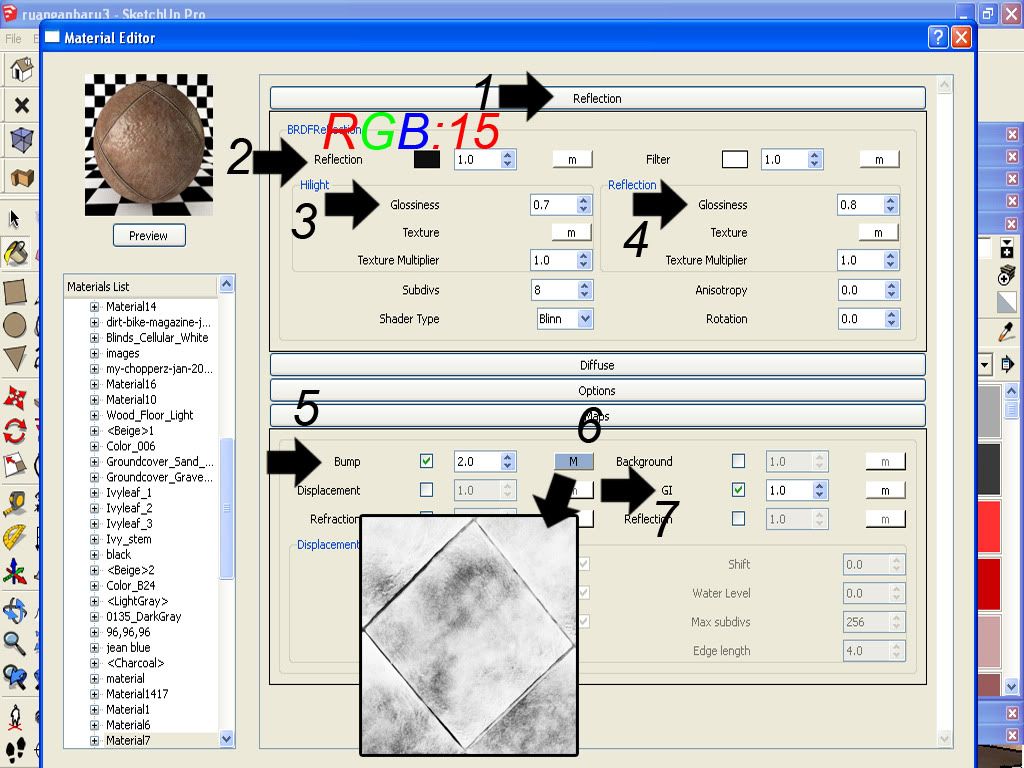
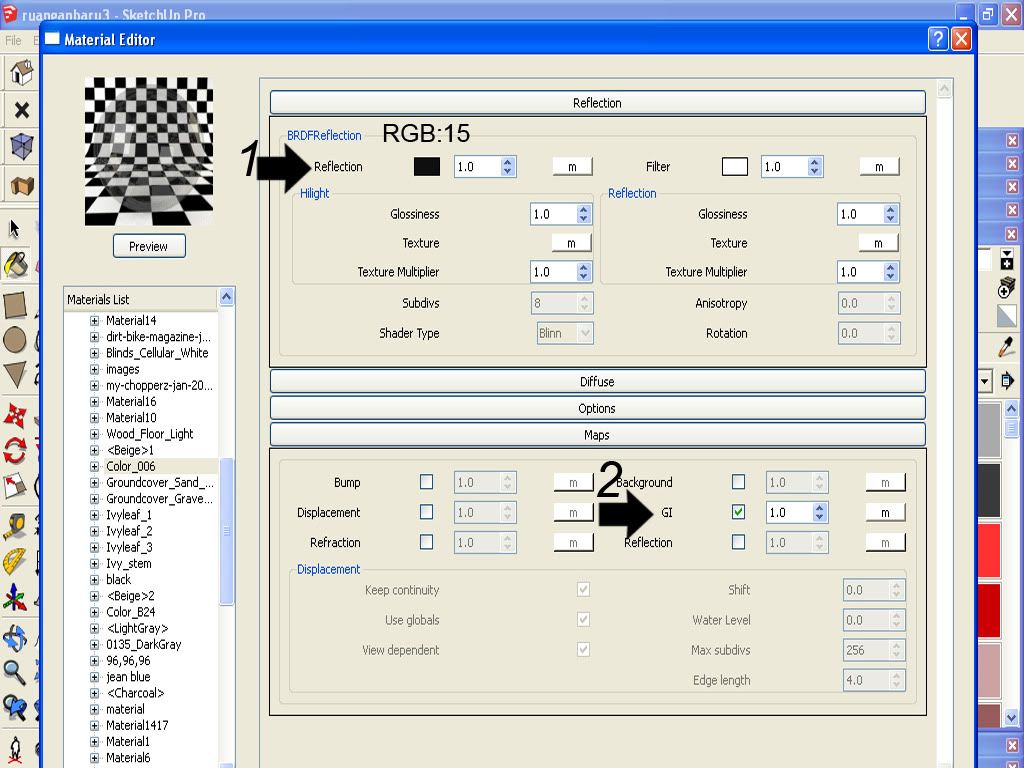
8. Some material settings
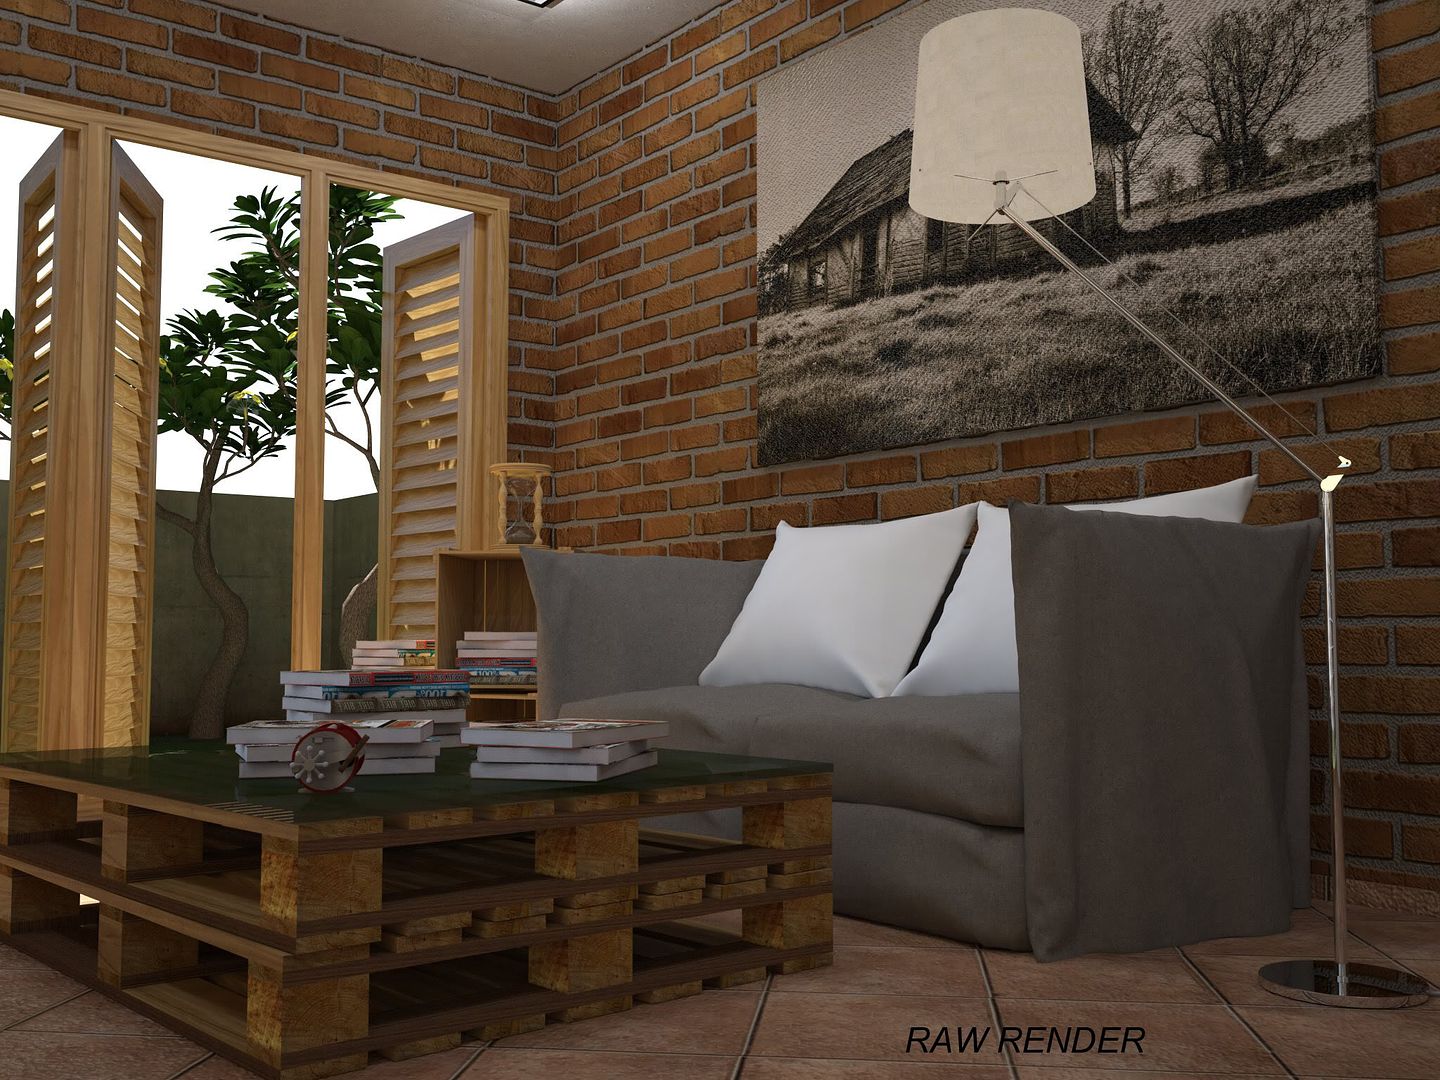
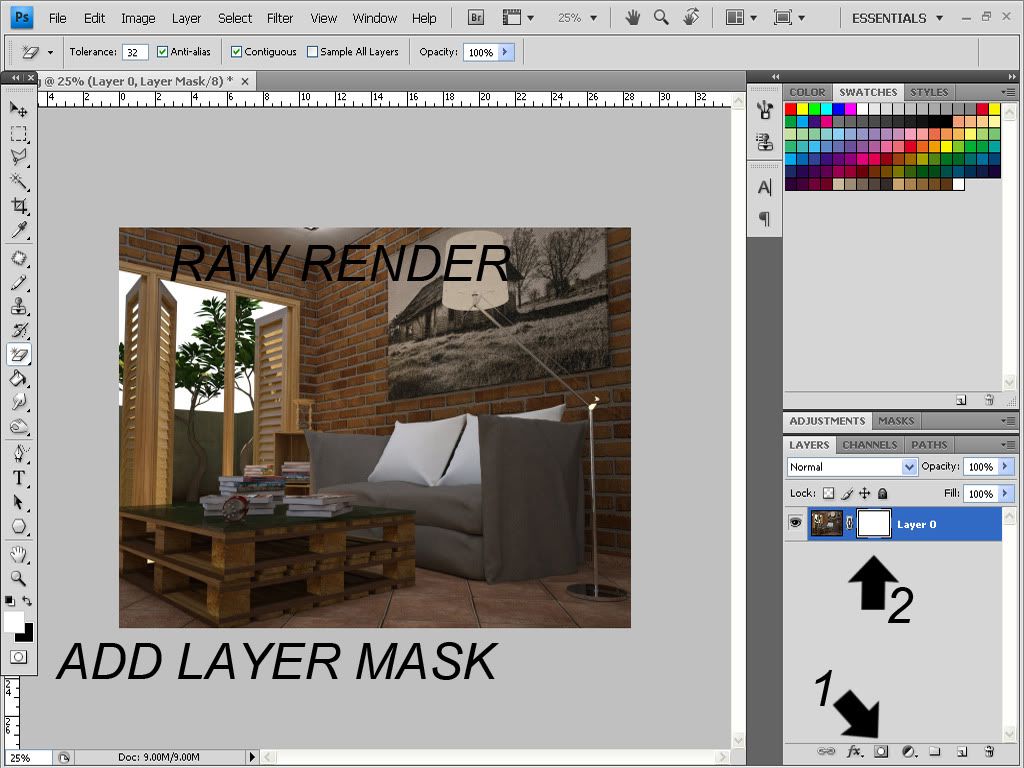
9.Raw Render image
10.Post processing - adding the background. If you saved your file in Jpeg, this would be your workflow. If you save your file in png, all you have to do is to neglect this step.

Thank you...
Second part coming soon.
Anyhow thanks to Mohd Izuan for this very intuitive Mini-the-Making.

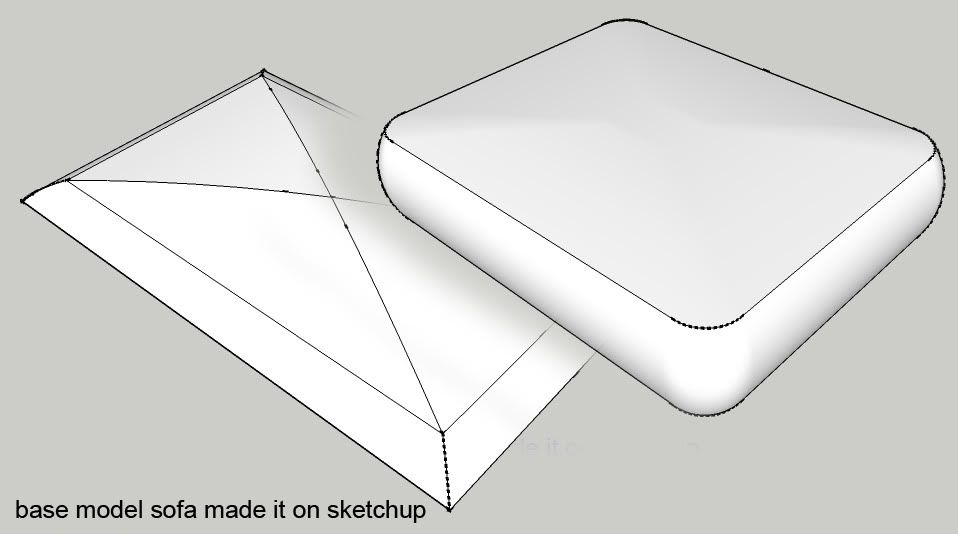
1. The basic shell made in SketchUp

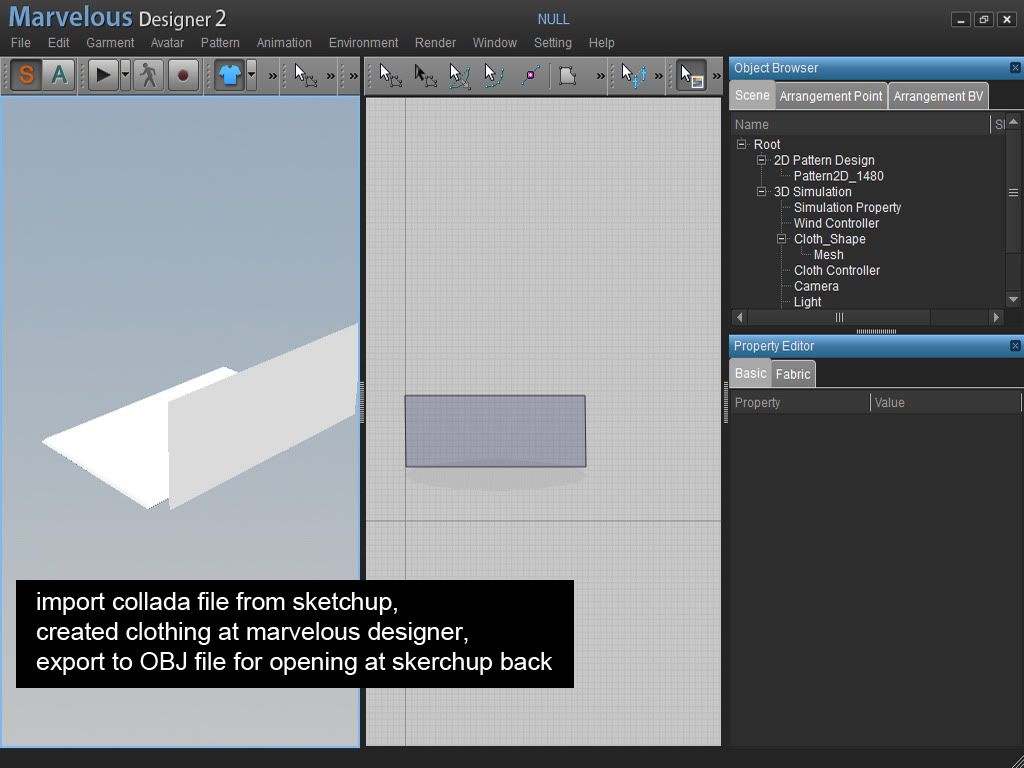
2.Using the basic shell inside Marvelous Designer. Detail tutorial will be presented in Part 2 of this two parts MTM.

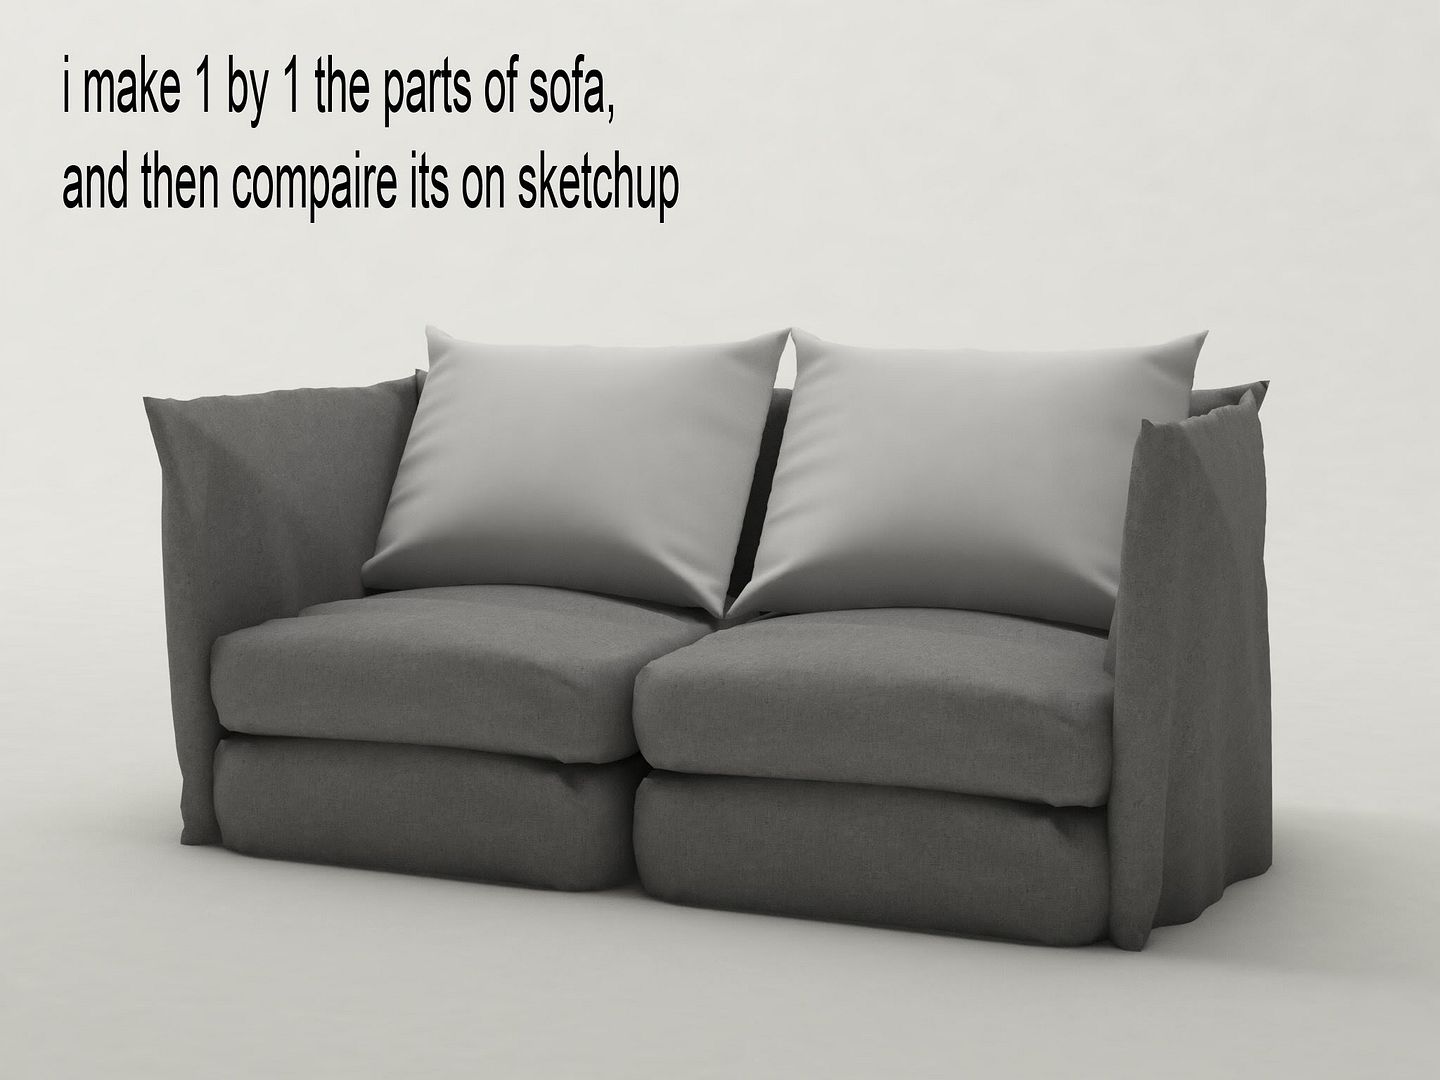
3. The finished model done with Marvelous Designer

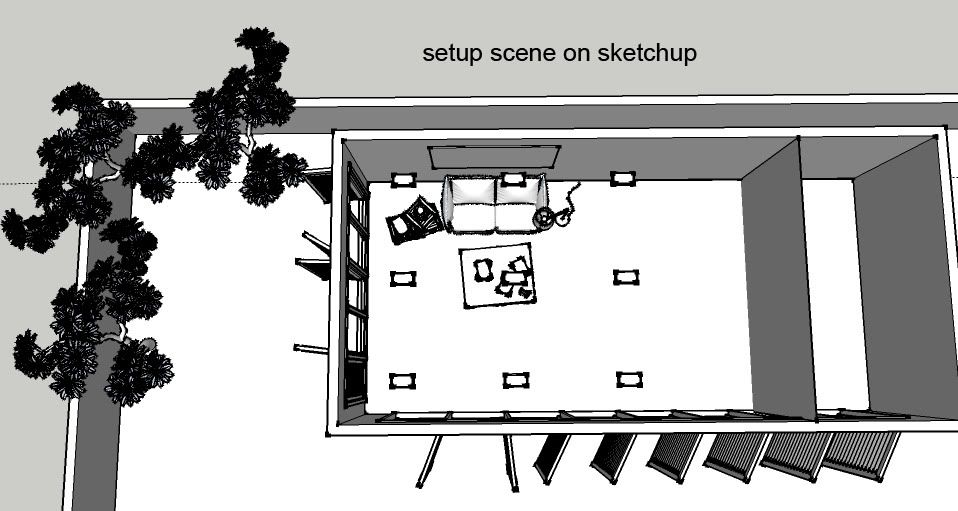
4. Here is the scene showing the basic set-up. Together with the sofa made in Marvelous designer.

5. SketchUp Scene

6.Some VRAY SU Settings

7. Enable "Z depth Channel". This will save the Zdpeth pass. This is quicker way in doing Depth of Field, rather than enabling it which will take longer time to render.

8. Some material settings


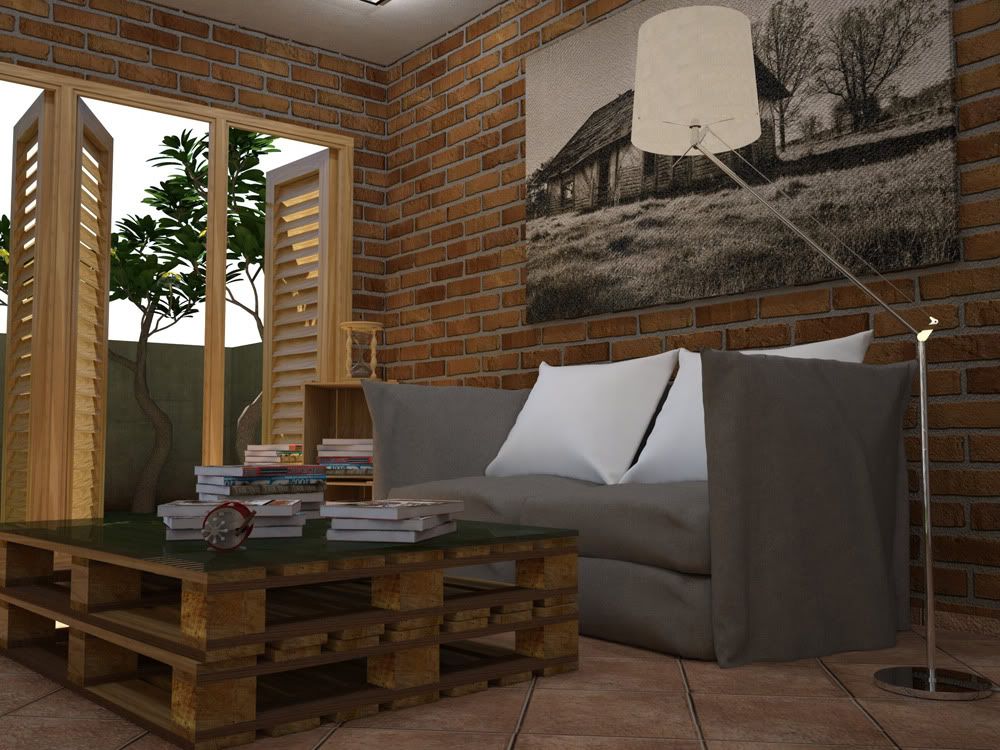
9.Raw Render image

10.Post processing - adding the background. If you saved your file in Jpeg, this would be your workflow. If you save your file in png, all you have to do is to neglect this step.

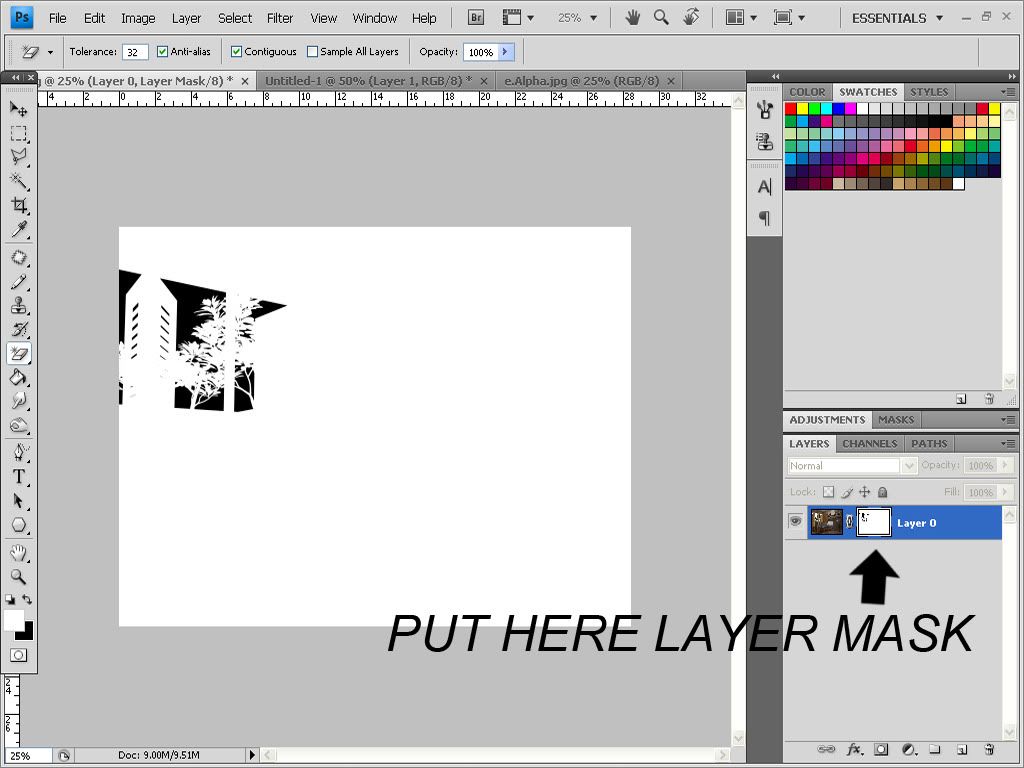
a. Use the Alpha pass and insert it in the mask

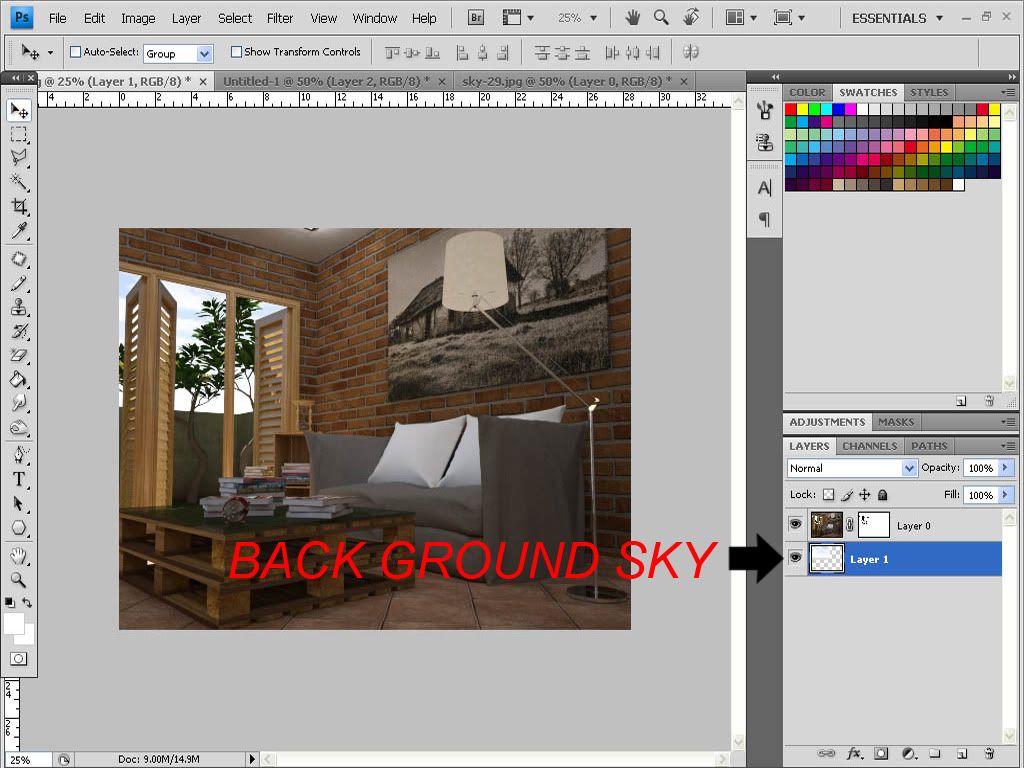
b. Place the sky background under the render layer

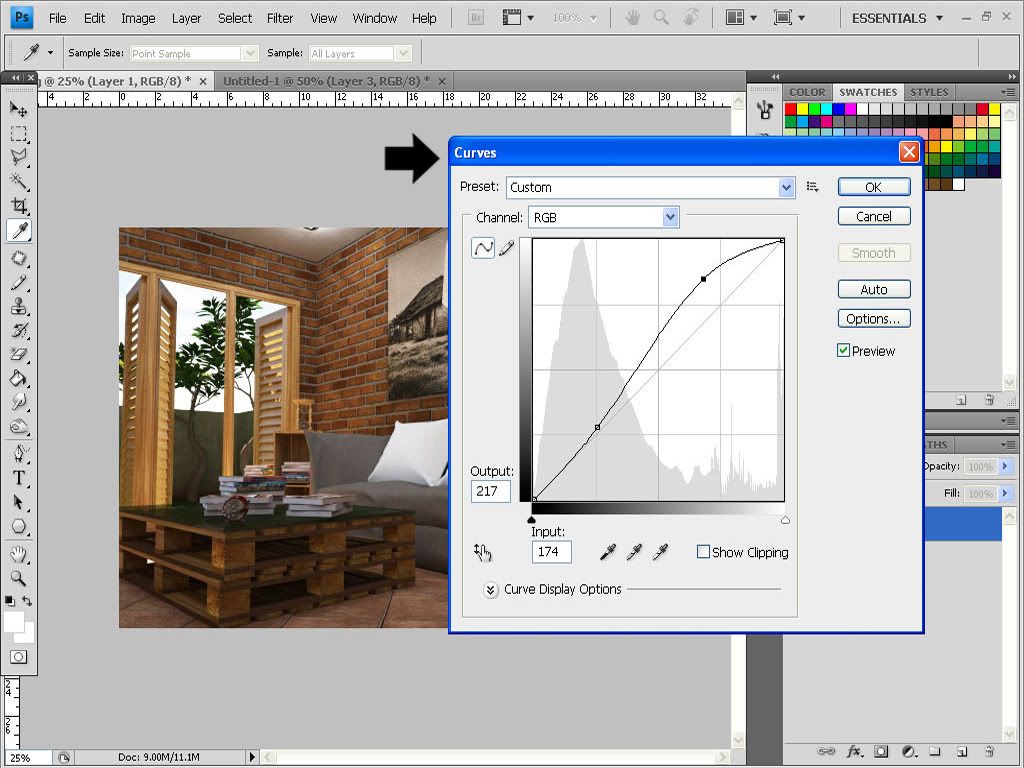
c. Correct exposure using curve

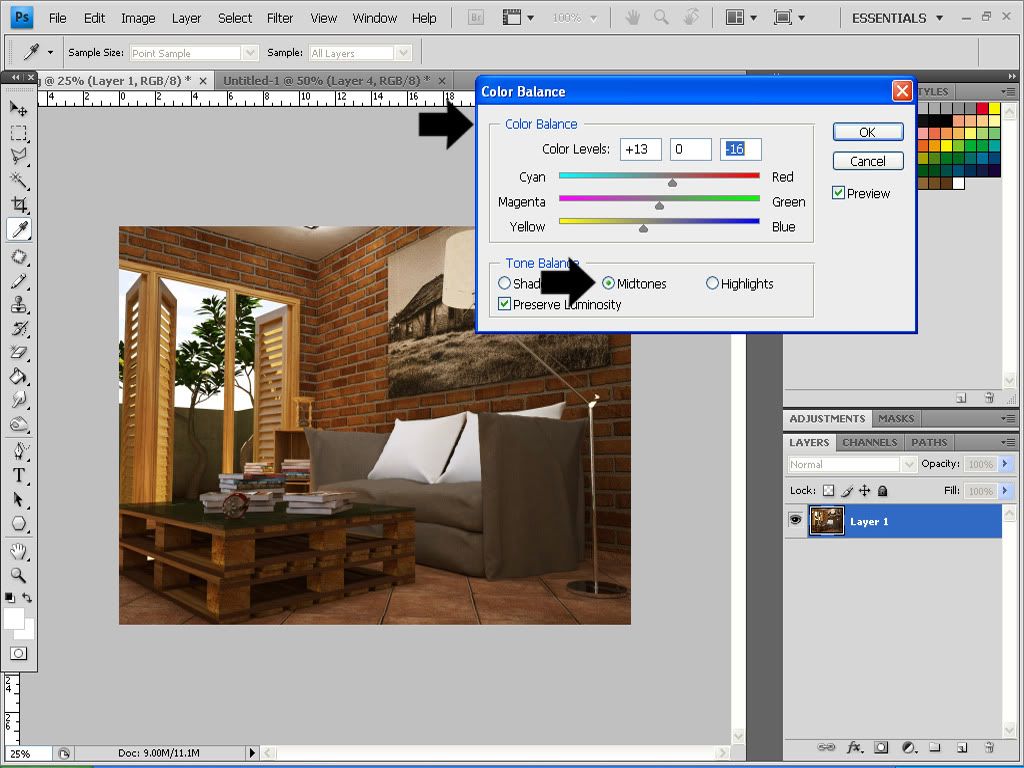
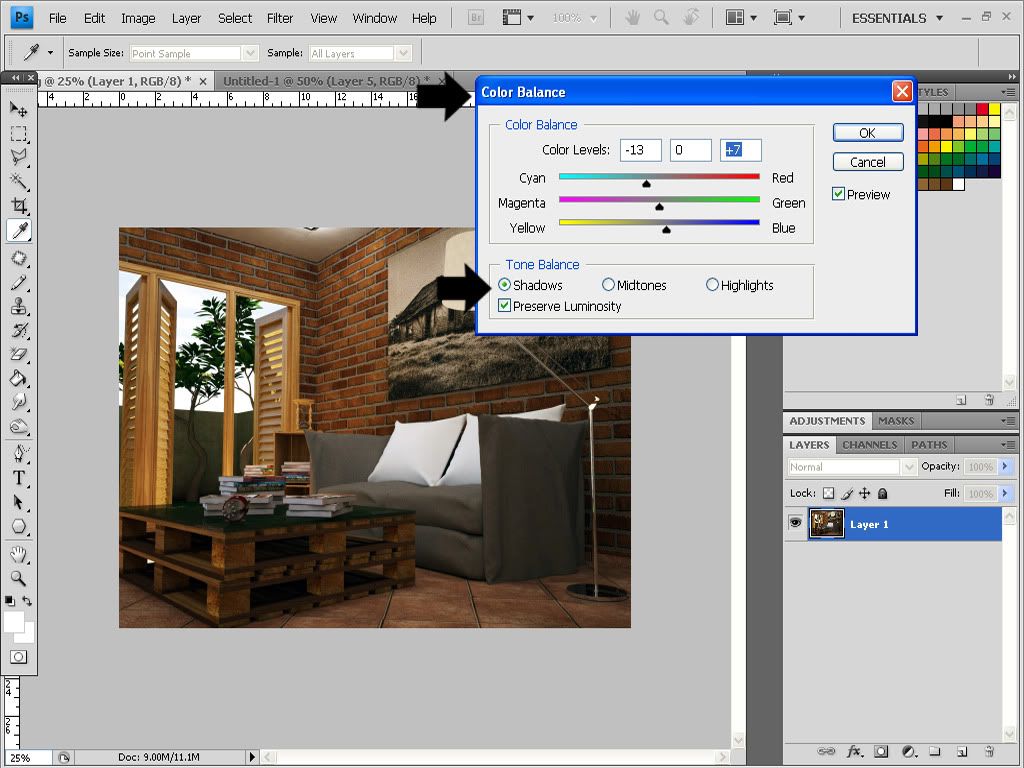
d. Correct the color balance for midtones, shadows and highlights (this is entirely base on your preference)


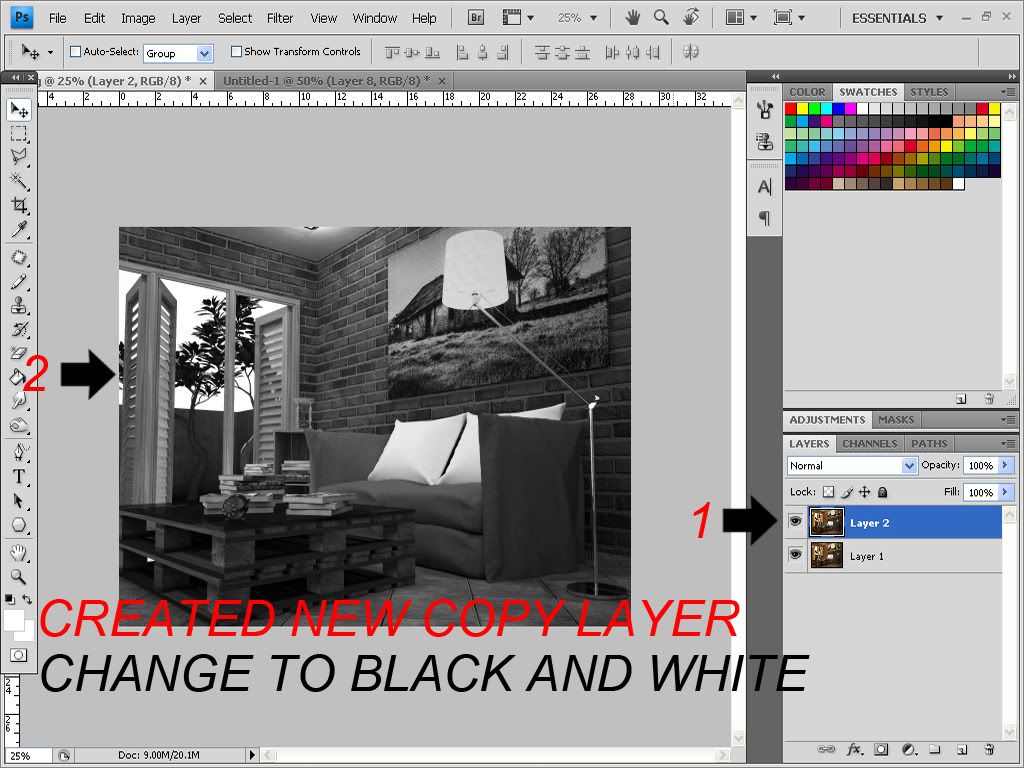
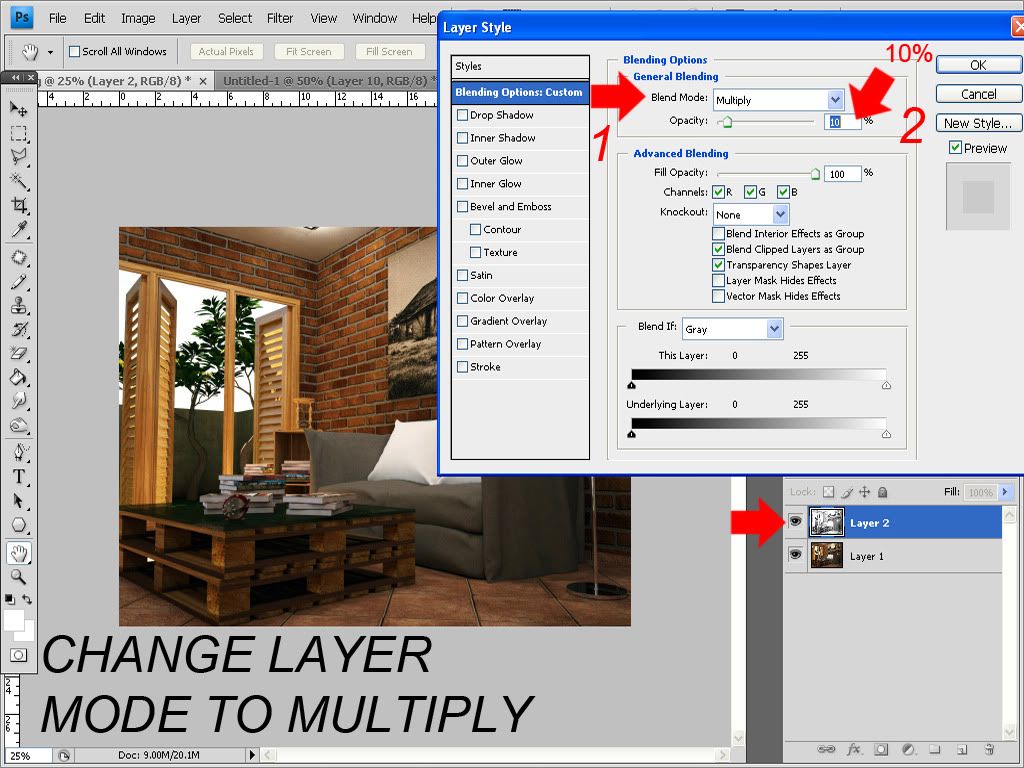
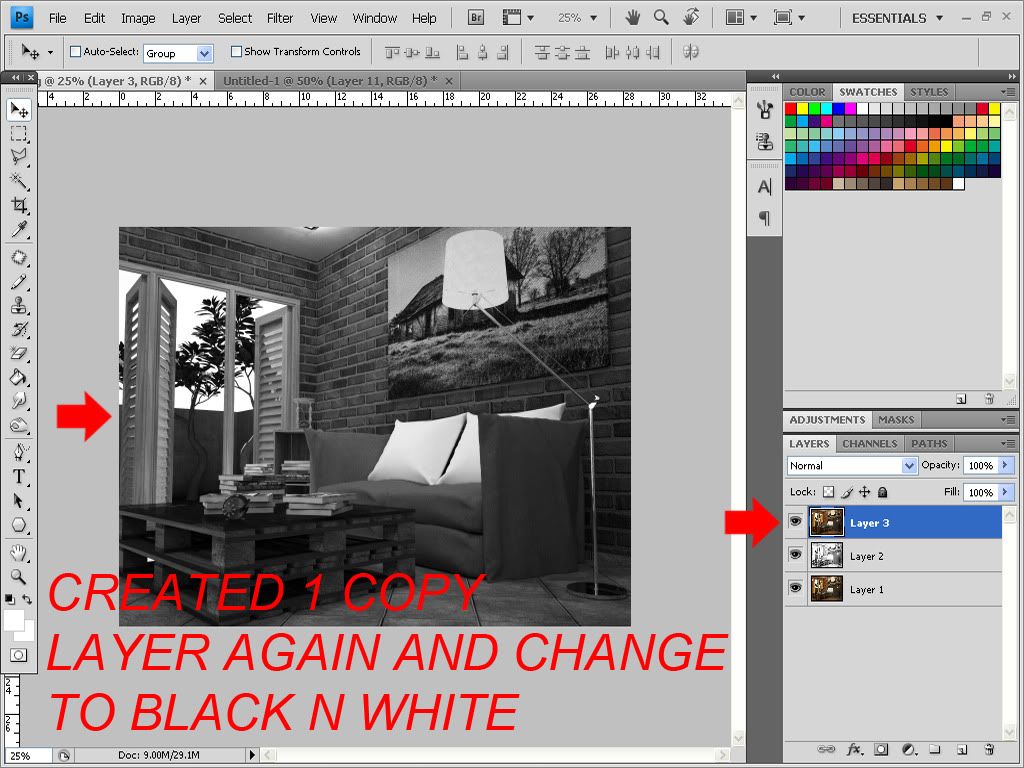
e. Improving the contrast using black and white points with multiply blending mode


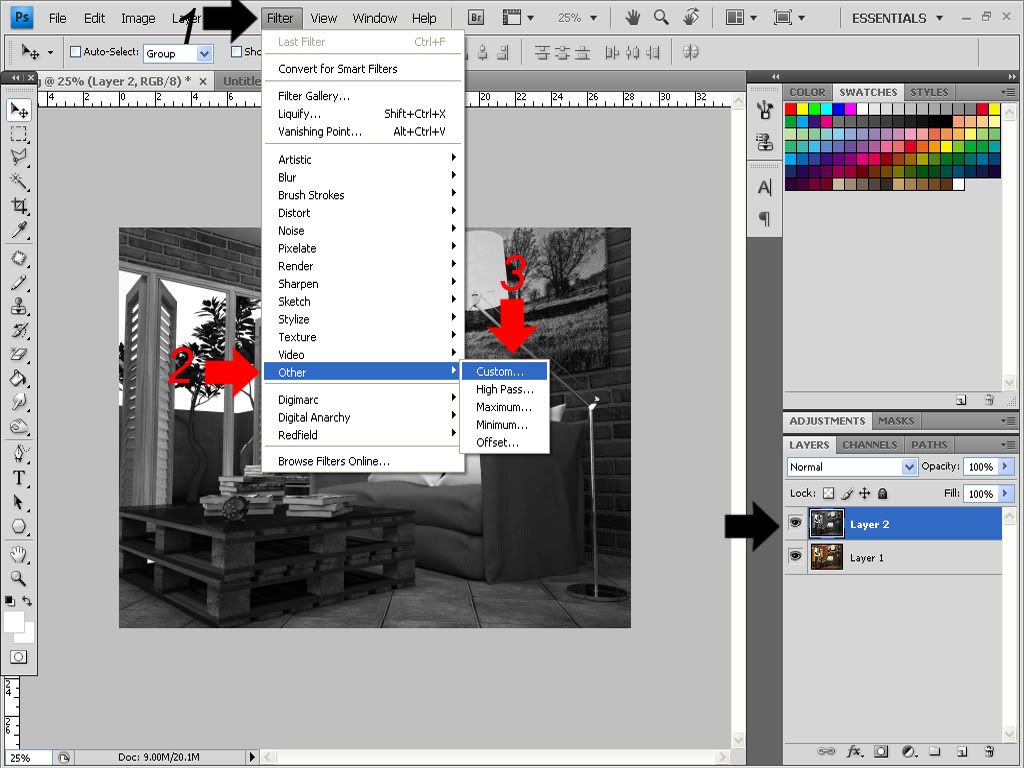
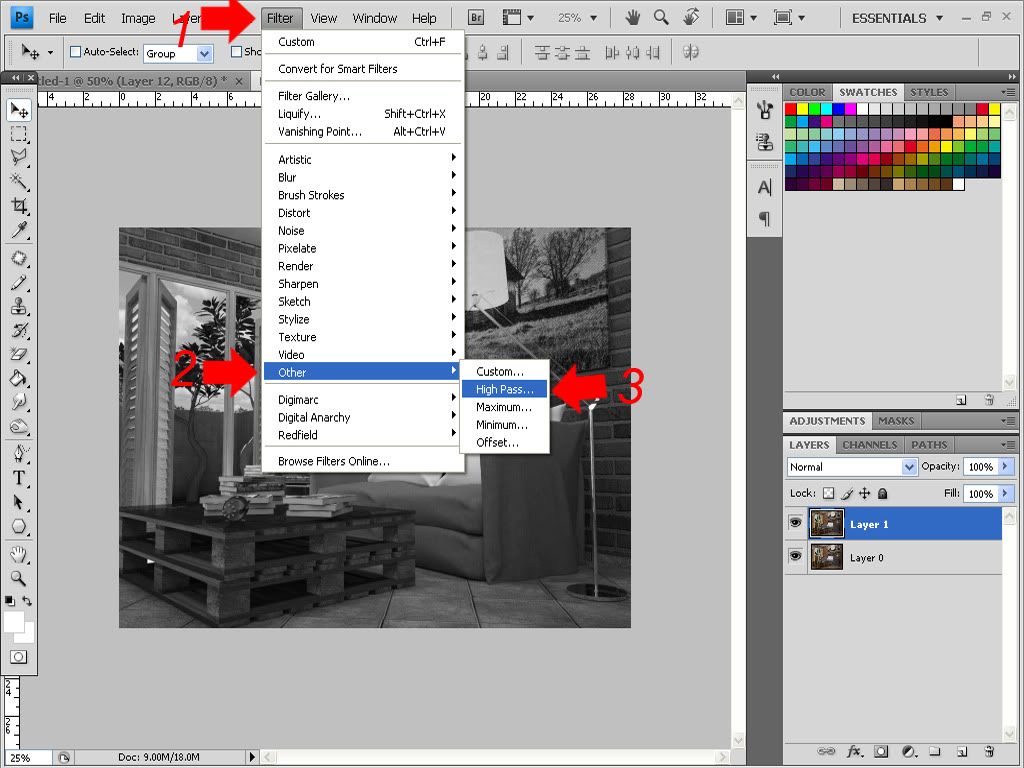
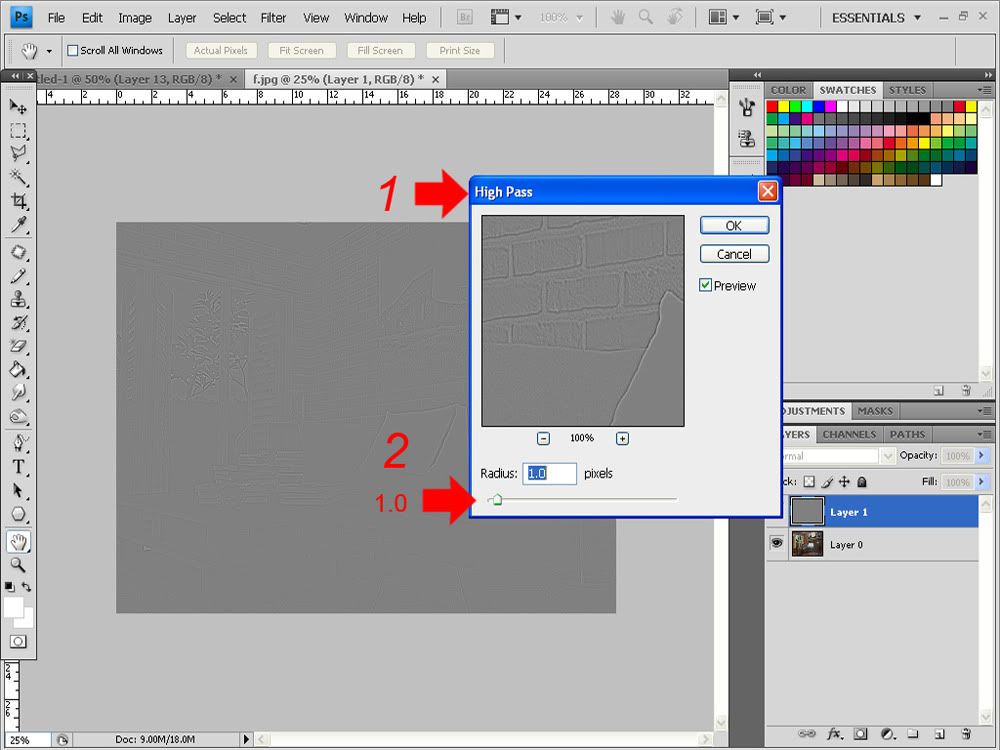
f. Improving the sharpness using high pass


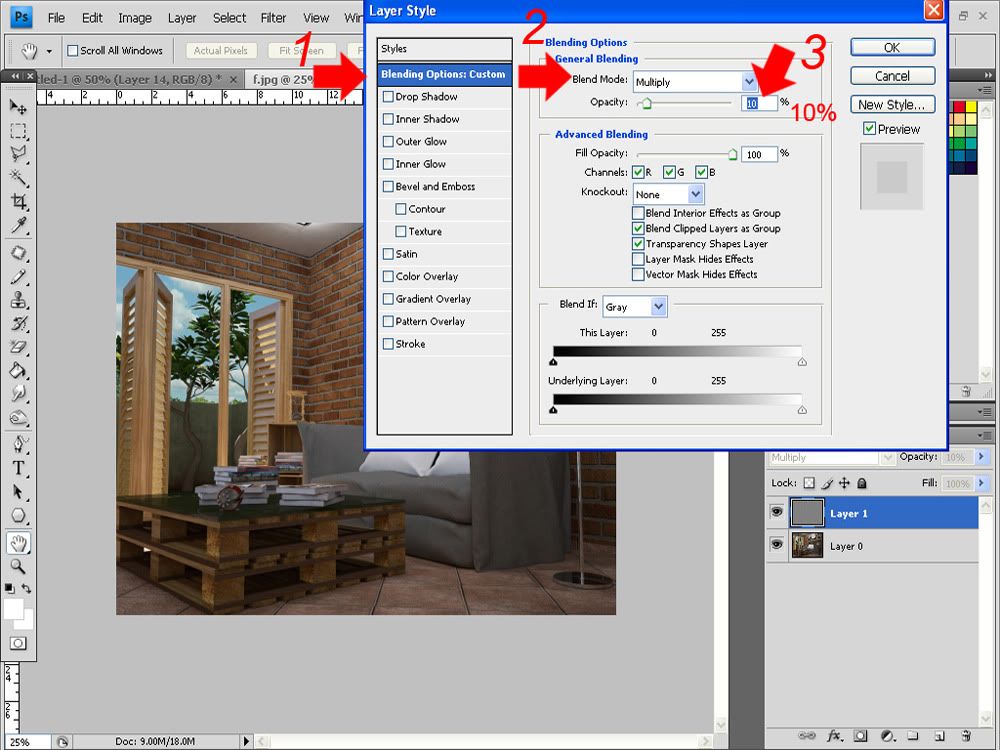
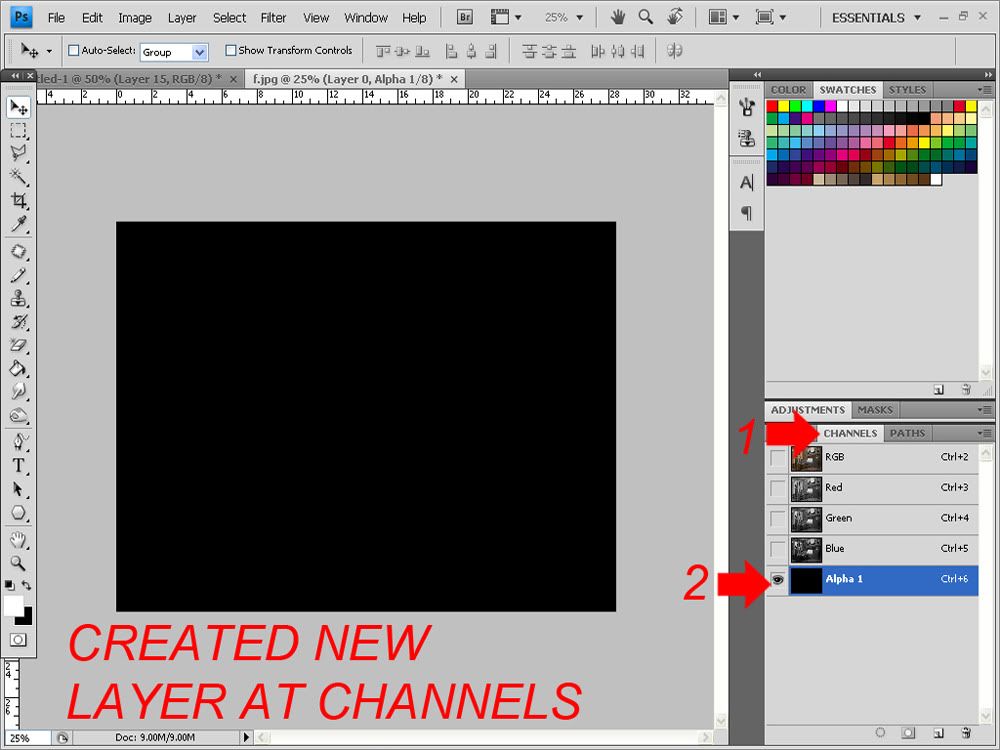
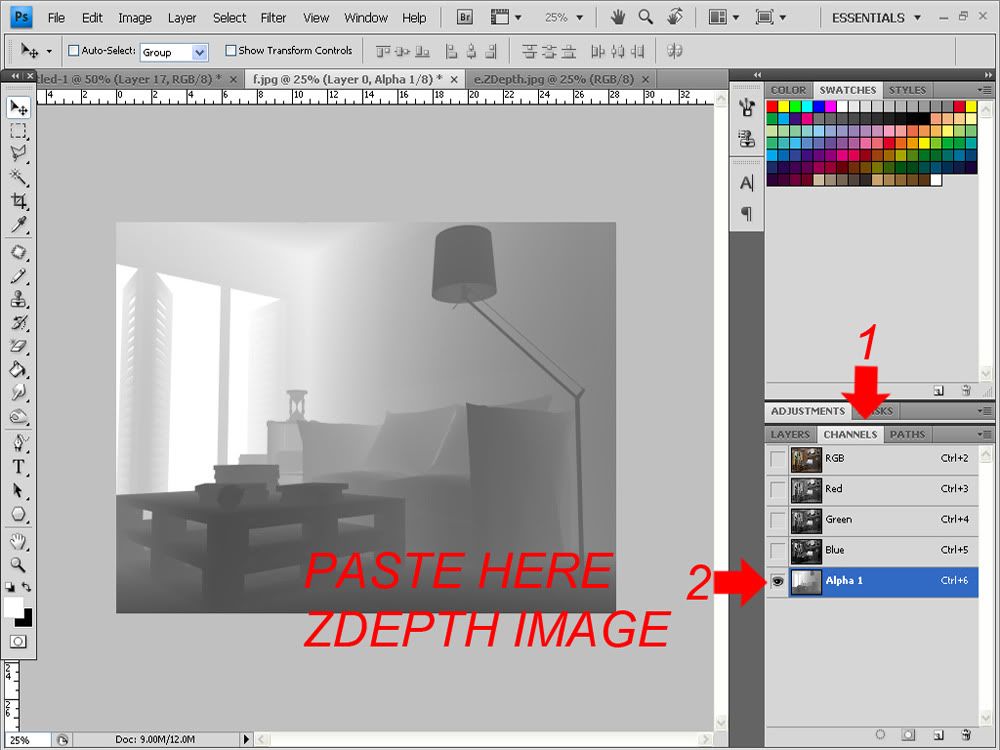
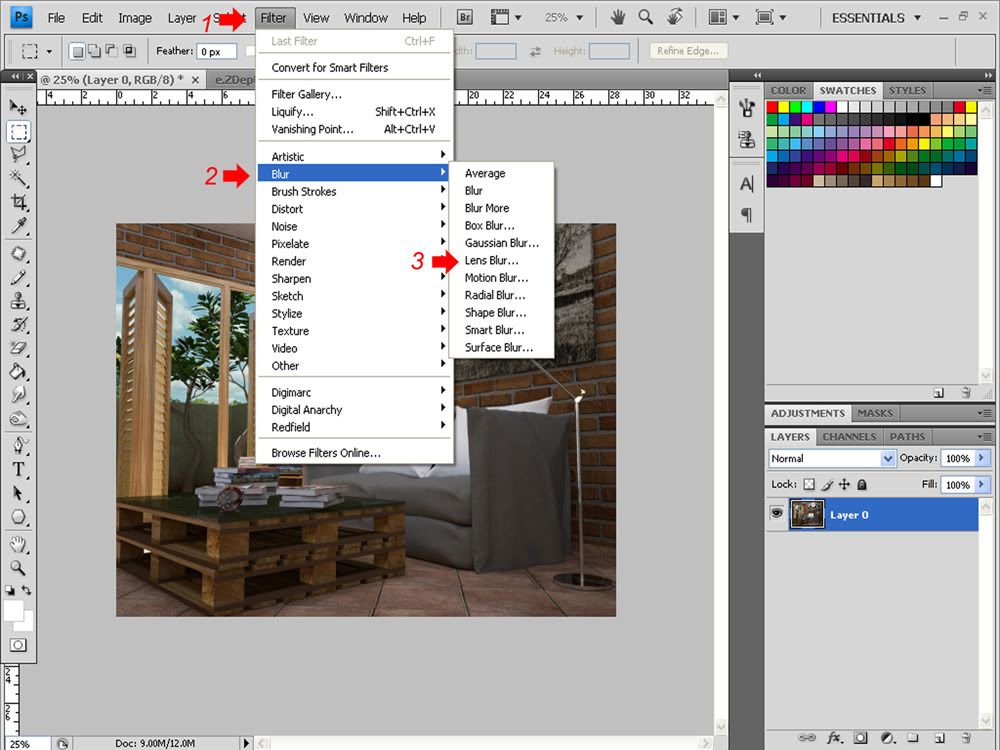
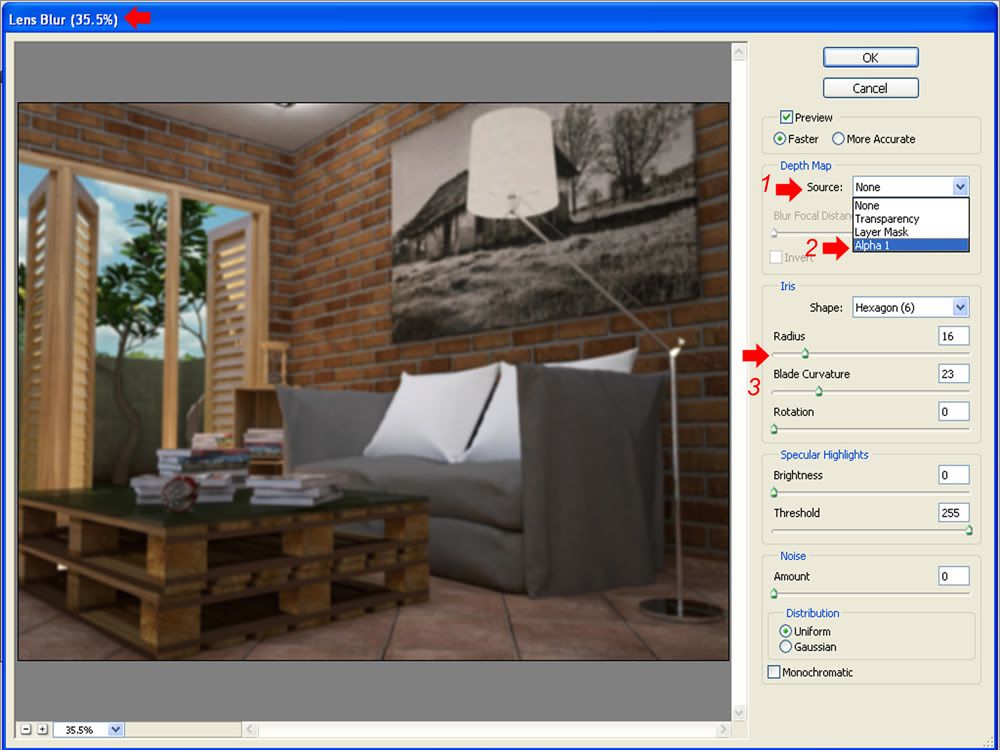
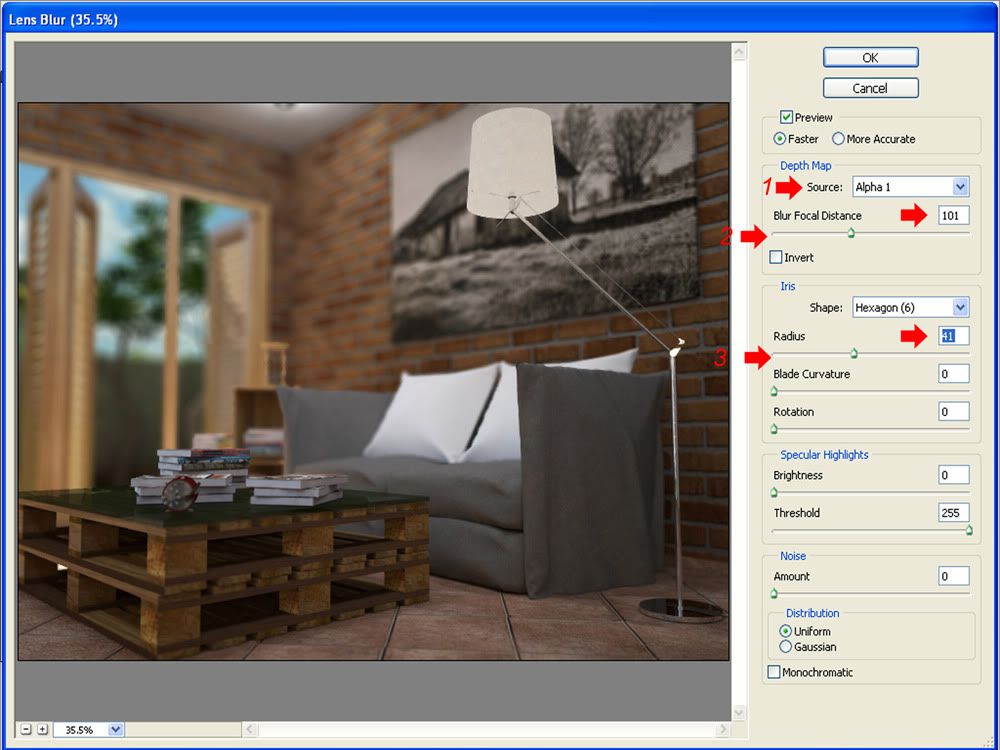
e. Creating depth of field using Zdpeth pass


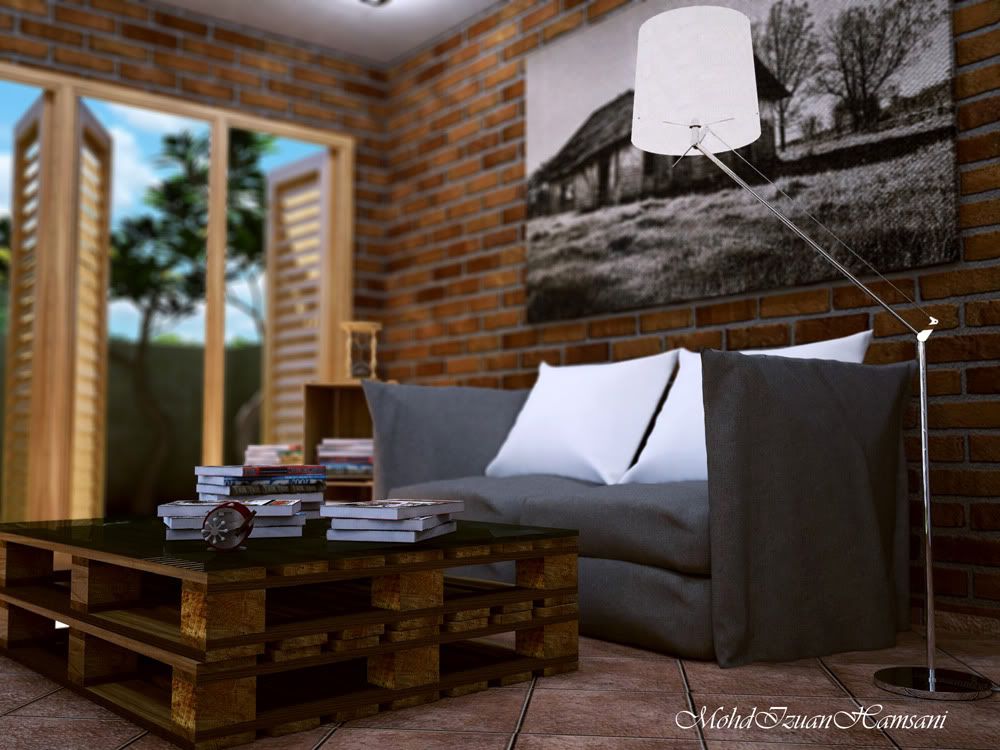
Let's compare again before and after post processing.


Thank you...
Second part coming soon.
No comments:
Post a Comment