First of all, we would like to thank Jamal Alhaj for these unique Photoshop brushes that he made. Download them for free. Download link, click HERE.
Pages
COPYRIGHT
All resources offered by this blogsite are shared by the authors themselves. Some of them were rewritten with permission and some were collected throughout the internet and exchanged between peers for personal study. Use of any resources offered for commercial purposes is prohibited. Otherwise you need to responsible for any consequences produced! Any profitable behavior of utilizing the resources downloaded from this site is condemned and disdained sternly.
Some of the resources, and data here were shared by the authors freely and we don't have all the capacity to know, if the components, materials inside the scenes were copyright protected. If you feel some resources have infringed your copyright, please contact us. We will delete them as quickly as possible. We won't bear any legal responsibility for the resources. Thanks.
Custom Search
Custom Search
Welcome to SketchUp, Vray and other Resources
Everyone is capable of learning. Learning is part of life. It is a social process of living and bringing everyone to share their inherited resources and discoveries. All of us can influence the life of others through sharing and caring. It is our belief that everyone should be a lifelong learner.
I am putting very important visualization resources and series: tutorials, tips, tricks, VRAY materials and settings, and mini-the-making (MTM) processes.
Yours,
Nomeradona
I am putting very important visualization resources and series: tutorials, tips, tricks, VRAY materials and settings, and mini-the-making (MTM) processes.
Yours,
Nomeradona
Showing posts with label photoshop. Show all posts
Wednesday, 28 November 2012
Free Photoshop Brushes from Jamal Alhaj
Monday, 5 September 2011
Tutorial: Photoshop Image composition
Wednesday, 24 August 2011
Tutorial: Creating a Concrete Road Material
Friday, 19 August 2011
Tutorial: From SketchUp to Photoshop
This is another excellent Photoshop tutorial from Alex Hogrefe " From SketchUp to Photoshop. Here Alex showed his workflow in using just a Sketchup image post process in Photoshop. The final output looks like a rendered image but without the use of any rendering engine.
As the title implies, this architecture illustration tutorial doesn't use a rendering engine. Click HERE to view Alex's Tutorial.
Tutorial: Adding Grass in Photoshop
Alex Hogrefe has shown shared this video in Youtube. It is a simple yet effective method of adding grass in Photoshop. He used a rendered image and then added the grass effect in Photoshop.
Thursday, 18 August 2011
Post Processing Trick: Adding reflected Caustics in Photoshop
Here is small trick shared by Michael Berber aka"oRangE.n.GreeN" at www.cgpinoy.org. Thanks Michael for allowing us to blog your trick here.

You need to download the Caustics Generator HERE.
Image Below- Generated Caustics Map using Caustics Generator

The Photoshop process


You need to download the Caustics Generator HERE.
Image Below- Generated Caustics Map using Caustics Generator
The Photoshop process
Monday, 1 August 2011
Tutorial: How to Use the Vray Alpha Channel in Photoshop
Labels:
Alpha channel,
Gerbe Dumahil,
photoshop,
post process
Tuesday, 19 July 2011
Tutorial: Cool Effects OVerlay using SketchUp and Photoshop
Do you still remember this post? Yeah! Triet Nguyen was one of our "Visualizer on the Spot". If you have a Facebook account, you can view his work HERE.
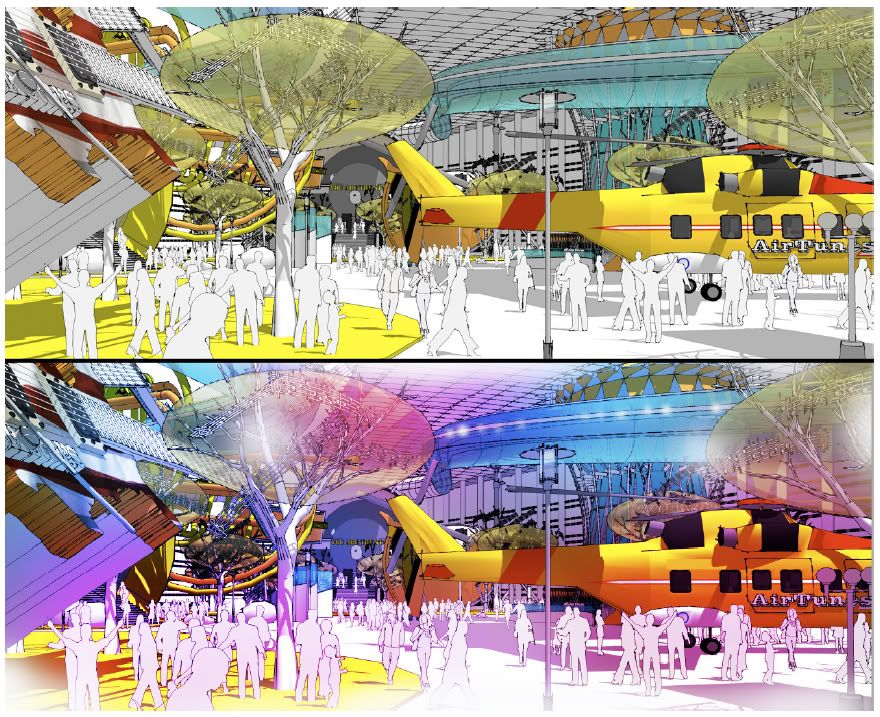
I asked him about his technique via his Facebook page, then realizing he is creating a tutorial on his technique. Here is Triet Nguyen's Cool Effects technique using SketchUp and Photoshop. Alternatively you can also view this at www.sketchucation.com
Here is Triet Nguyen's Tutorial
In this exercise, we will light up an image in Photoshop by painting and using layer blending modes.
Step 1
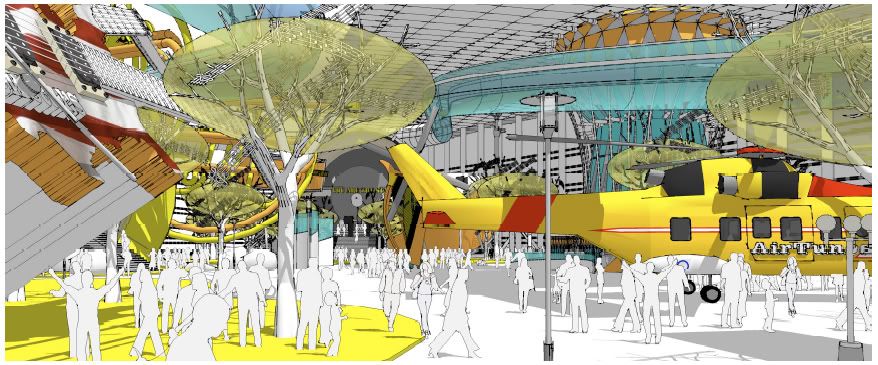
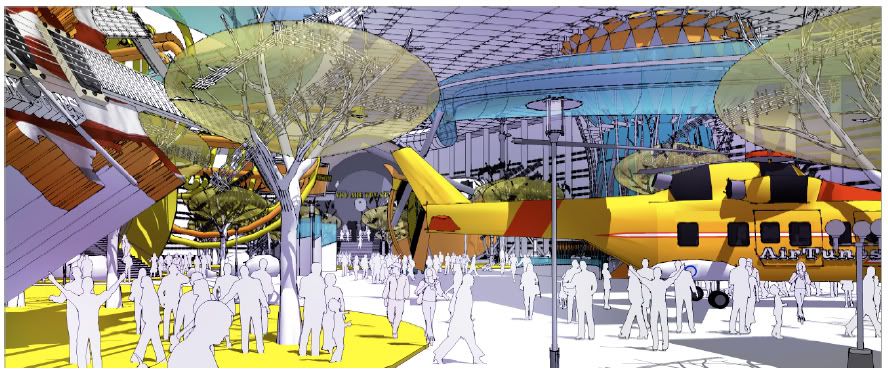
Export 2D colored image from Sketchup with full color, shadows and textures.
Step 2
Step 3
Step 5
Repeating step 2, this time we will name the new layer Red Overlay (see image below).
Final Image
I asked him about his technique via his Facebook page, then realizing he is creating a tutorial on his technique. Here is Triet Nguyen's Cool Effects technique using SketchUp and Photoshop. Alternatively you can also view this at www.sketchucation.com
Here is Triet Nguyen's Tutorial
In this exercise, we will light up an image in Photoshop by painting and using layer blending modes.
Step 1
Export 2D colored image from Sketchup with full color, shadows and textures.
Step 2
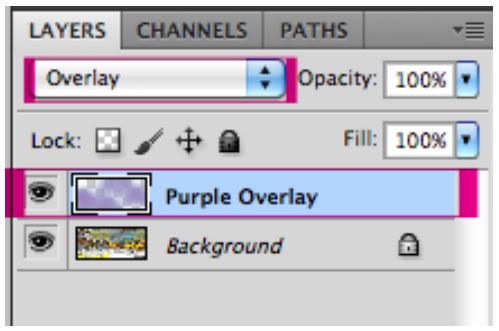
Launch Photoshop and open the image. I cropped the example to 2669 x 1098 pixels. Create a layer and call it Purple Overlay; and set layer blending mode to Overlay.
Step 3
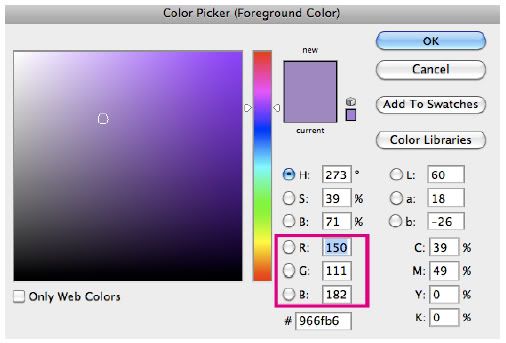
Select the Airbrush Soft Round with Opacity 35. Choosing the size of the brush depends on the size of the image. Ideally, we want this effect resembling purple neon light to blend with the other colors. In this case, I set the radius of the brush to 500 pixels. Open Color Picker by clicking on the Foreground Color from the tool set and choose purple color with the settings: R: 150, G: 111 and B: 182. (see image below)
Step 4
Make sure the Purple Overlay layer is highlighted. Now we are ready to light up the image by starting to paint areas as desired. We will see the image begin to brighten up with a hint of the purple neon light effect.
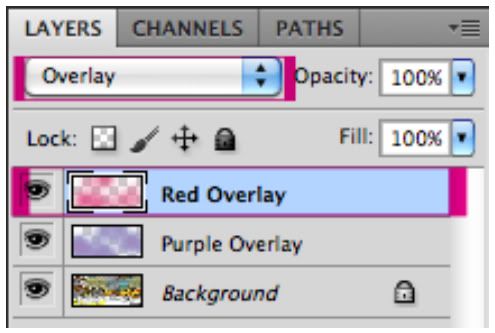
Repeating step 2, this time we will name the new layer Red Overlay (see image below).
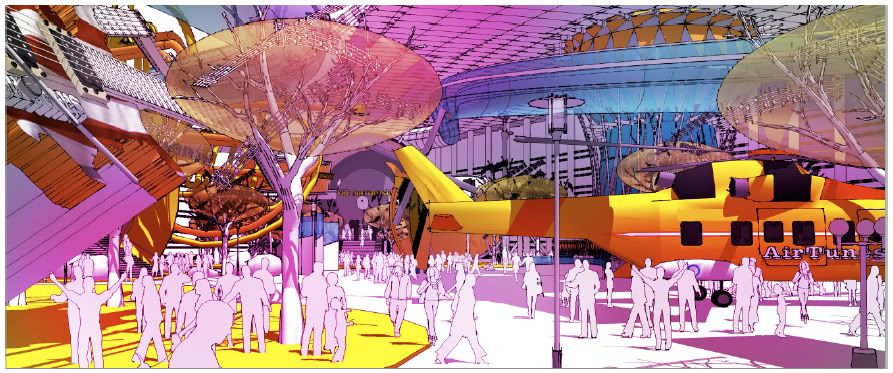
Again select the Airbrush Soft Round with Opacity 35 and radius 500 pixels, choosing red color with the settings: R:248, G: 27 and B: 136. Select the Red Overlay layer and start painting on the areas we want to light up. The image start to look more interesting now, but we need some blue neon lights.
Step 6
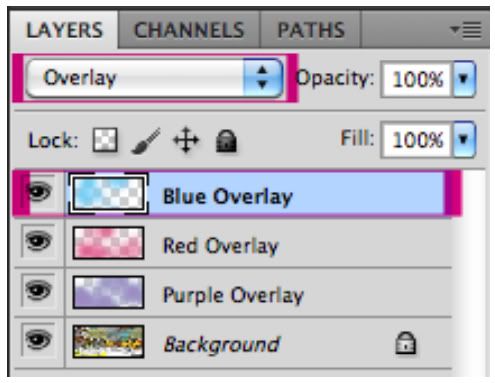
As with step 2 and 5, we will create a layer called Blue Overlay and set the layer mode to overlay.
Again, select the Airbrush Soft Round with Opacity 35 and radius 500 pixels. Choose purple color with the settings: R:19, G: 200 and B: 247. Select the Blue Overlay layer and start painting on the glass tube, ceiling, guitar set and parts of the floor. The picture is glowing,
however it needs touching up here and there. In this particular case, I create some spotlights.
Step 7
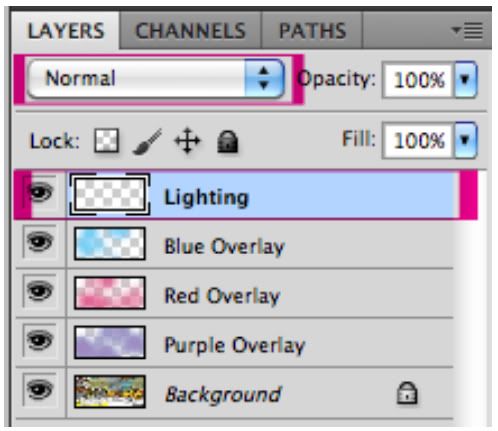
We create a layer called Lighting with the layer mode as Normal by default.
Choose the Airbrush Soft Round with Opacity 50 and set radius to 30 pixels. Pick the white color from the Color Picker or press key D to bring black and white color for the background and foreground. (Press key X to switch background and foreground). Start creating some lights on the glass tube, “music trees” and drum set. Boom... Itʼs done.
Final Image
Subscribe to:
Posts (Atom)