Here is my Basic Vray SketchUp Tutorial Series 4 which focus with Diffuse Map and how to control this map effectively.
Before staring this tutorial it is advisable to read the following tutorials:
Anyhow Here the 4th entry for this series
PART 1: Adjusting the Texture Position
Step1: Selecting the texture.
You can select the texture in two ways. The first one is using the Vray Material Editor and the second one is using the native Sketchup Material editor. Use the eyedropper icon and point the material you want to edit. In this case, I choose the wallpaper 2 (see screen grab below)
Once the texture is selected, you will see in the Vray Material Editor that this material is selected and highlighted. Any material that you created in SketchUp from Vray SketchUp 1.33 up, will have VRAY material automatically.
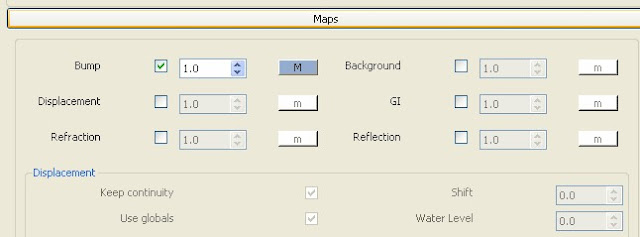
Step 2: Adding bump map.
Let us add Bump map. Go to the Maps tab, click the small "m" to the right.
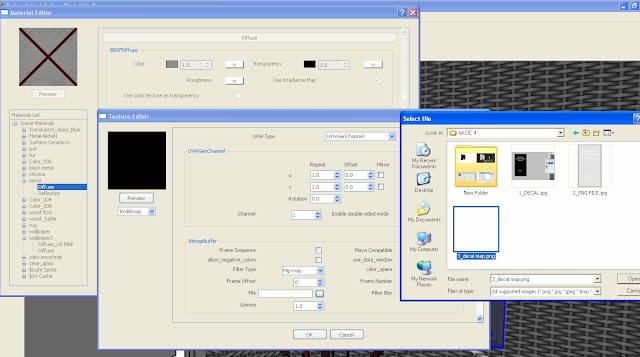
Once clicked, this new tab will appear. Under Map type, select "Texbitmap". Go to Bitmap Buffer, click the small box on the right of the File. Load your Bump Map.
Here is the Bumpmap that we will be using for this tutorial.
When we apply a different bump map with different pattern from diffuse map, we won't have any idea how the bump map is pplied. In the below screen grab only the diffuse map shows, we wont have any idea how will be the effect of the wooden weave bump map that we applied. To control the UV position and scale of the bump map we will go to the next step.
Step 3: Adjusting the position and scale of the Bump map.
First of all, I would like to recognize Fernando Rentas, I owed this one from him.
We can adjust the scale and position of bumpmaps or any other maps like displacement, reflection etc. by creating a proxy diffuse map and placing it on the upper stack. We will load the same material we used in the bumpmap in this proxy diffuse material. We will make the proxy diffuse map as transparent so as to have no effect to our original diffuse map. Here is how to do it.
a. Create second diffuse layer
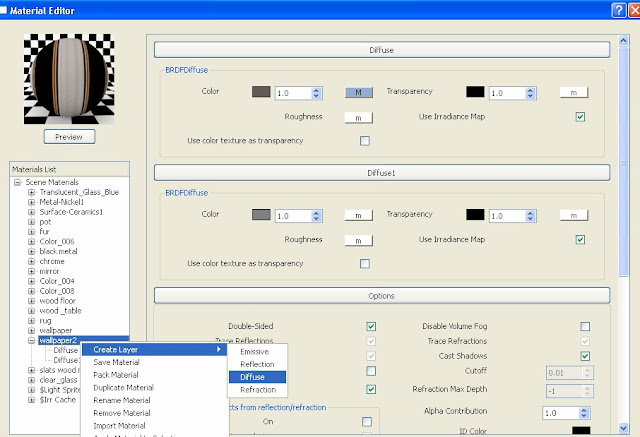
b. You can rename this second diffuse layer (in my case Diffuse_UV MAP), and move it on the upper stack. Load the same bump map on the second diffuse map.
The 2nd Diffuse map shows up in the screen grab, what happen to the Diffuse 1 ? Well its under this second diffuse material that we put on the top layer. Don't worry we will just use this to adjust the position and scale of the bump map.In the screen grab below, the bump map scale is showing and its too small to see.
c. Adjust the Diffuse proxy map.
To adjust the scale, we always advise you to use the Sketchup Native material editor. It's, exact, easier, faster and the effect can be seen immediately in real-time.
Below, I entered 200x 200.. The image scale has been adjusted in real time.
d. Adjusting the Color Transparency. Let us now adjust the transparency of the diffuse proxy map. You can do this quickly by putting white color to the color swatch. But the problem, you will end up on making the wall transparent also. The best way to do it is by assigning an A color map with 'white' hue. See image below.
Here is the render. We can see the effect of the bump map to the wall. We also managed to adjust the scale of the bump map.
PART 2: Creating Decal Material
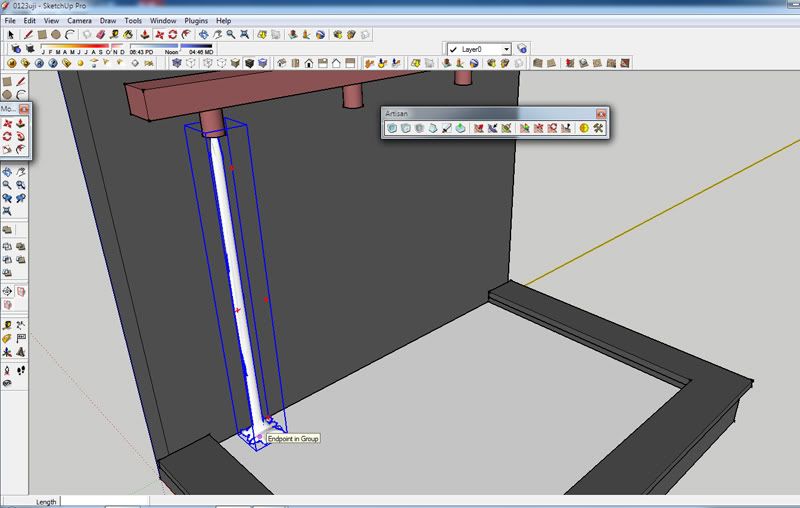
Next we will create a decal material and we will adjust the scale and position of this material. Let use the mirror to do this. Use the eyedropper of the Native SketchUp Material Editor like in Step1 and select the mirror material. Below shows the highlighted mirror material
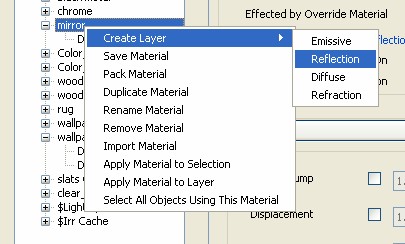
Let us create reflection Layer.
Since we did not put any map to the reflection layer, this suggest that the material is 100% reflective (like mirror material).
Here is the render. See the effect of the mirror material
Creating the Decal Map
Let us first create the decal map using Photoshop. In Photoshop, I quickly added some texts.
Be sure the background is transparent. Save it in png format.
Now let us follow what we have done in tutorial 3. Move the Diffuse layer on top of the Reflection Layer. Load in the diffuse layer the decal map that we have done in Photoshop.
Below shows the effect of the diffuse map to the mirror. It's repeating many times. This time we will adjust the texture position and scale.
Again by using the Native Sketchup Material editor adust the scale.
Adjust also the position by right clicking the mouse.
You can also use the pins (by unfixing them) in adjusting both the scale and position. Ok I'm satisfied with this.
Now, this is the most important in decal. Be sure to click 'Use color texture as transparency".
Here is the final render. Notice the effect of decal to the mirror.


