

We are starting another series Advanced Vray For SketchUp Series. Our first is courtesy of David Brufau aka "dBrenders".
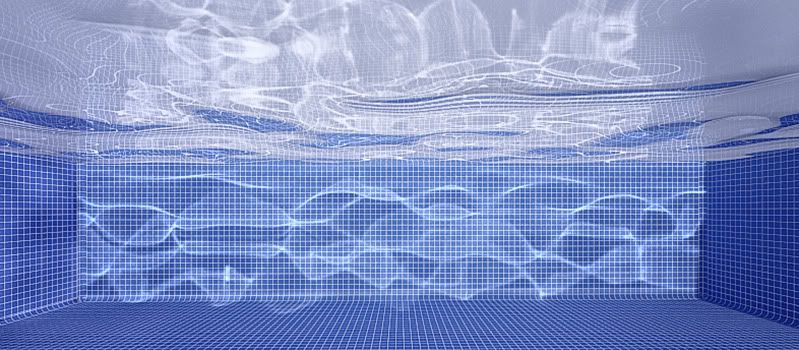
Final Image
The Process
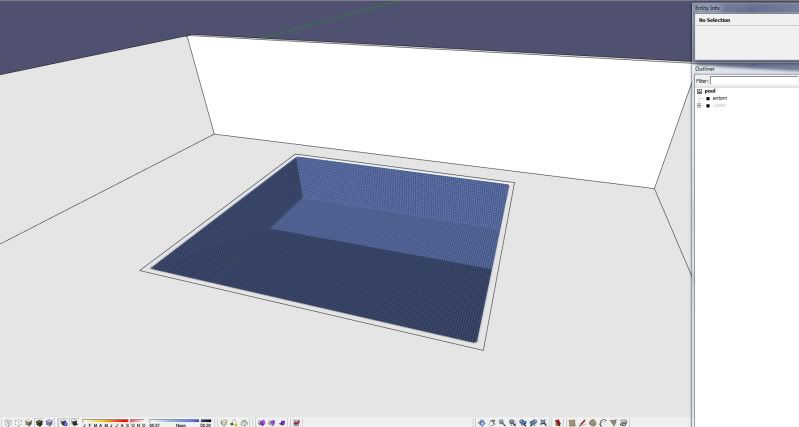
Step 1
Build a simple pool, and apply pool- tiles material
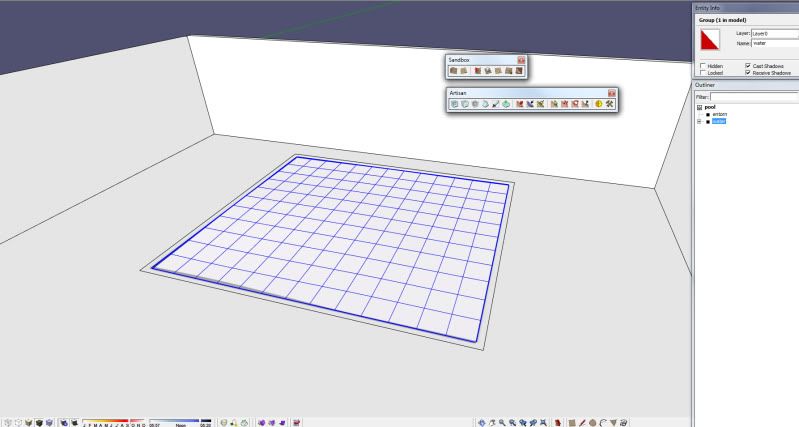
Step 2
Use sandbox tool. Create a plane surface from scratch. The more subdivisions the better

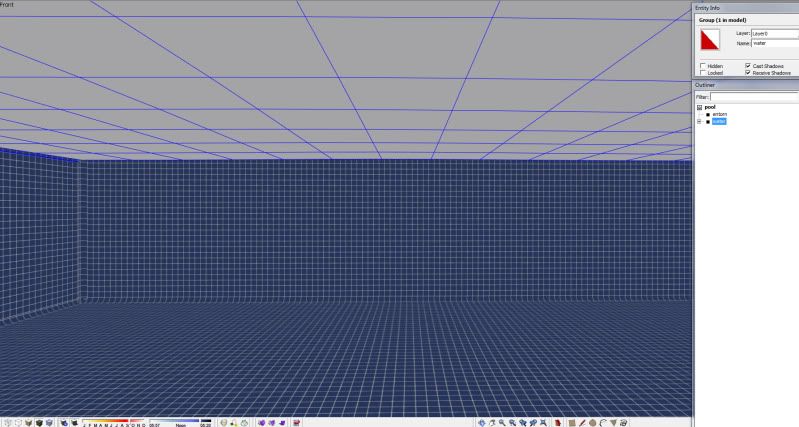
Step 3
Increasing the number of subdivisions is better, but of course more processing time is needed

Step 4
Use sandbox' smoove tool. You can also use the sculpt tool of Artisan plugins. Use these tool to sculpt and displace the surface.
Step 5. Drag your camera below the water surface. Adjust the angle of your sun for the incidence of lights and shadows. Make sure to view the front face of your surface, otherwise water material wont work properly
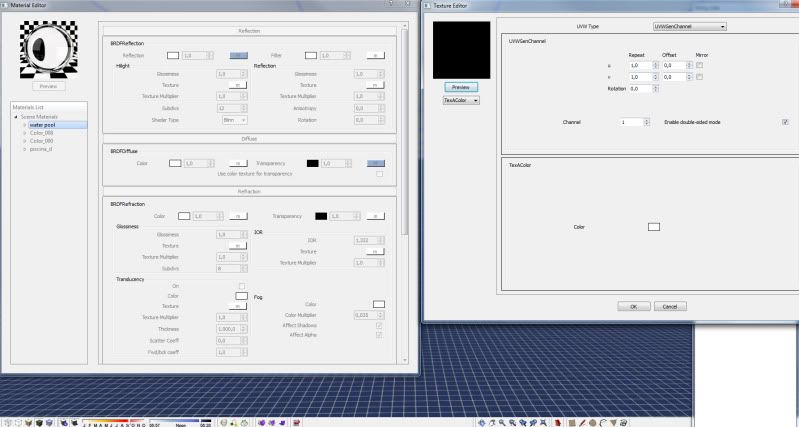
Step 6. Edit the reflection layer of your water material, in reflection layer, choose Fresnel Map with IOR set to 1,332 (typical water Index of refraction value).

Step 7. Diffuse color white, transparency should be Tex Acolor and apply white color for full tranparency
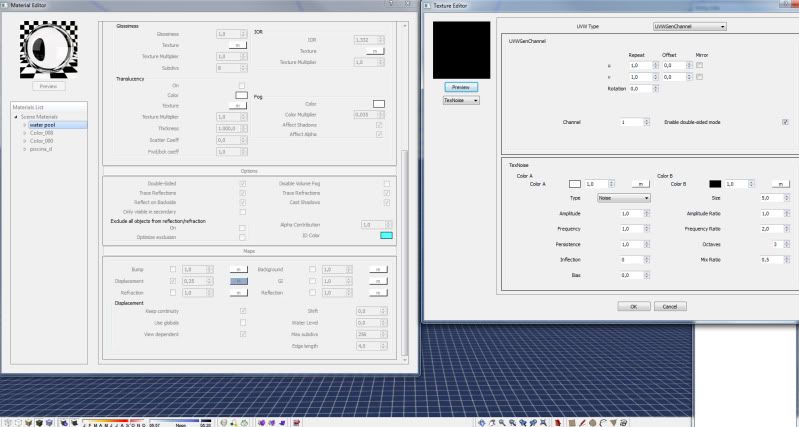
Step 8. In maps option slot, add displacement. Use 0,25 and disable "use global'. Choose noise map. Increase the size for nicer huge waves.
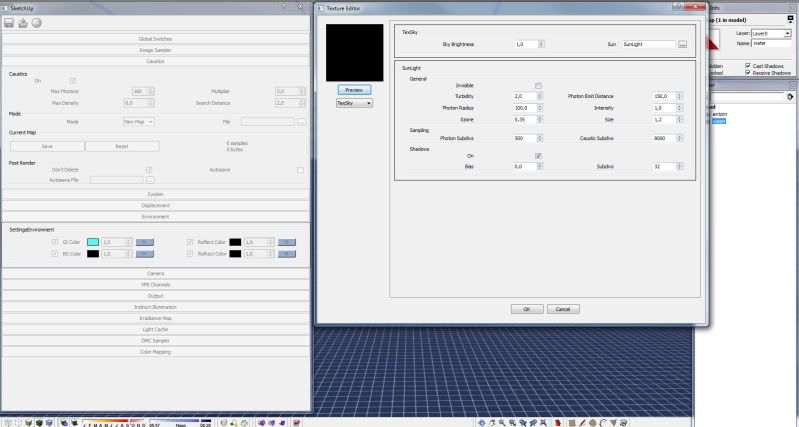
Step 9. In the output tab, tick caustics. Use the following parameters that are shown in the below image. You need to make some trials for sharper caustics. Be patient!

Step 10. In the Environment tab, apply the following sun parameters. The higher caustic subdivision the better
Step 11. Render it!.
Final Image
Final Image
The Process
Step 1
Build a simple pool, and apply pool- tiles material
Step 2
Use sandbox tool. Create a plane surface from scratch. The more subdivisions the better
Step 3
Increasing the number of subdivisions is better, but of course more processing time is needed
Step 4
Use sandbox' smoove tool. You can also use the sculpt tool of Artisan plugins. Use these tool to sculpt and displace the surface.
Step 5. Drag your camera below the water surface. Adjust the angle of your sun for the incidence of lights and shadows. Make sure to view the front face of your surface, otherwise water material wont work properly
Step 6. Edit the reflection layer of your water material, in reflection layer, choose Fresnel Map with IOR set to 1,332 (typical water Index of refraction value).
Step 7. Diffuse color white, transparency should be Tex Acolor and apply white color for full tranparency
Step 8. In maps option slot, add displacement. Use 0,25 and disable "use global'. Choose noise map. Increase the size for nicer huge waves.
Step 9. In the output tab, tick caustics. Use the following parameters that are shown in the below image. You need to make some trials for sharper caustics. Be patient!
Step 10. In the Environment tab, apply the following sun parameters. The higher caustic subdivision the better
Step 11. Render it!.
Final Image
No comments:
Post a Comment