Thanks dB Renders for providing this excellent tutorial.
Depth of Field the easy way using getcamera distance of easy way from sketchUcation.com.
Download the plugin and install it.
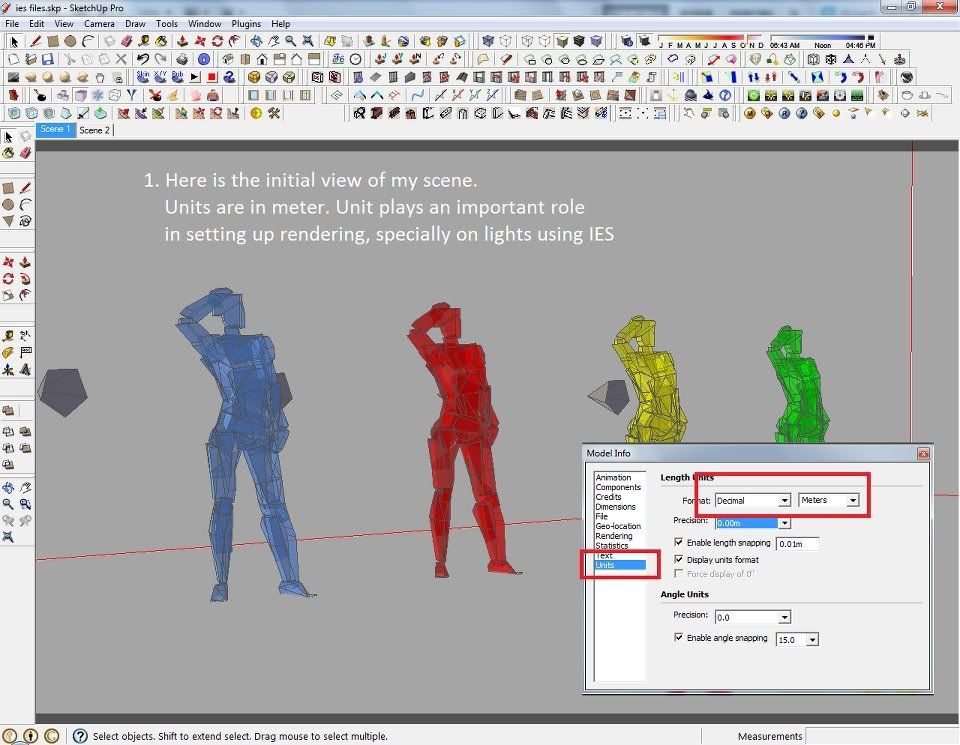
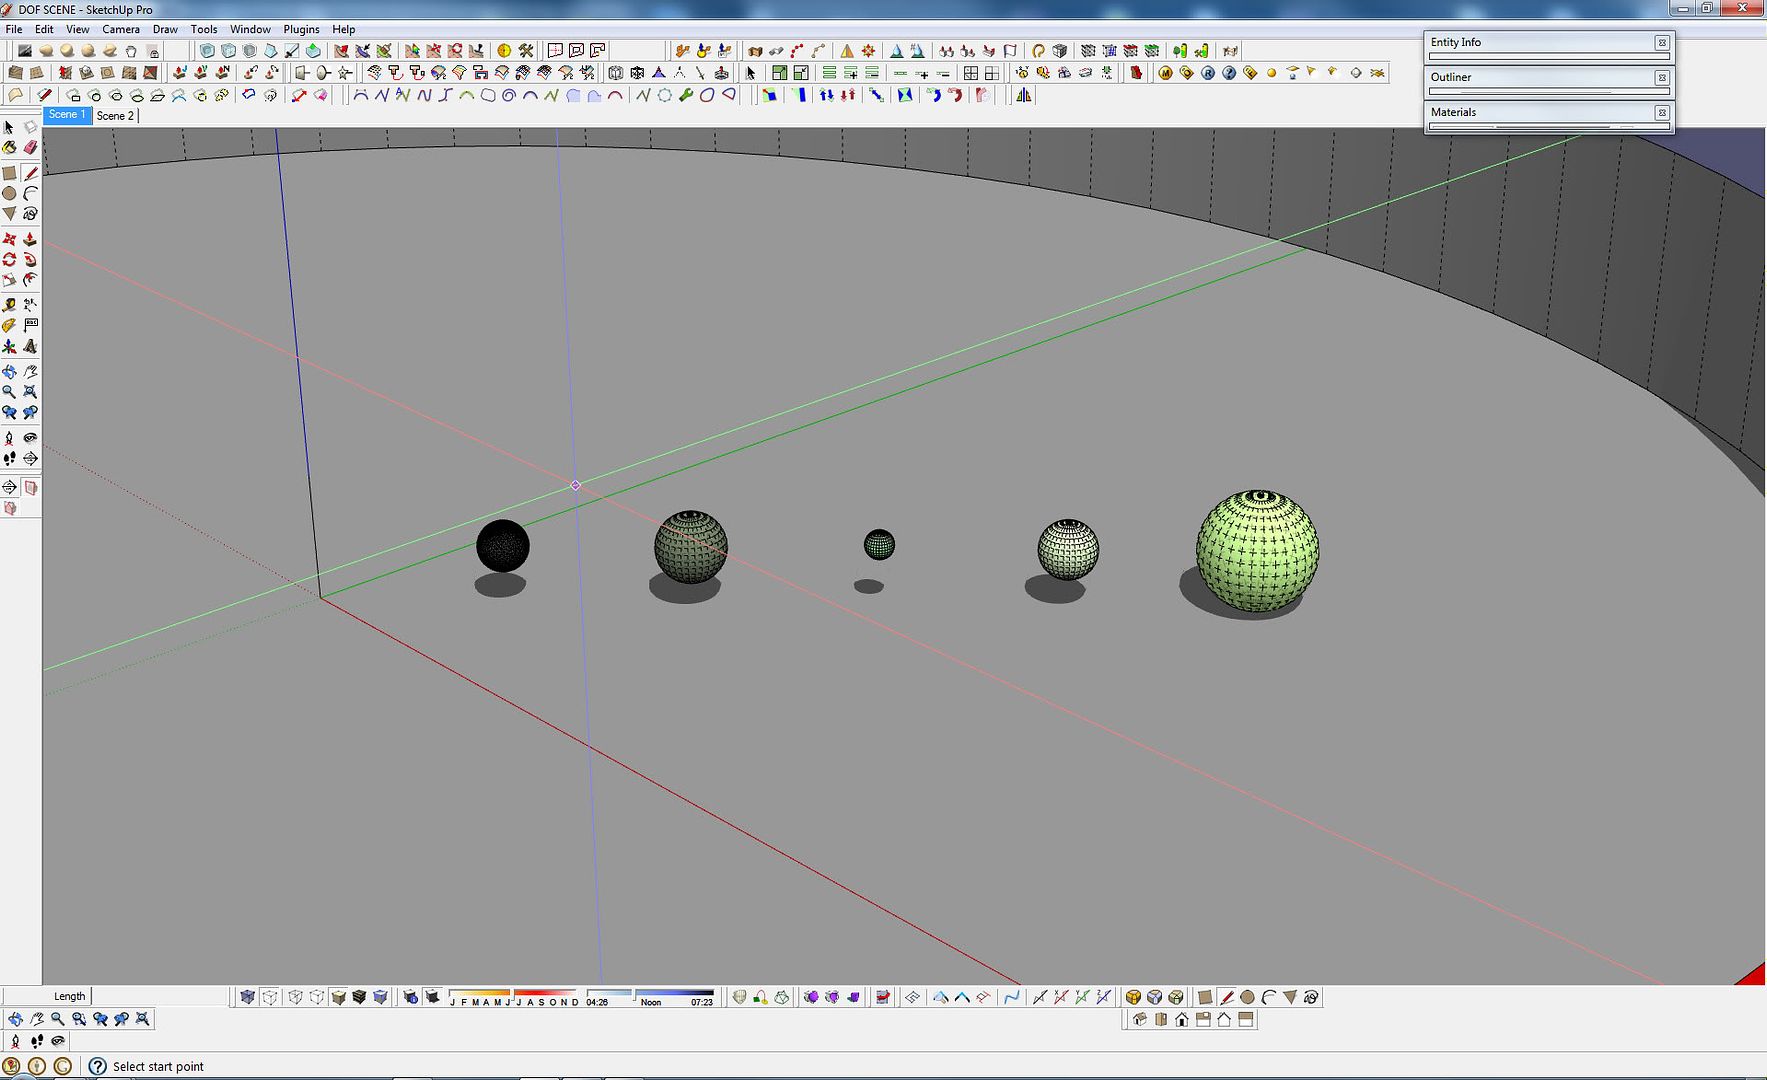
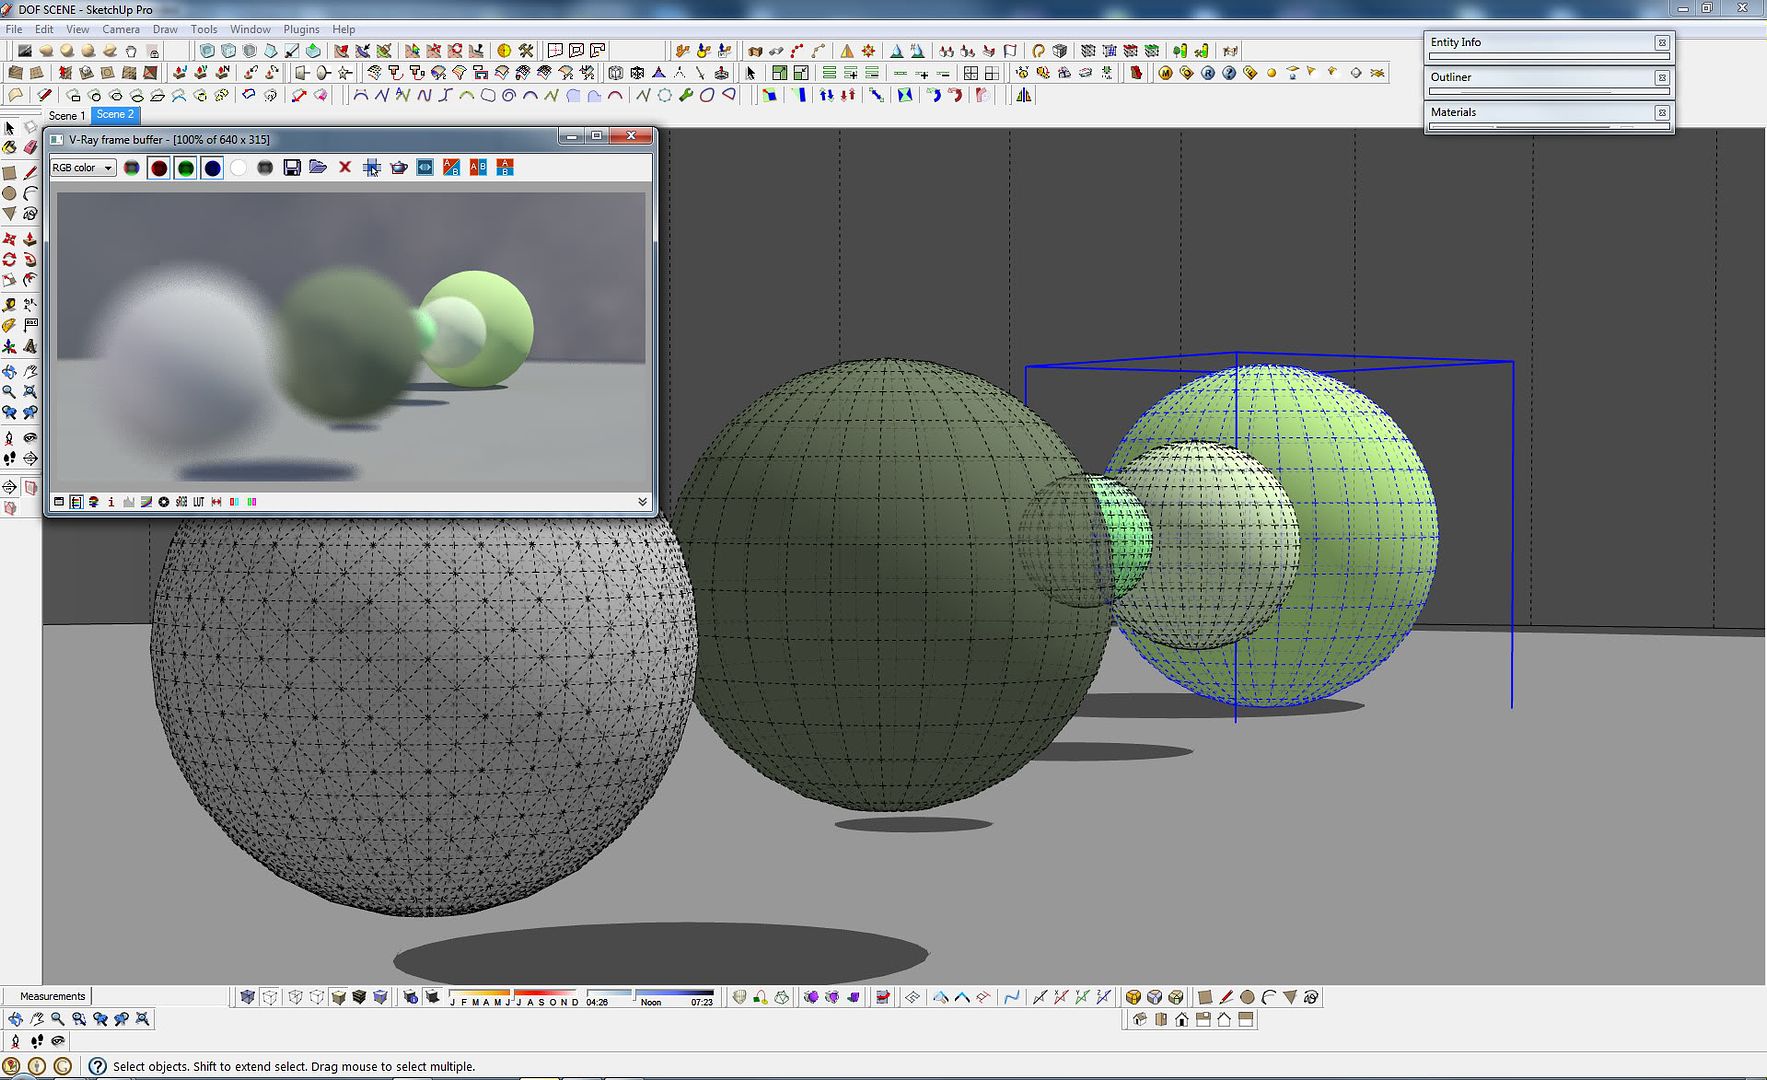
Step 1: Create a scene with objects positioned in different distances from the camera.
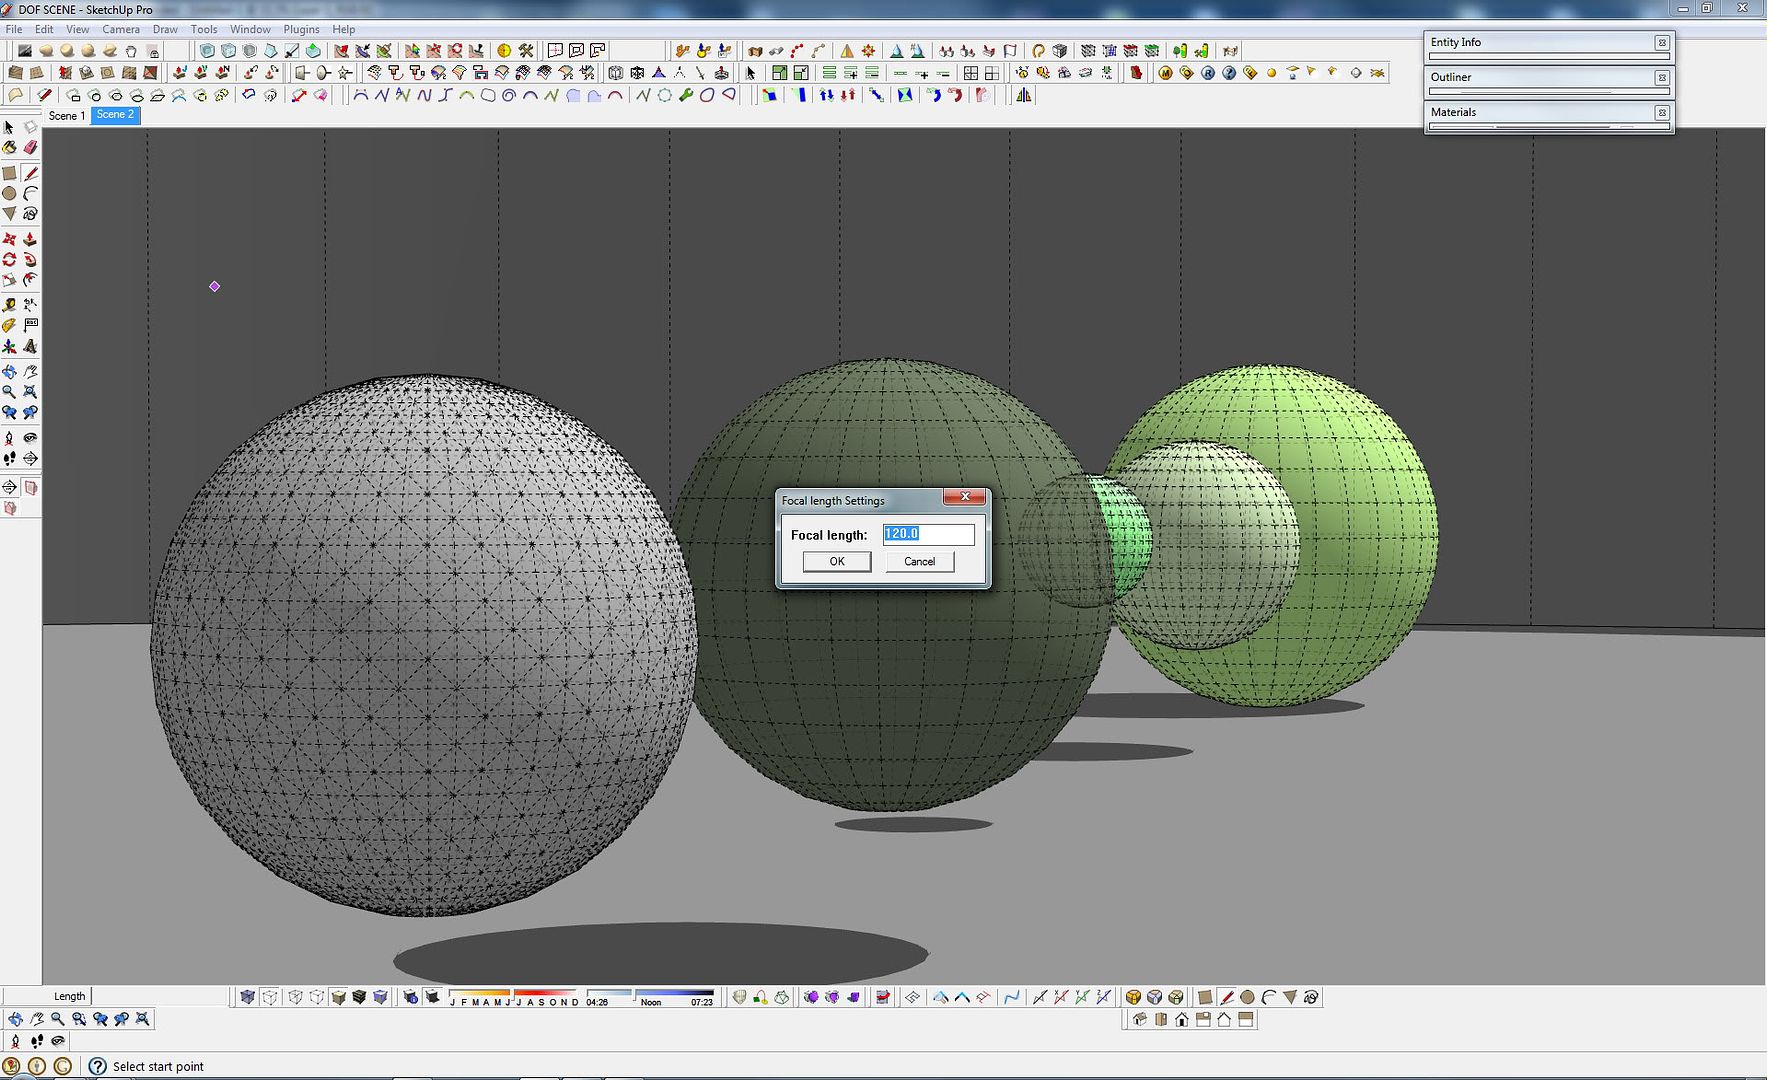
Step 2: Set your camera with high focal length and low field of view; 17deg.
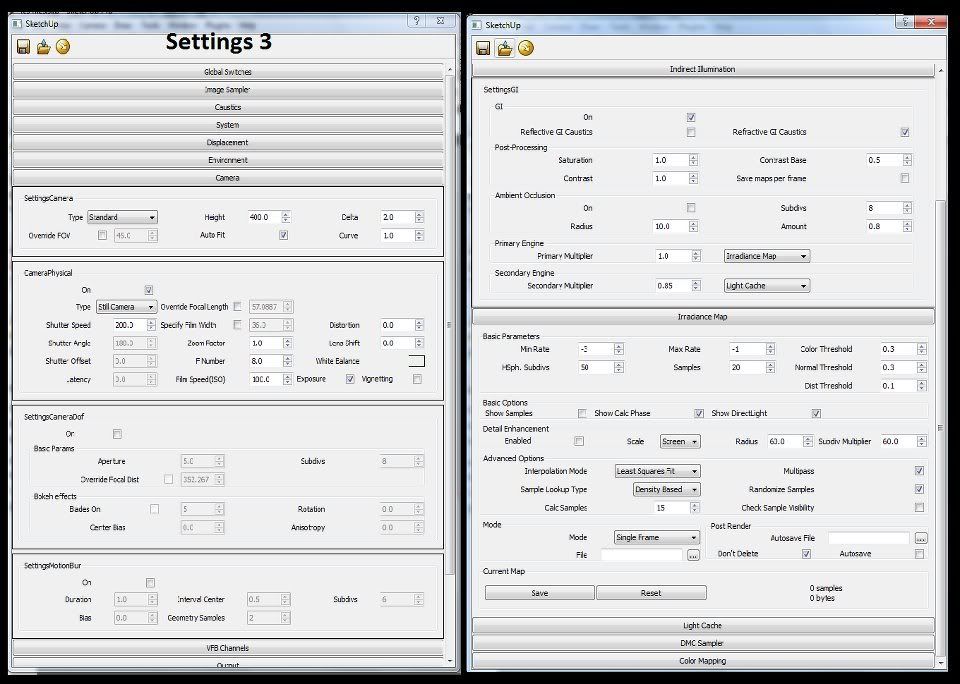
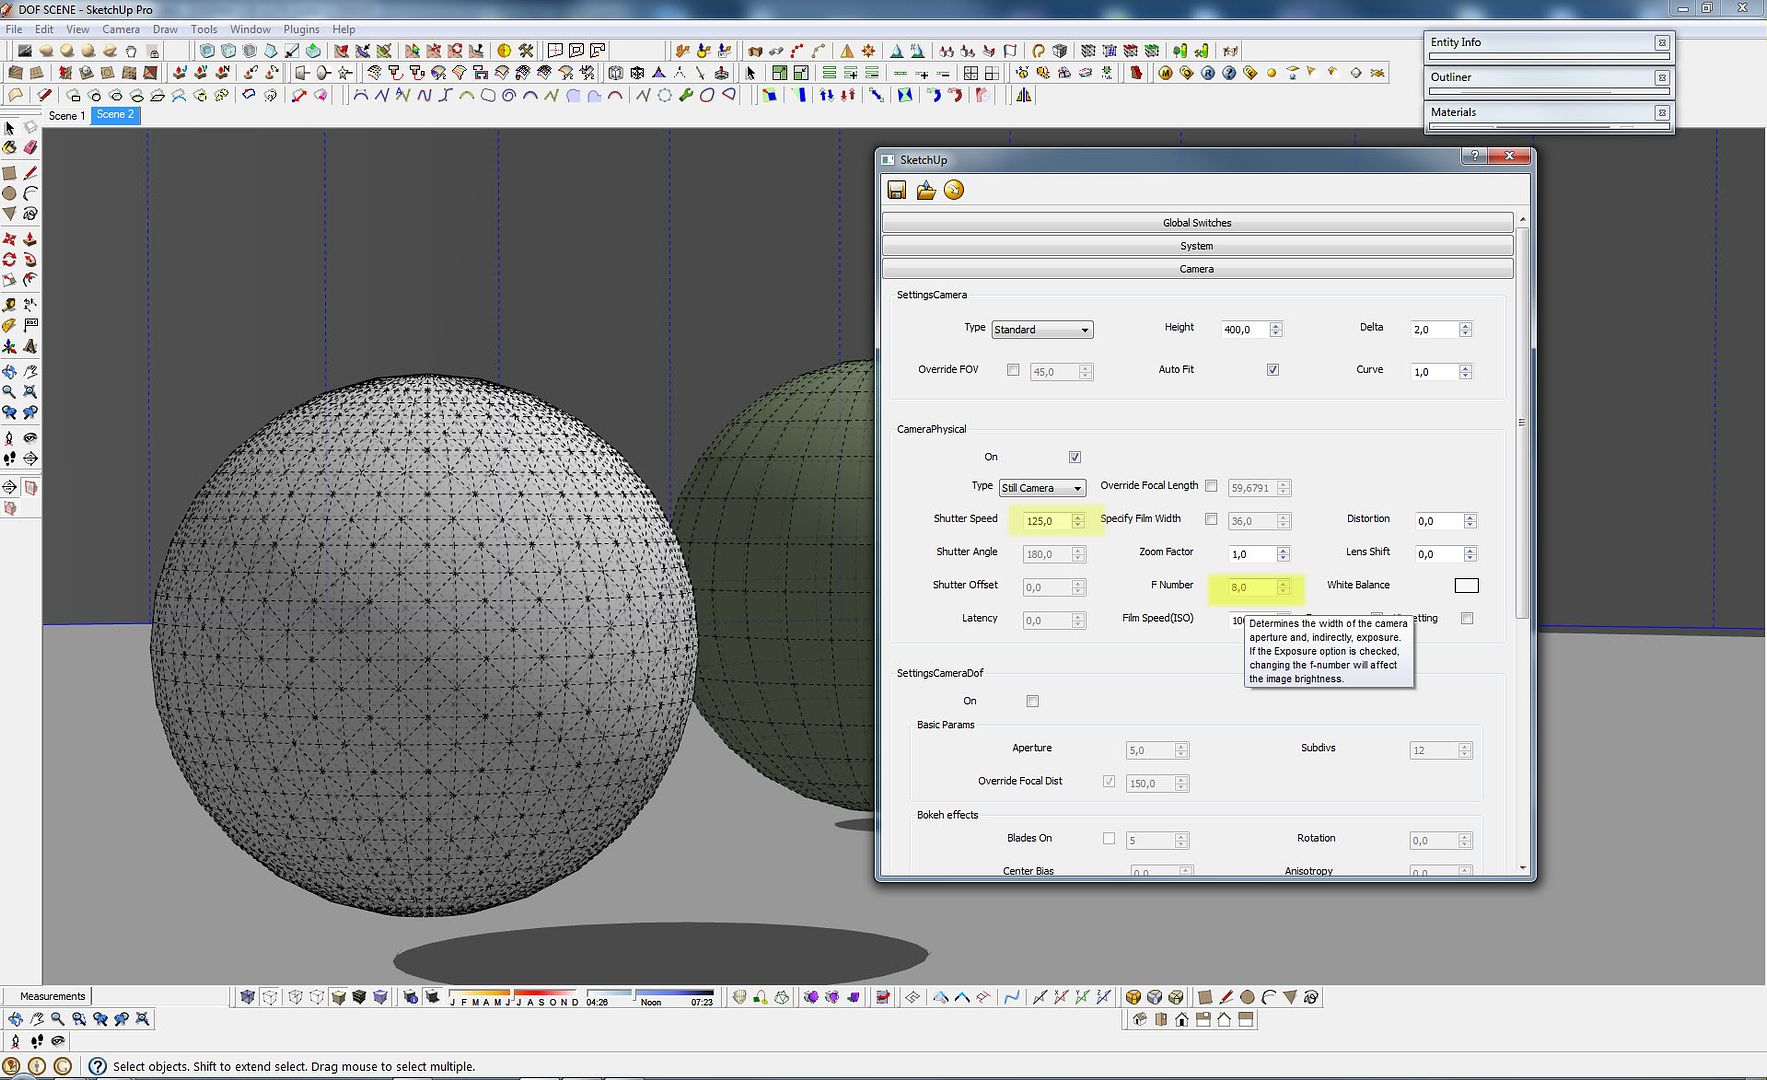
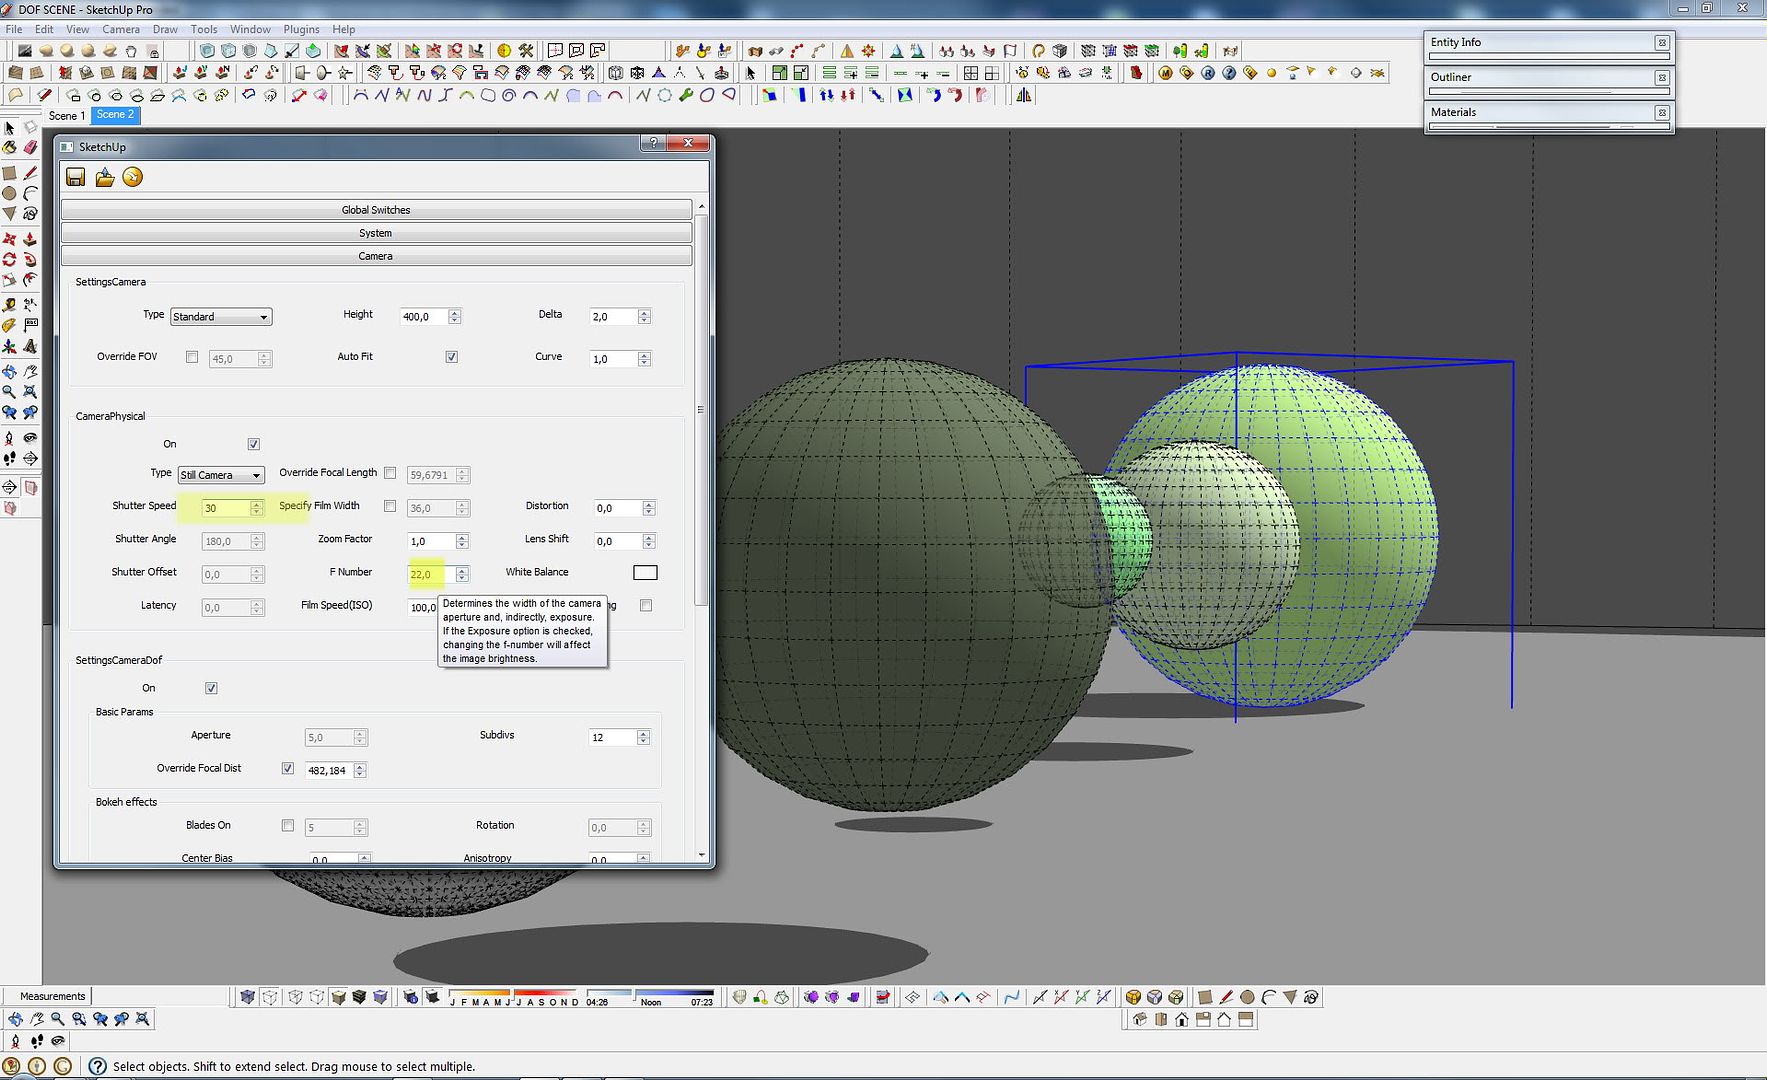
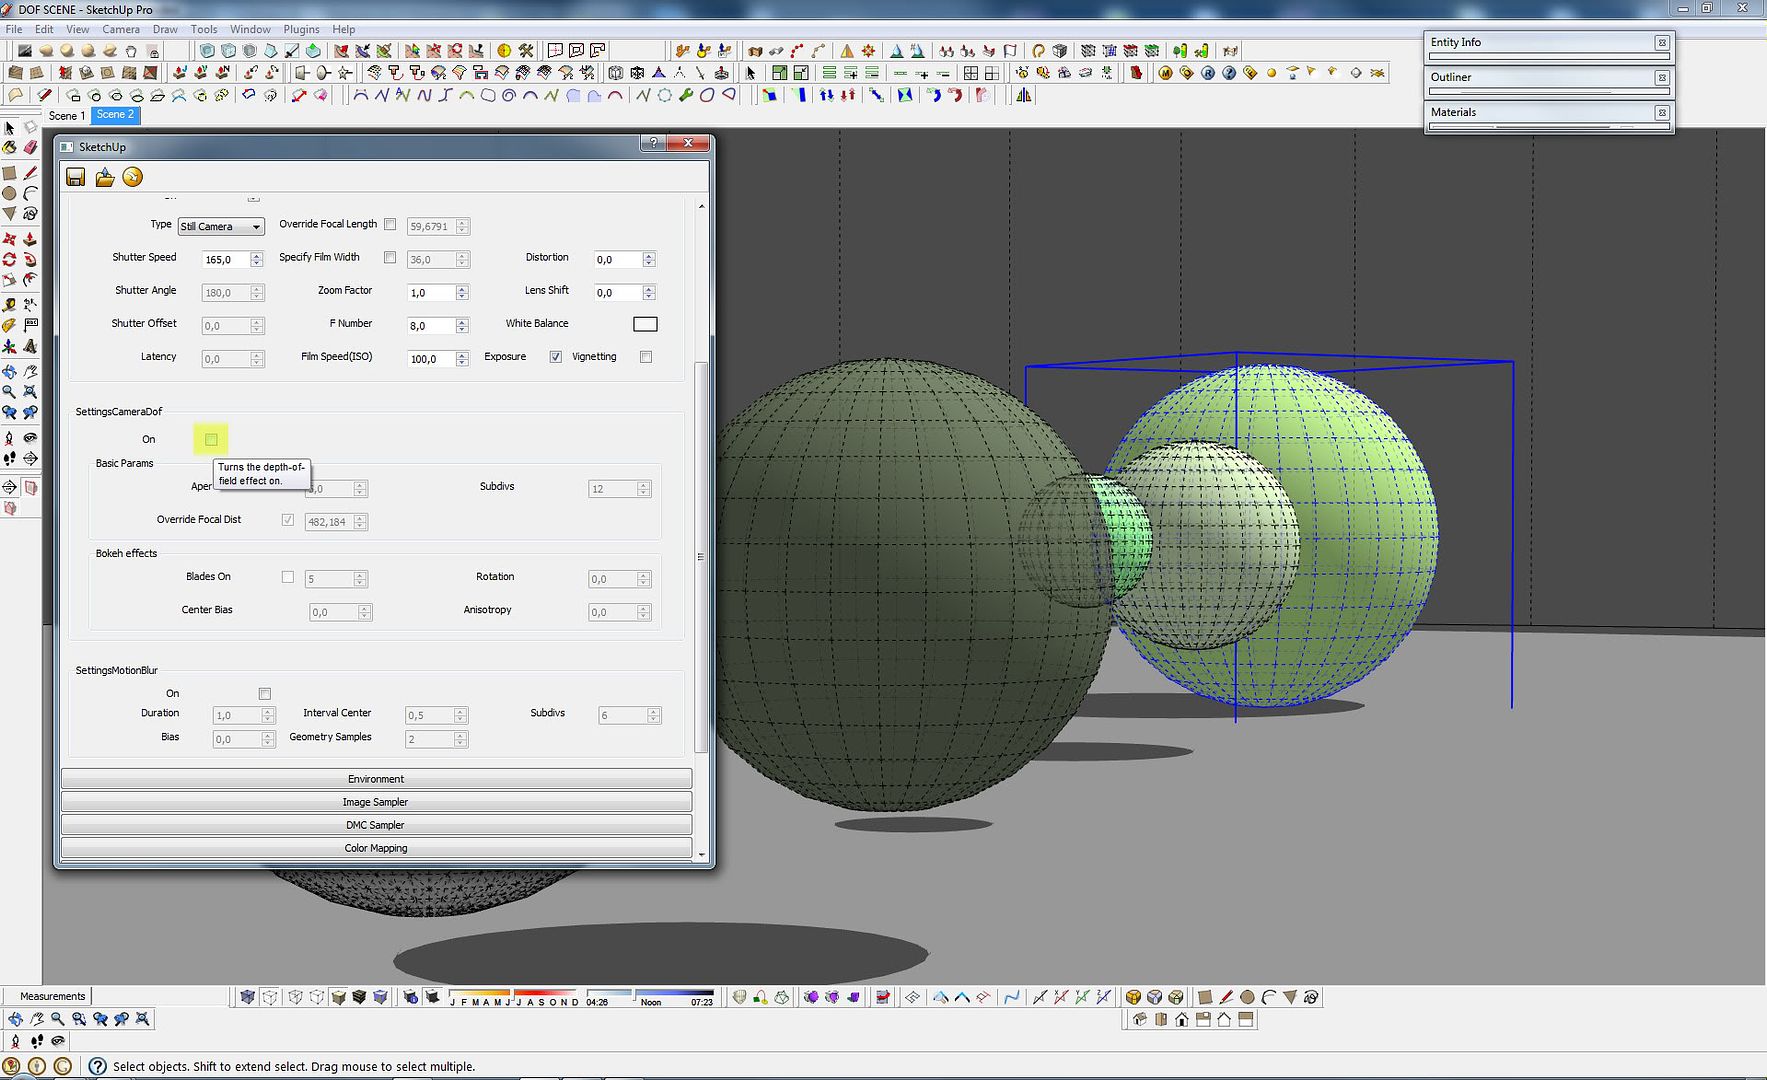
Step 3: Open VRAY options, access camera tab, and set it to standard parameters e.g f.number to 8 , shutter speed 125.
Step 4: Tick depth of field (dof) option box.
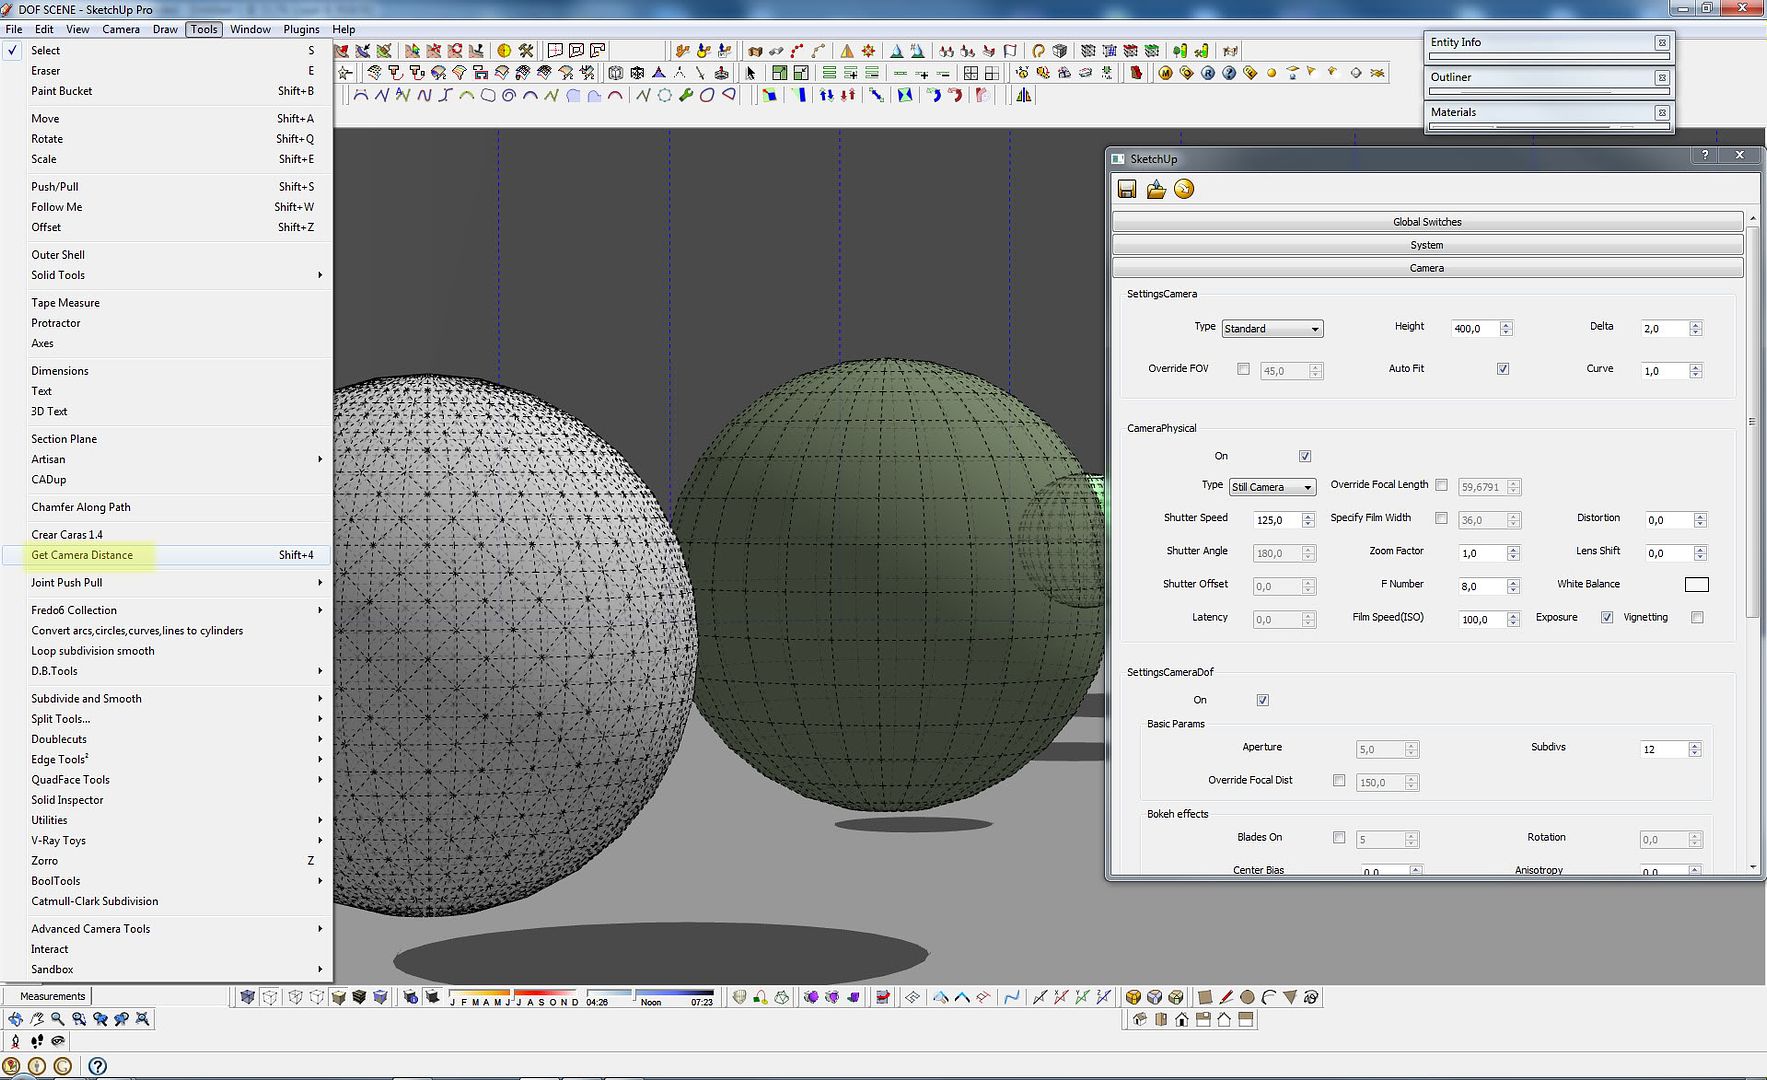
Step 5: Access "plugin get camera distance from tools menu", or create a customize shortcut; mine is shift+4.
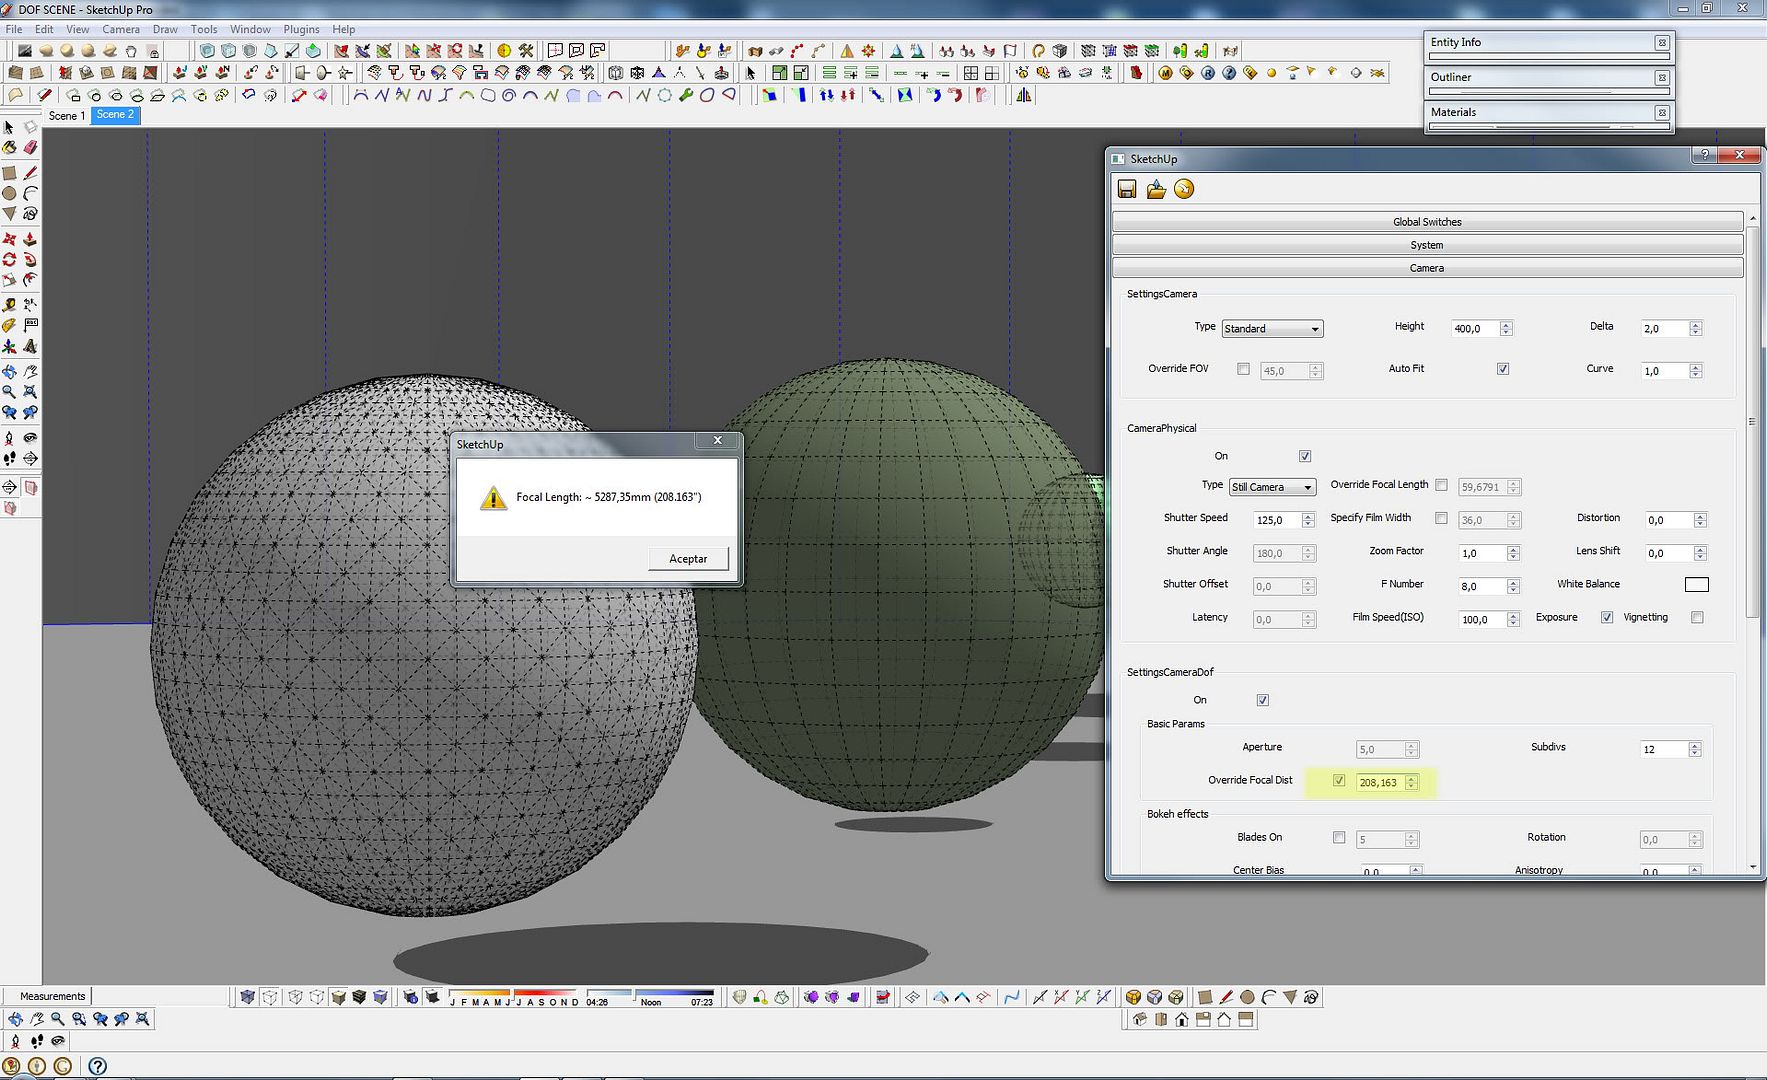
Step 6: Set the point you want to focus and get the distance information in inches. (Vray works in inches)
Step 7: Check override option and put there the distance of your focus.
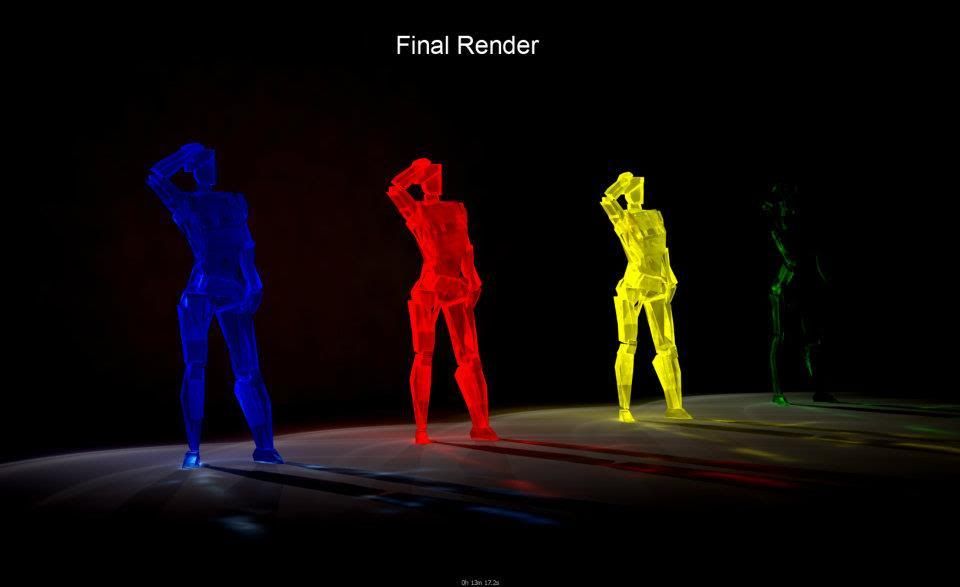
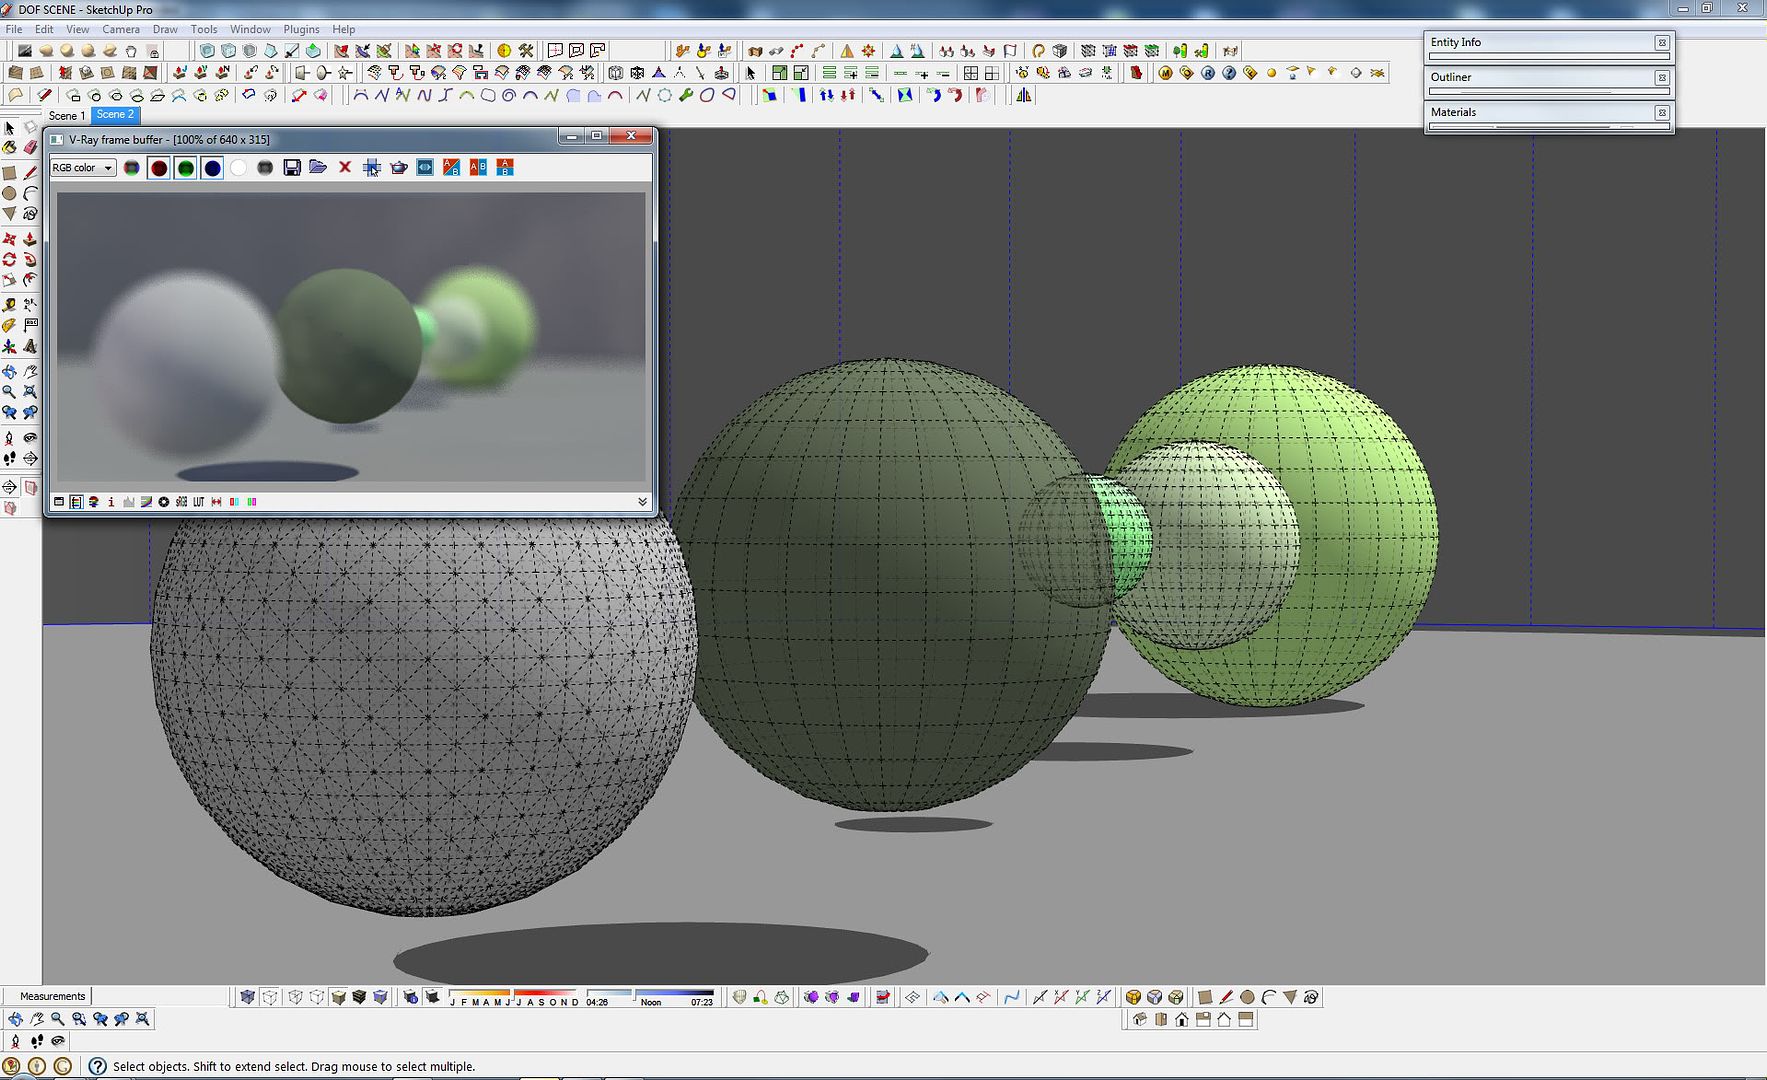
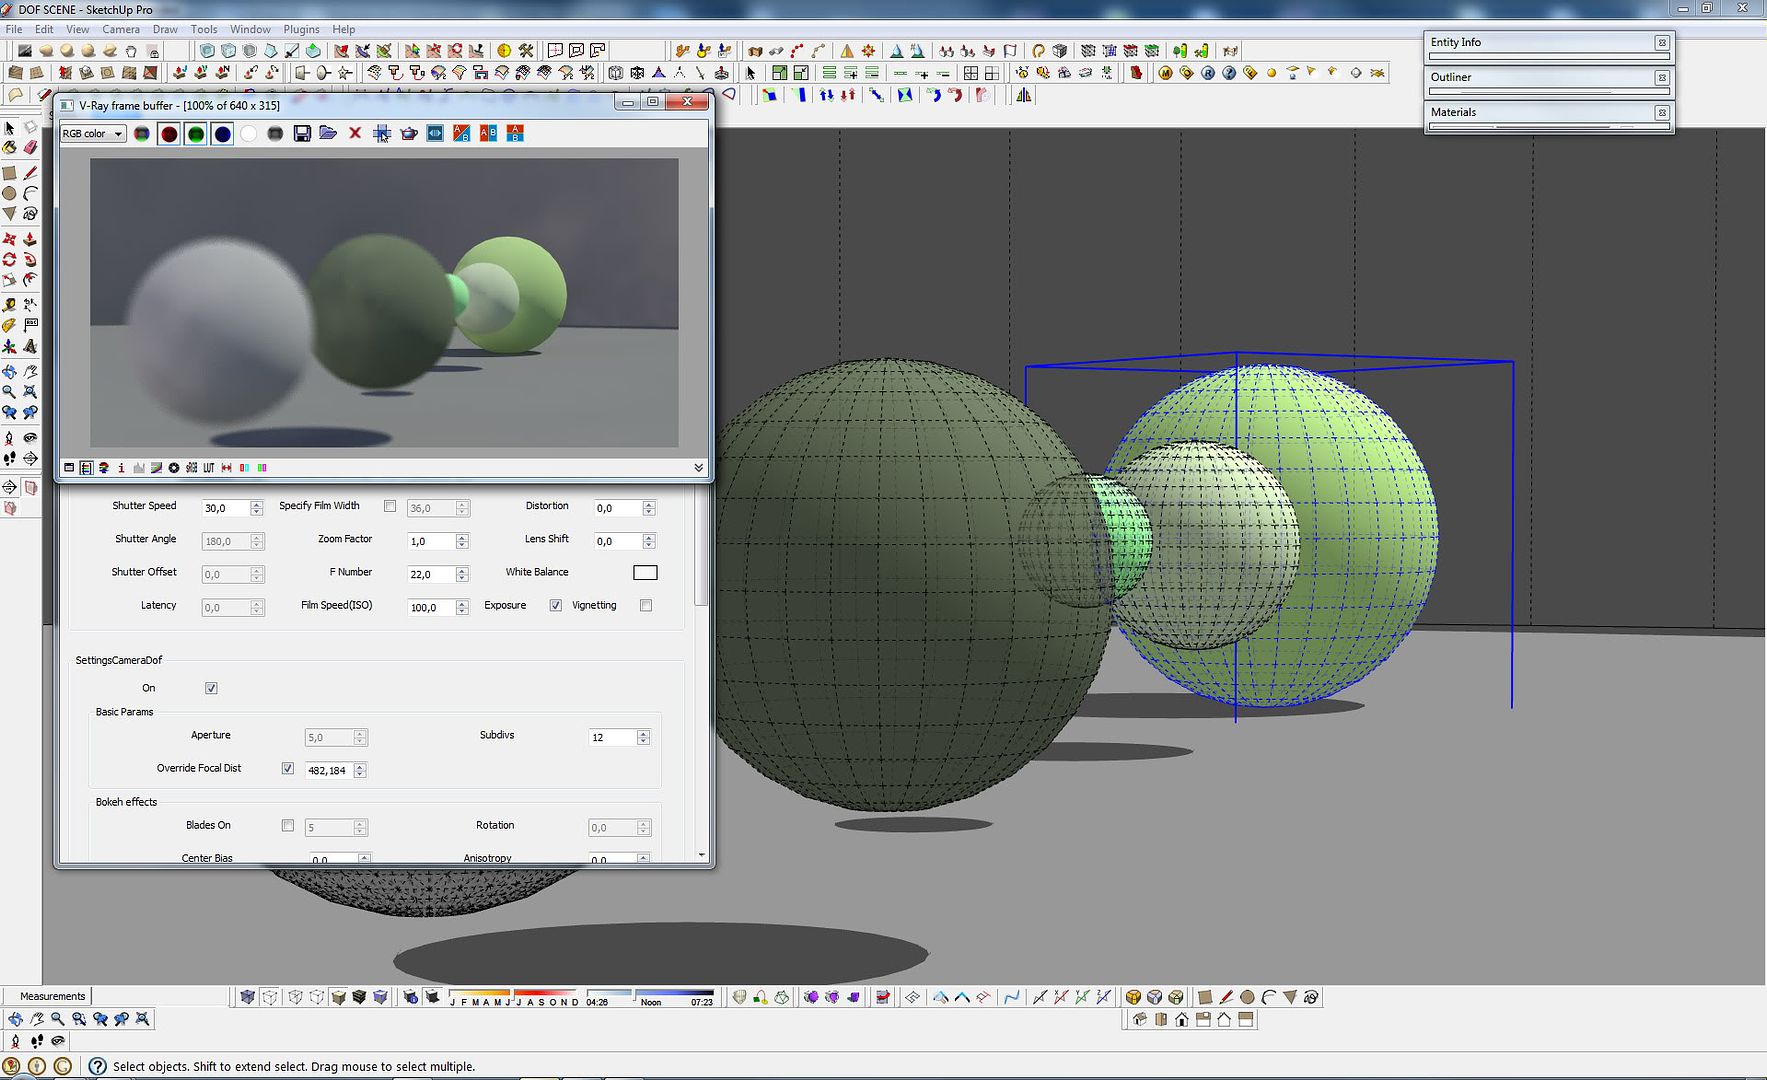
Step 8: Create render
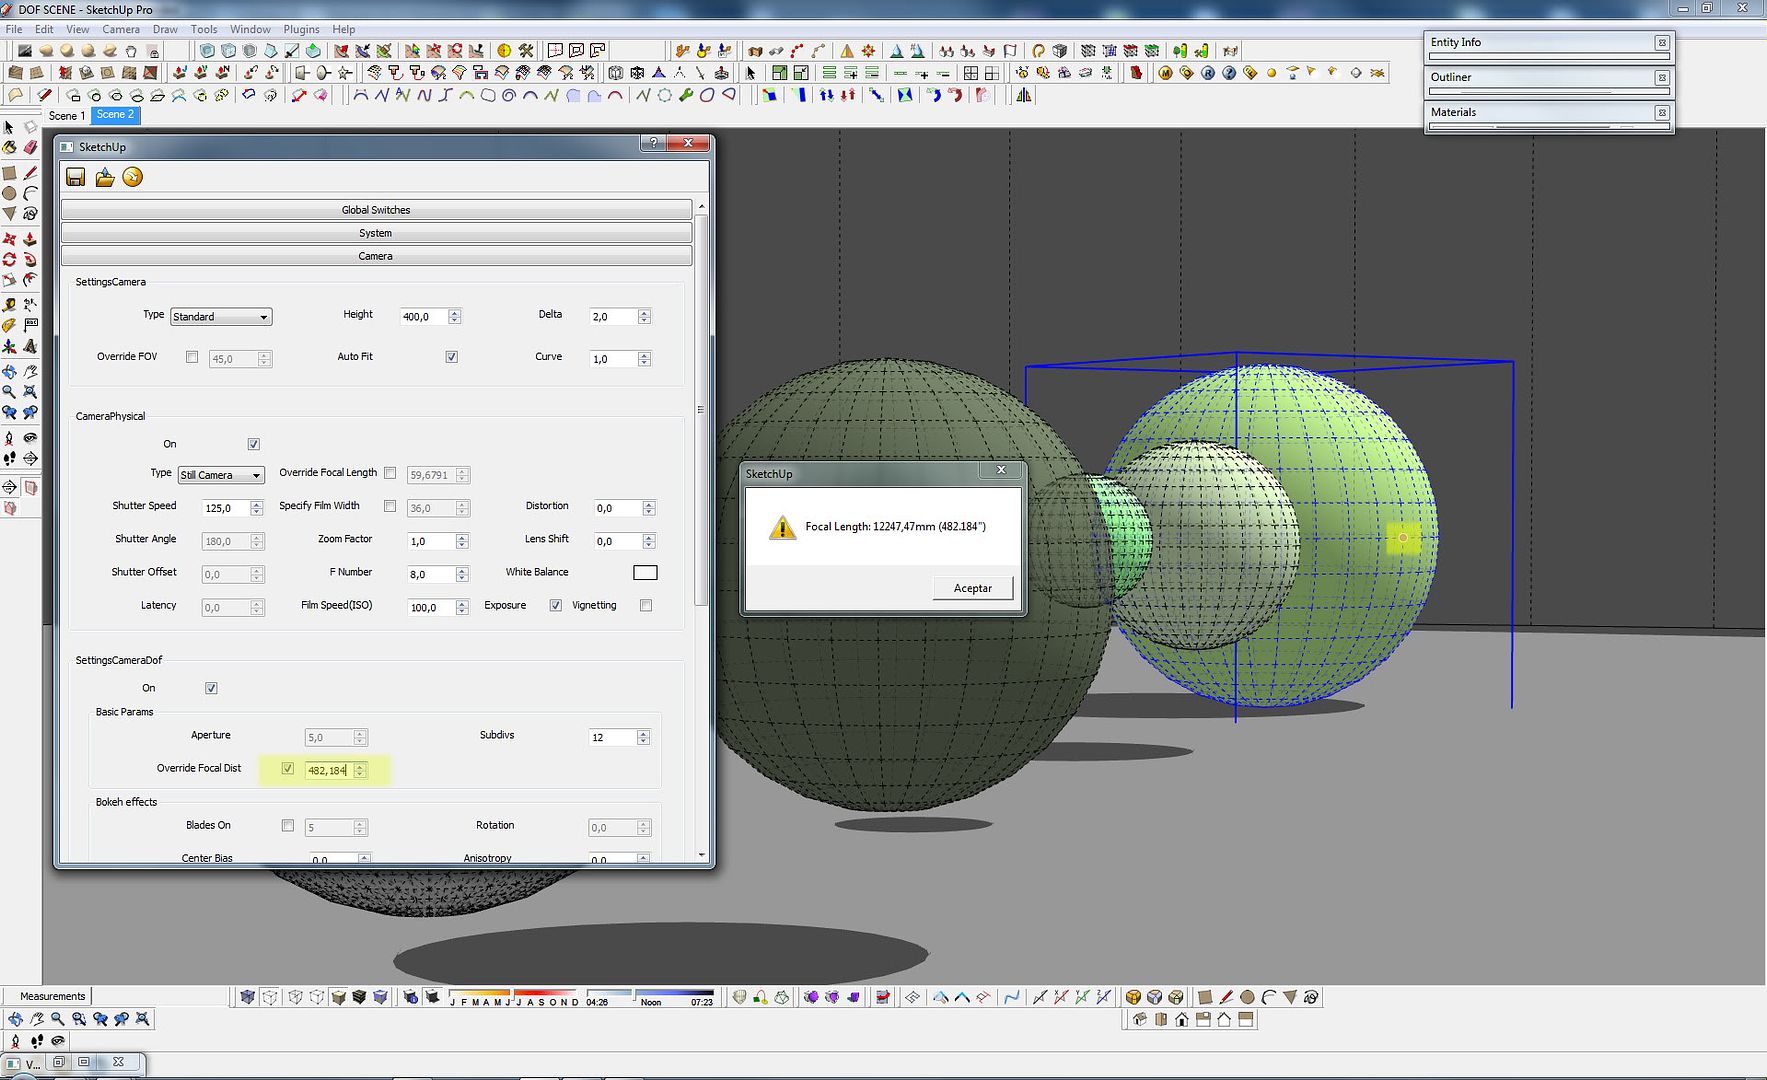
Step 9: Choose another focal point and do the same as the previous step.
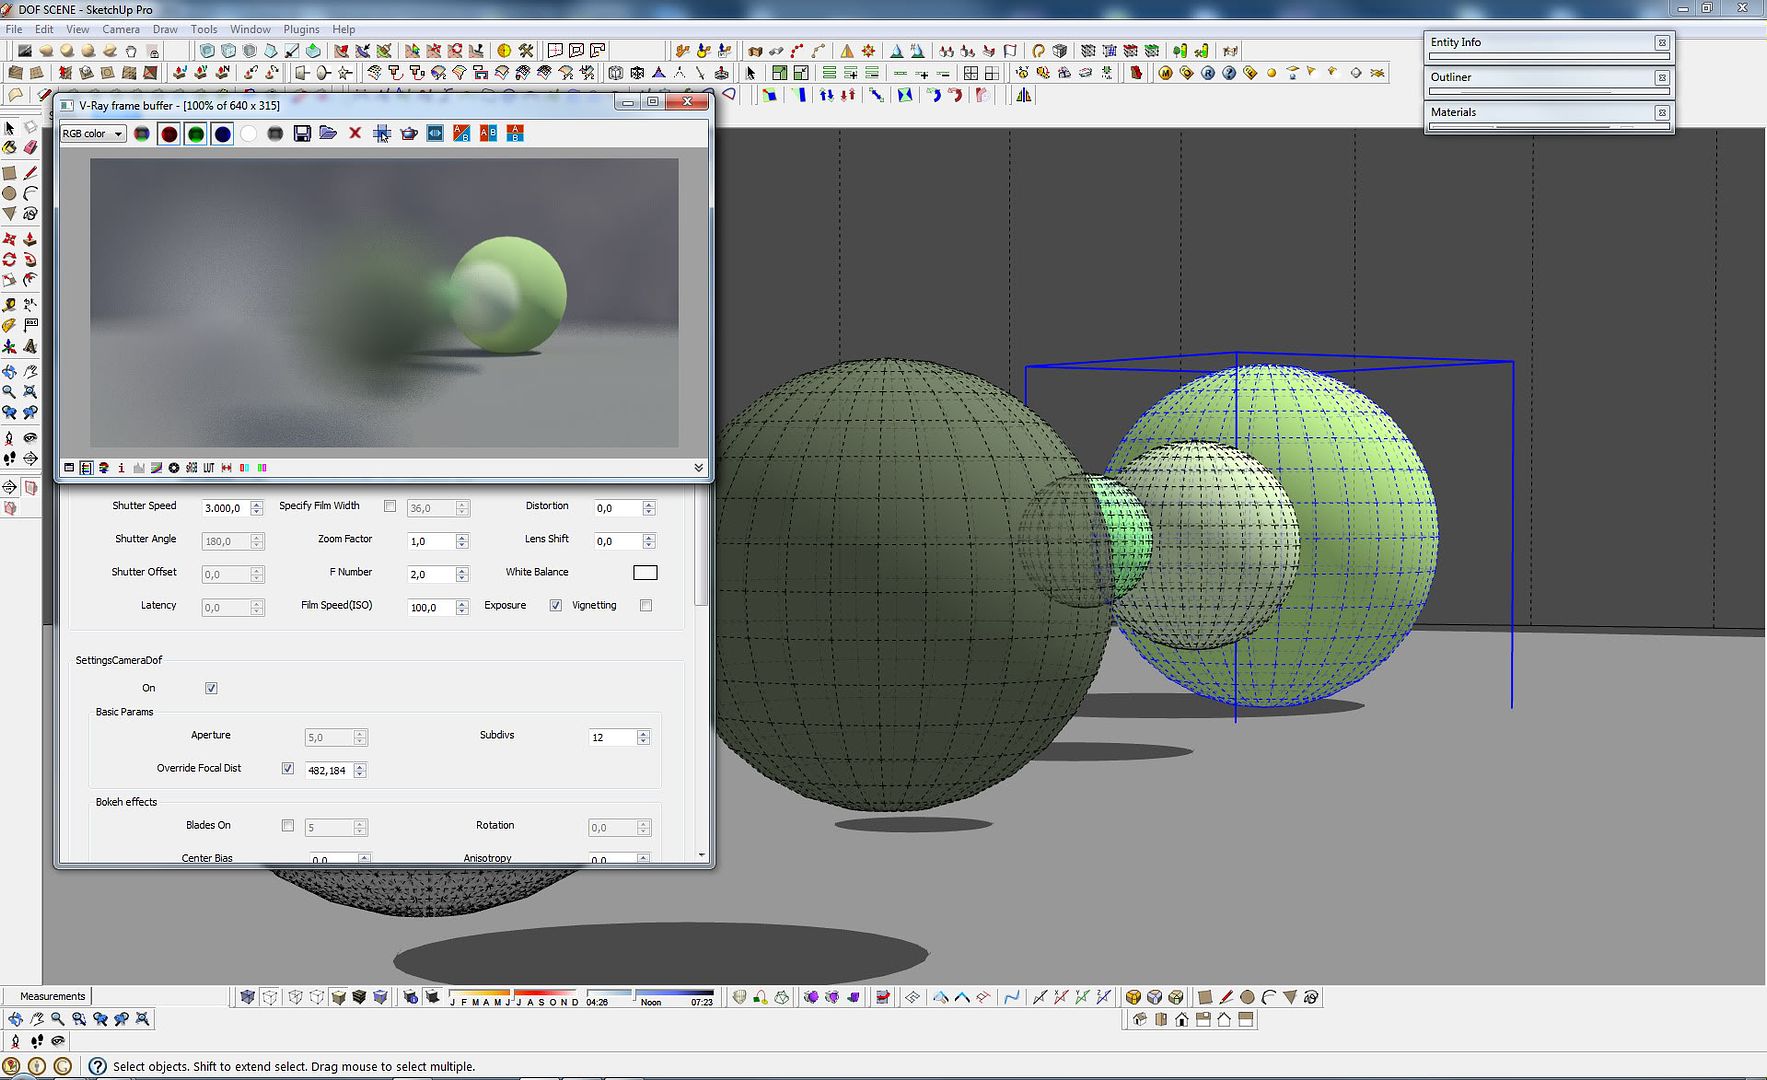
Step 10: Now is time to play with your f. number to achive stronger DOF effect or subtle one.
Note: Less aperture the f.number the longer depth of field (less DOF effect). The lower the f.number the shorter the depth of field which means stronger DOF effect like in real camera. You need to adjust the other camera values to balance your exposure. Youo can see this in the next images, 11, 12,13
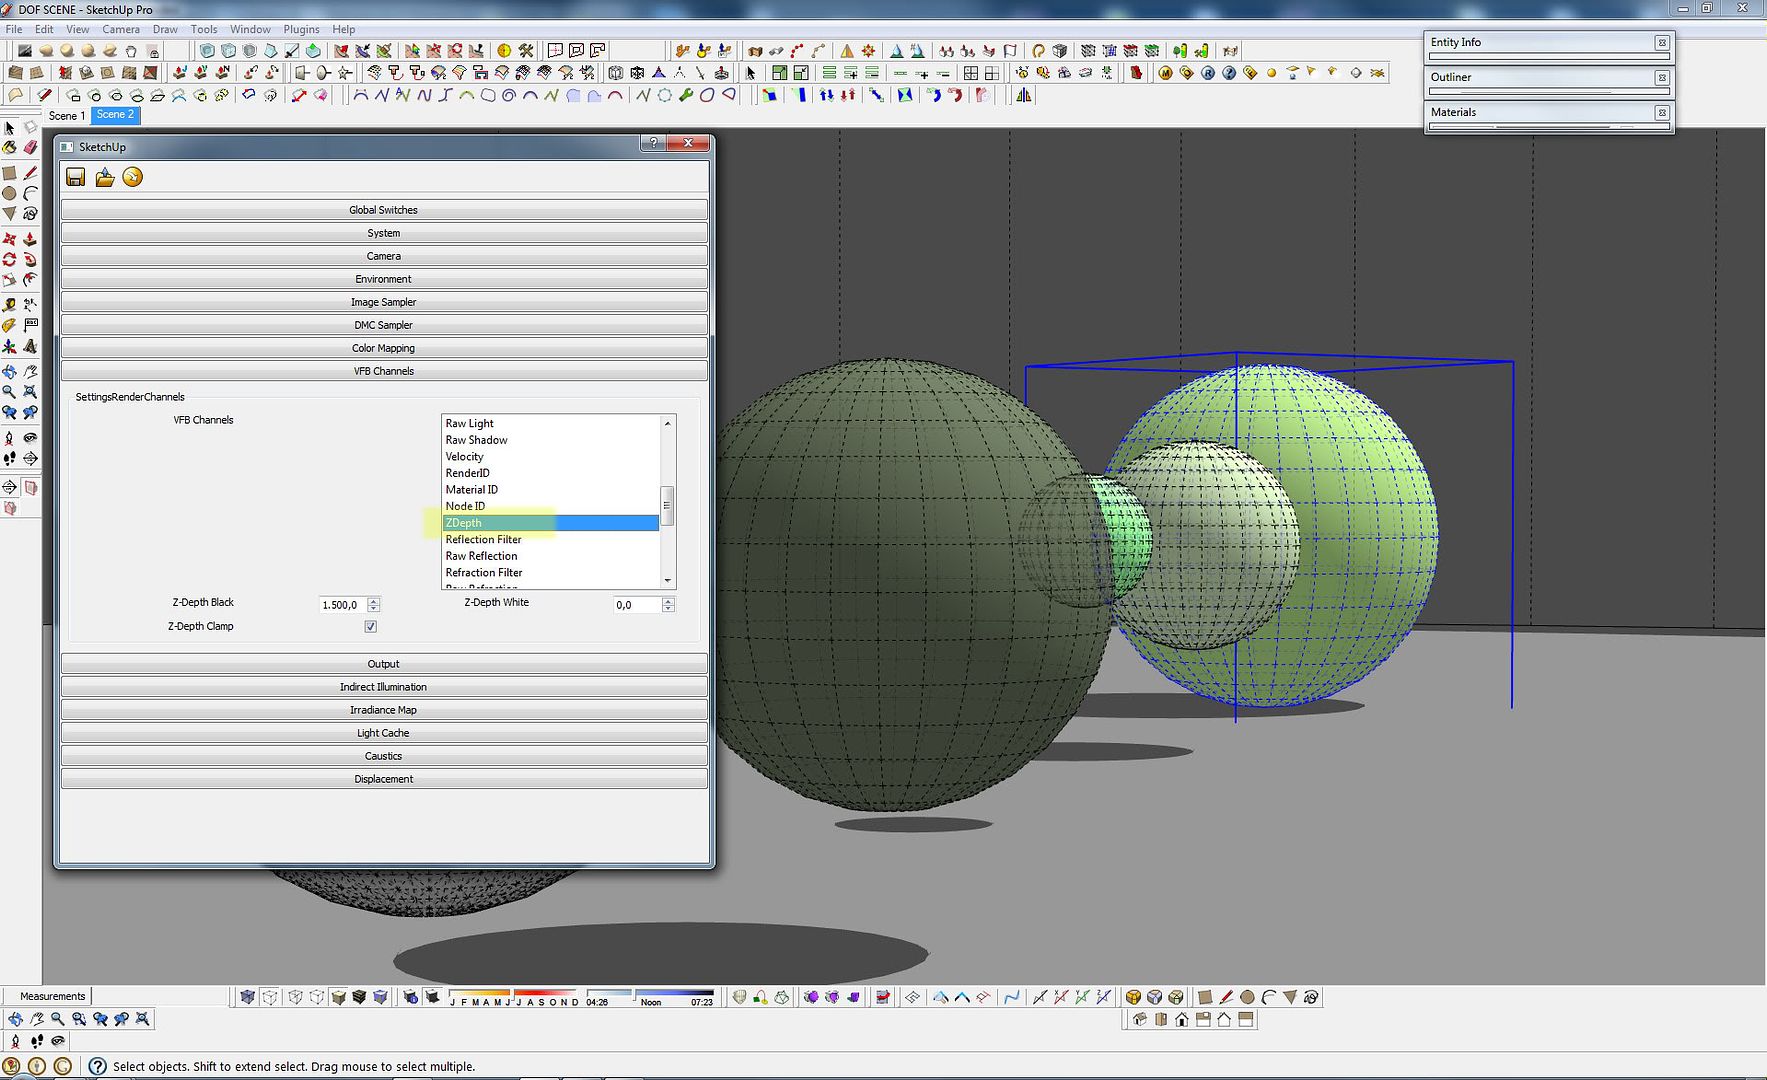
Step 11: Now is time to get the same effect using z-depth pass from vfb channel. Then we will use the channel in Photoshop.
Step 12: First untick the dof in the camera tab. This option is faster.
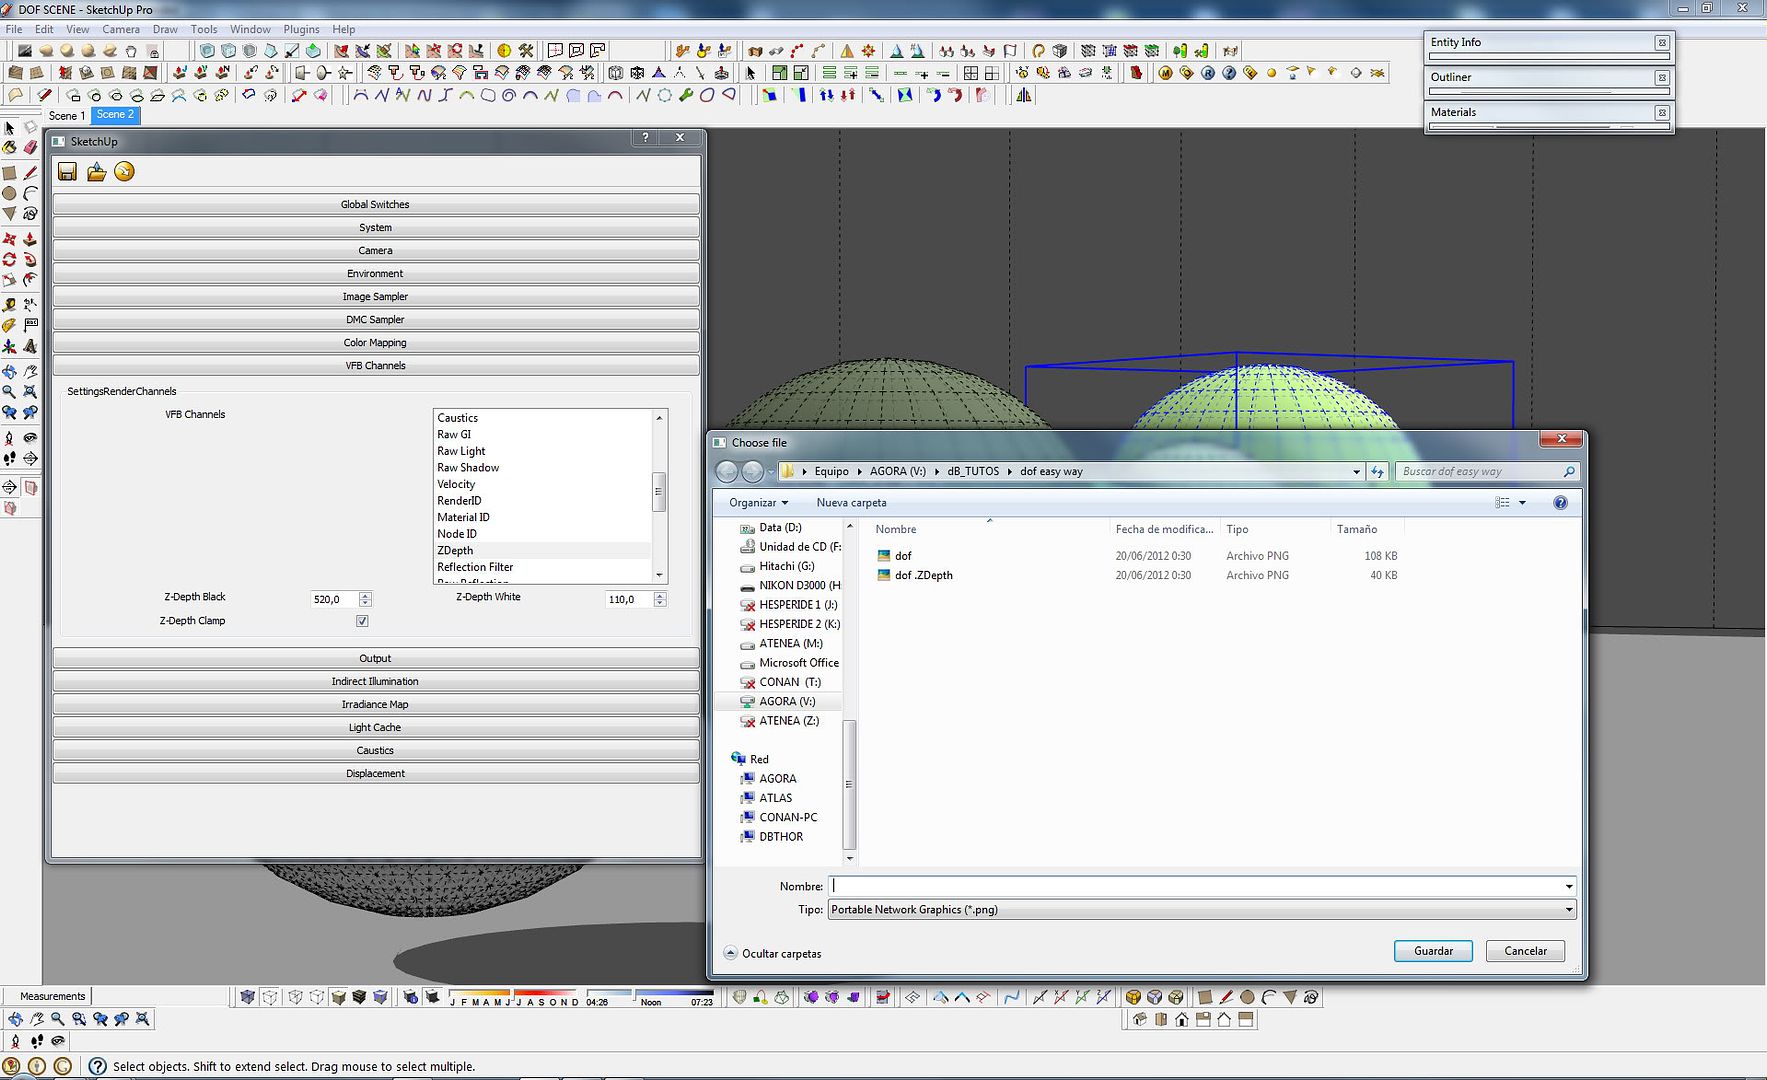
Step 13: Go to vfb Channels tab and choose z-depth
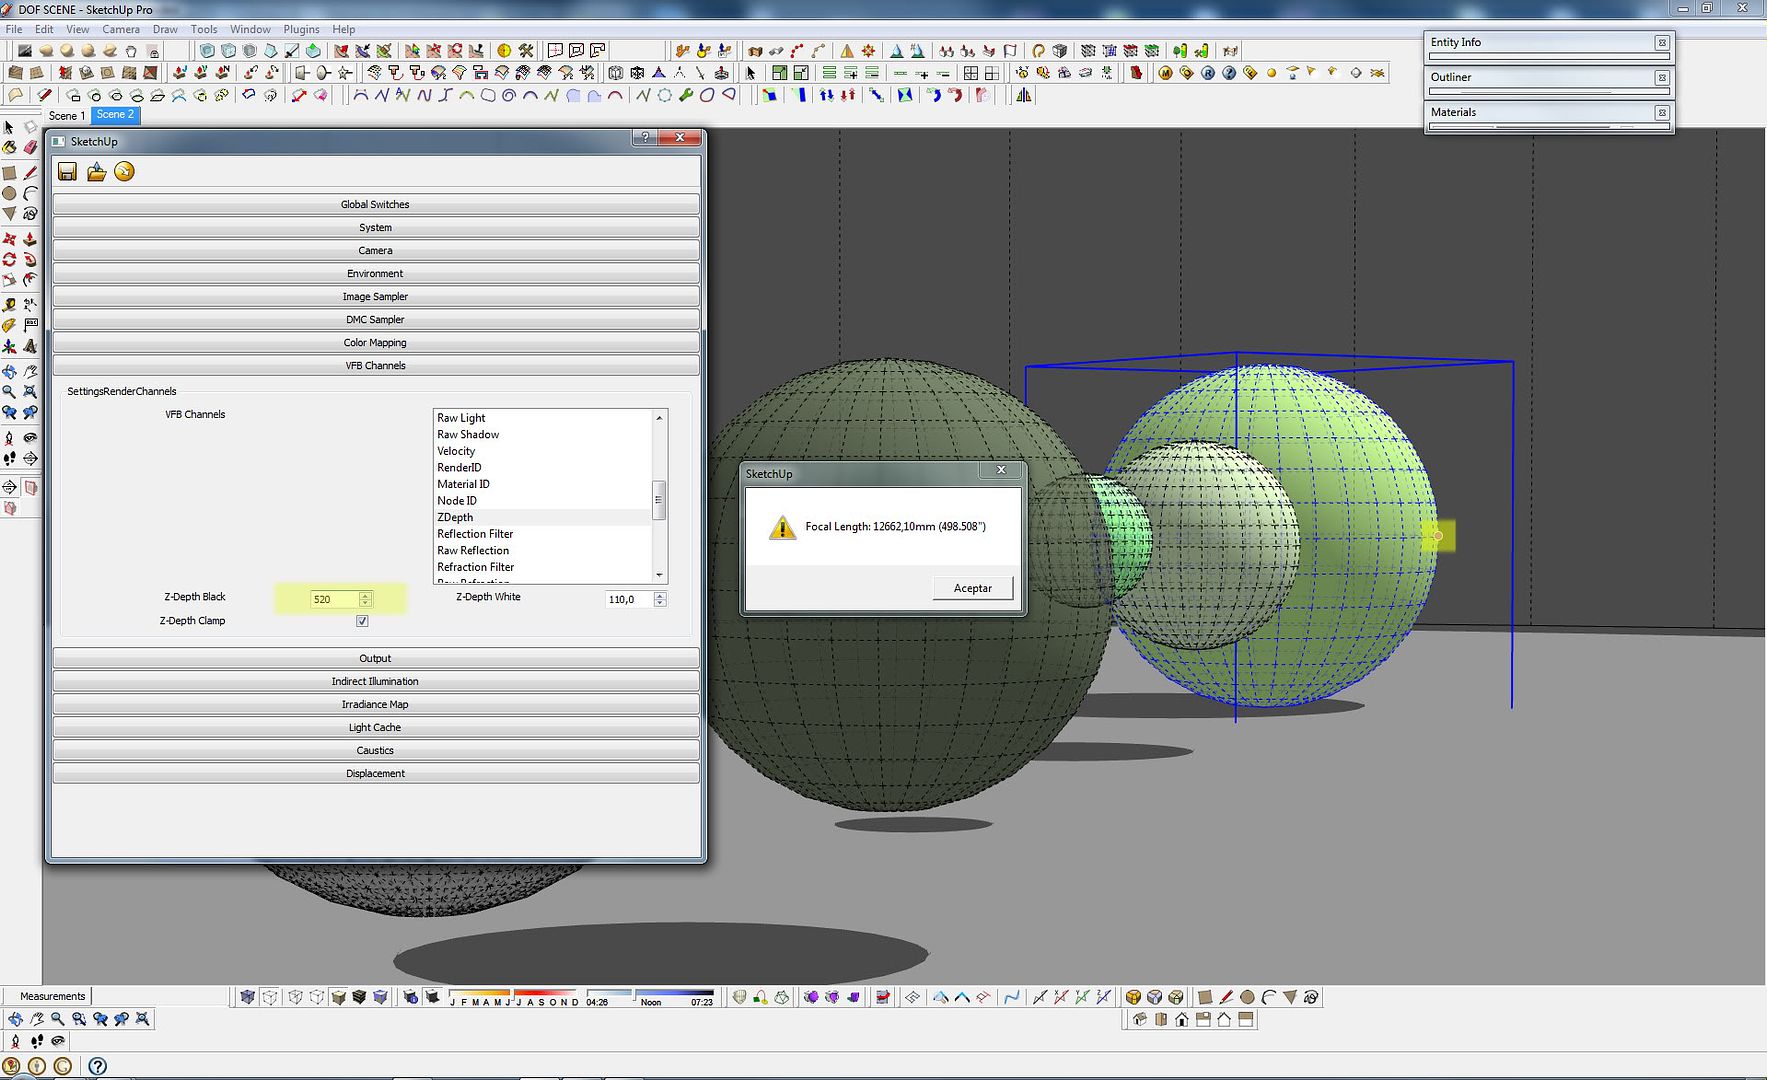
Step 14: In z-depth white value put the distance to the nearest point you have in
the scene. Also in inches use the same plugin before the measure the
distances.
Step 15: In z-depth black value, place the distance of the farthest point, check z-depth clamp.
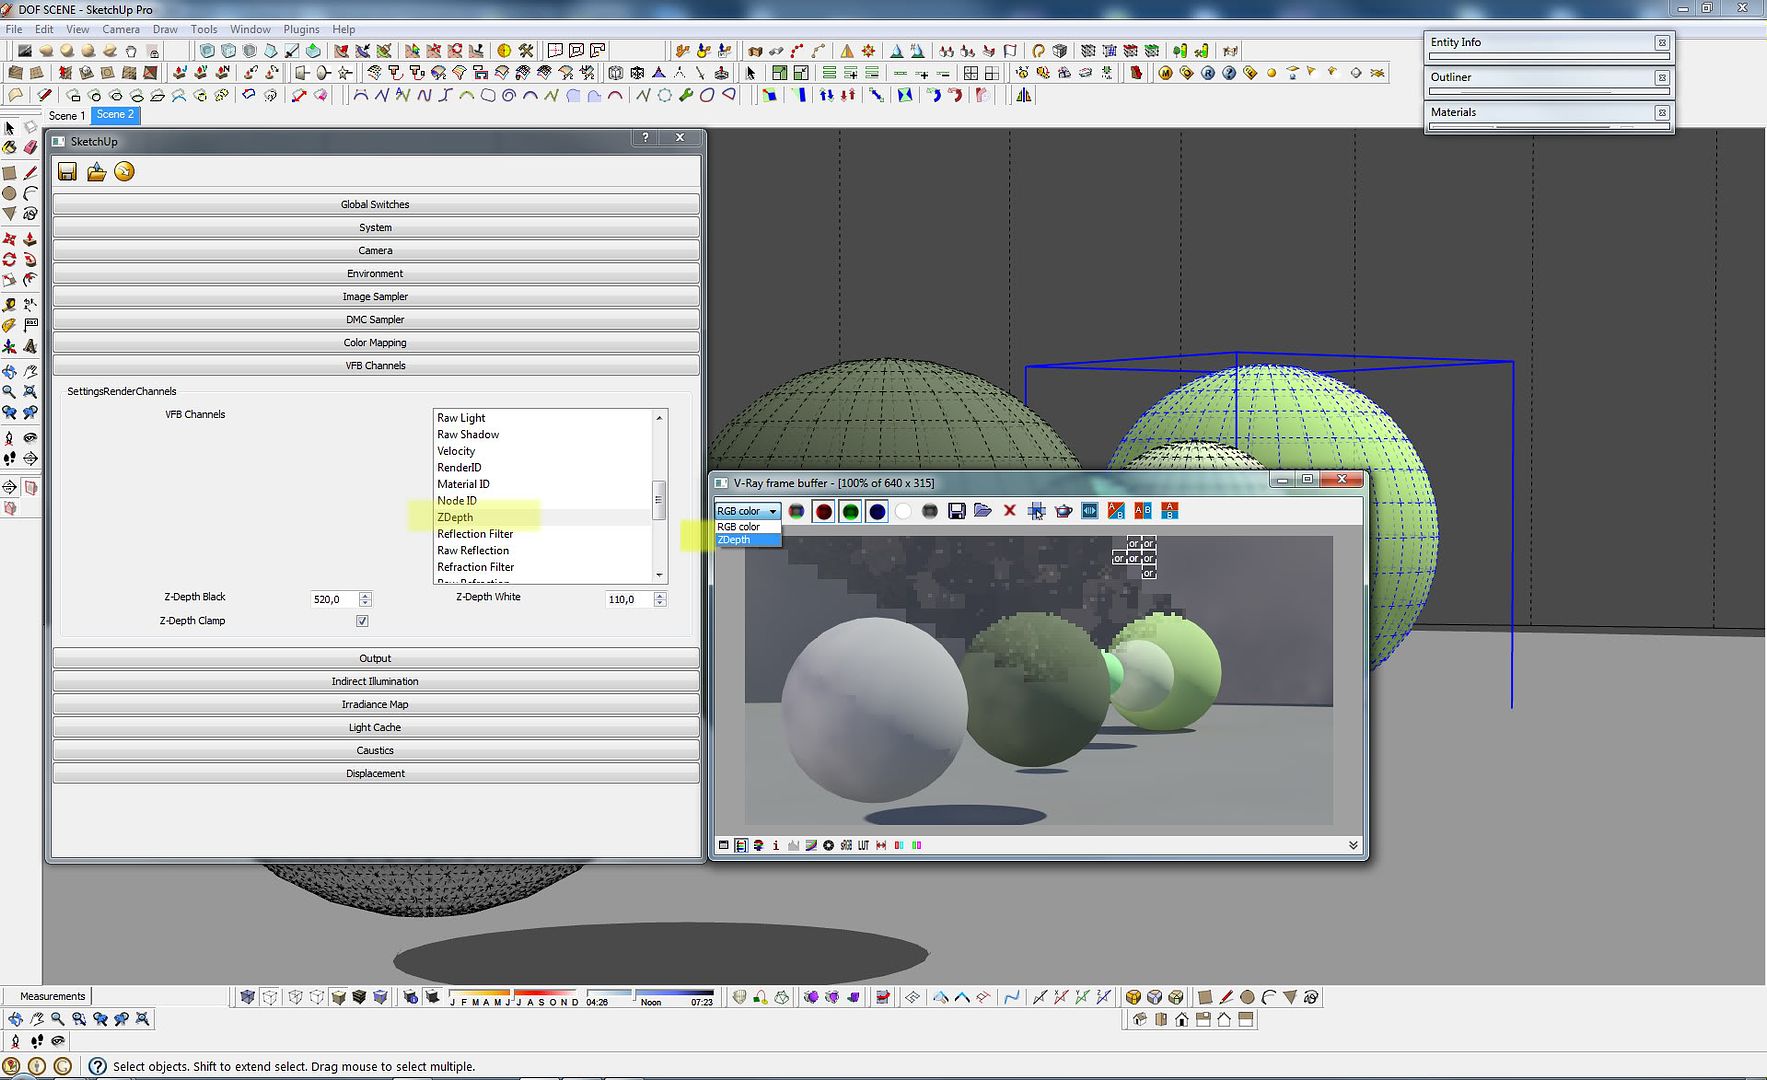
Step 16: On top left corner of VRAY frame buffer you can see the channels go to z-depth to see the result.
Step 17: Check the result.
Step 18: Copy z-depth image
Step 19:
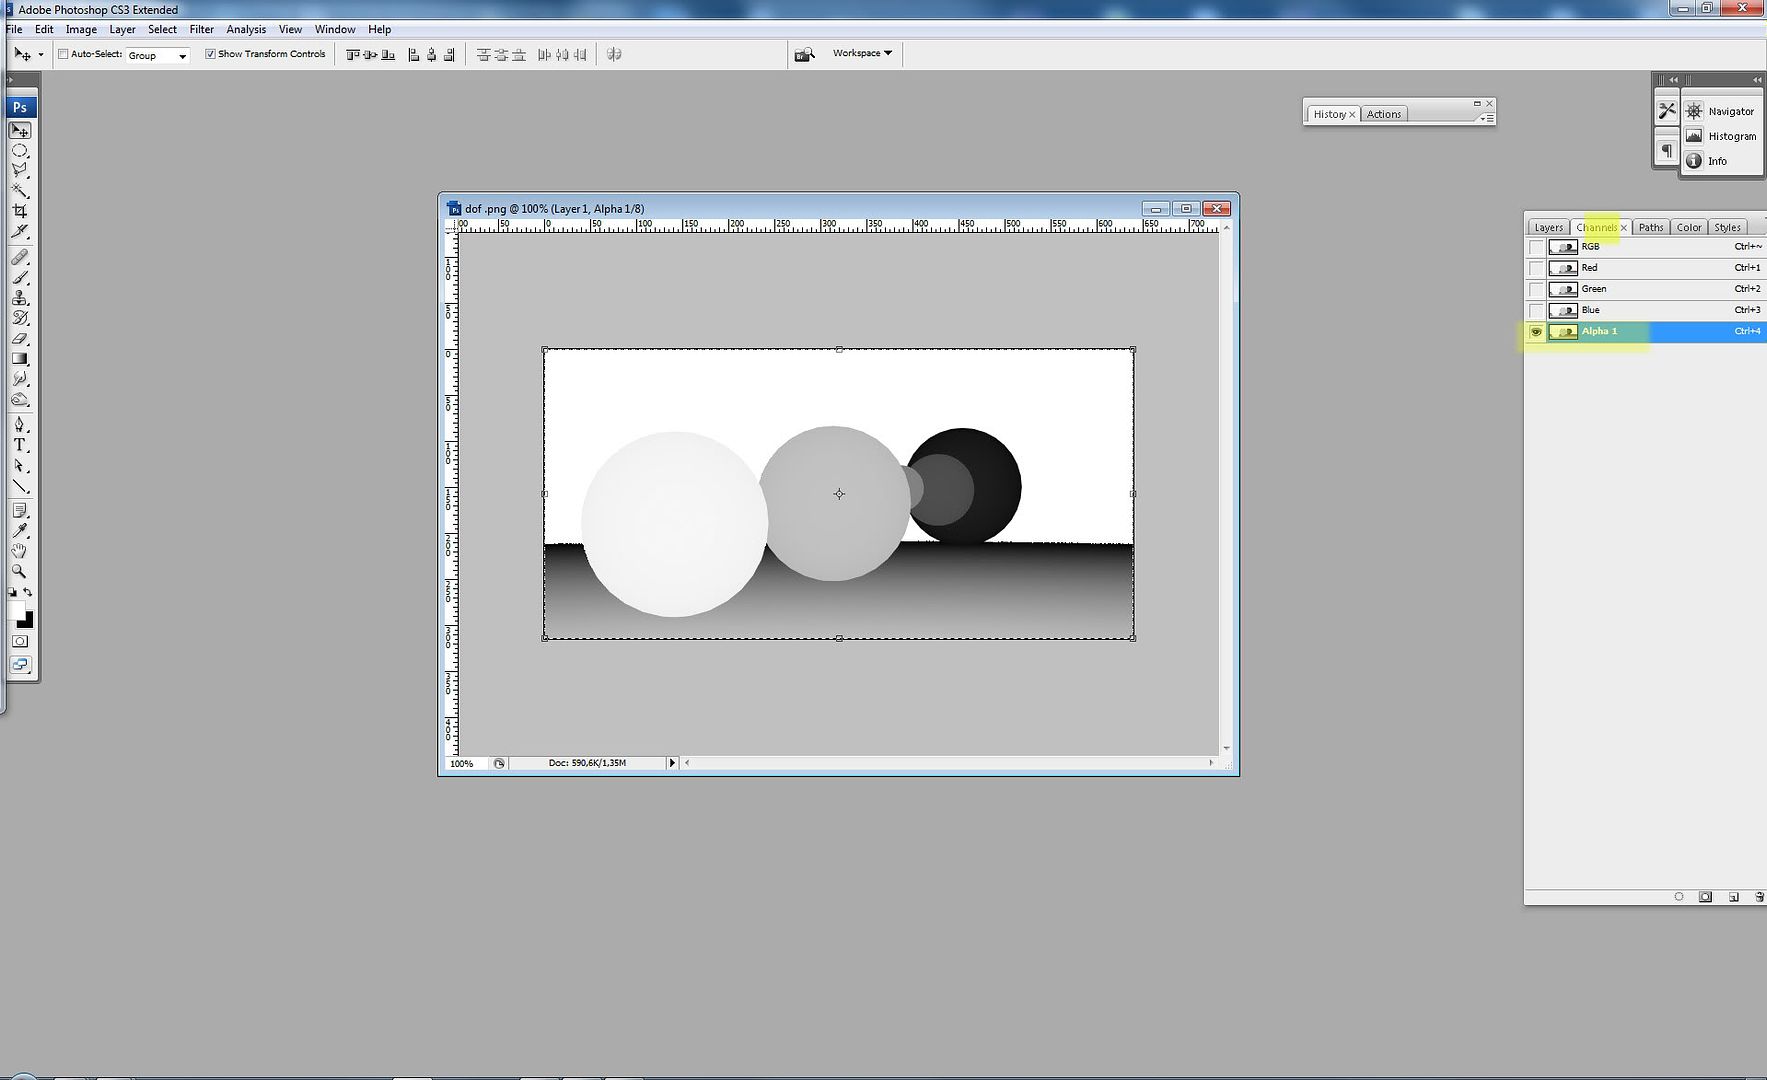
After render, your channels will be saved. You will use both of them in Photoshop.
Step 20: Paste it in the channels tab as a new alpha channel
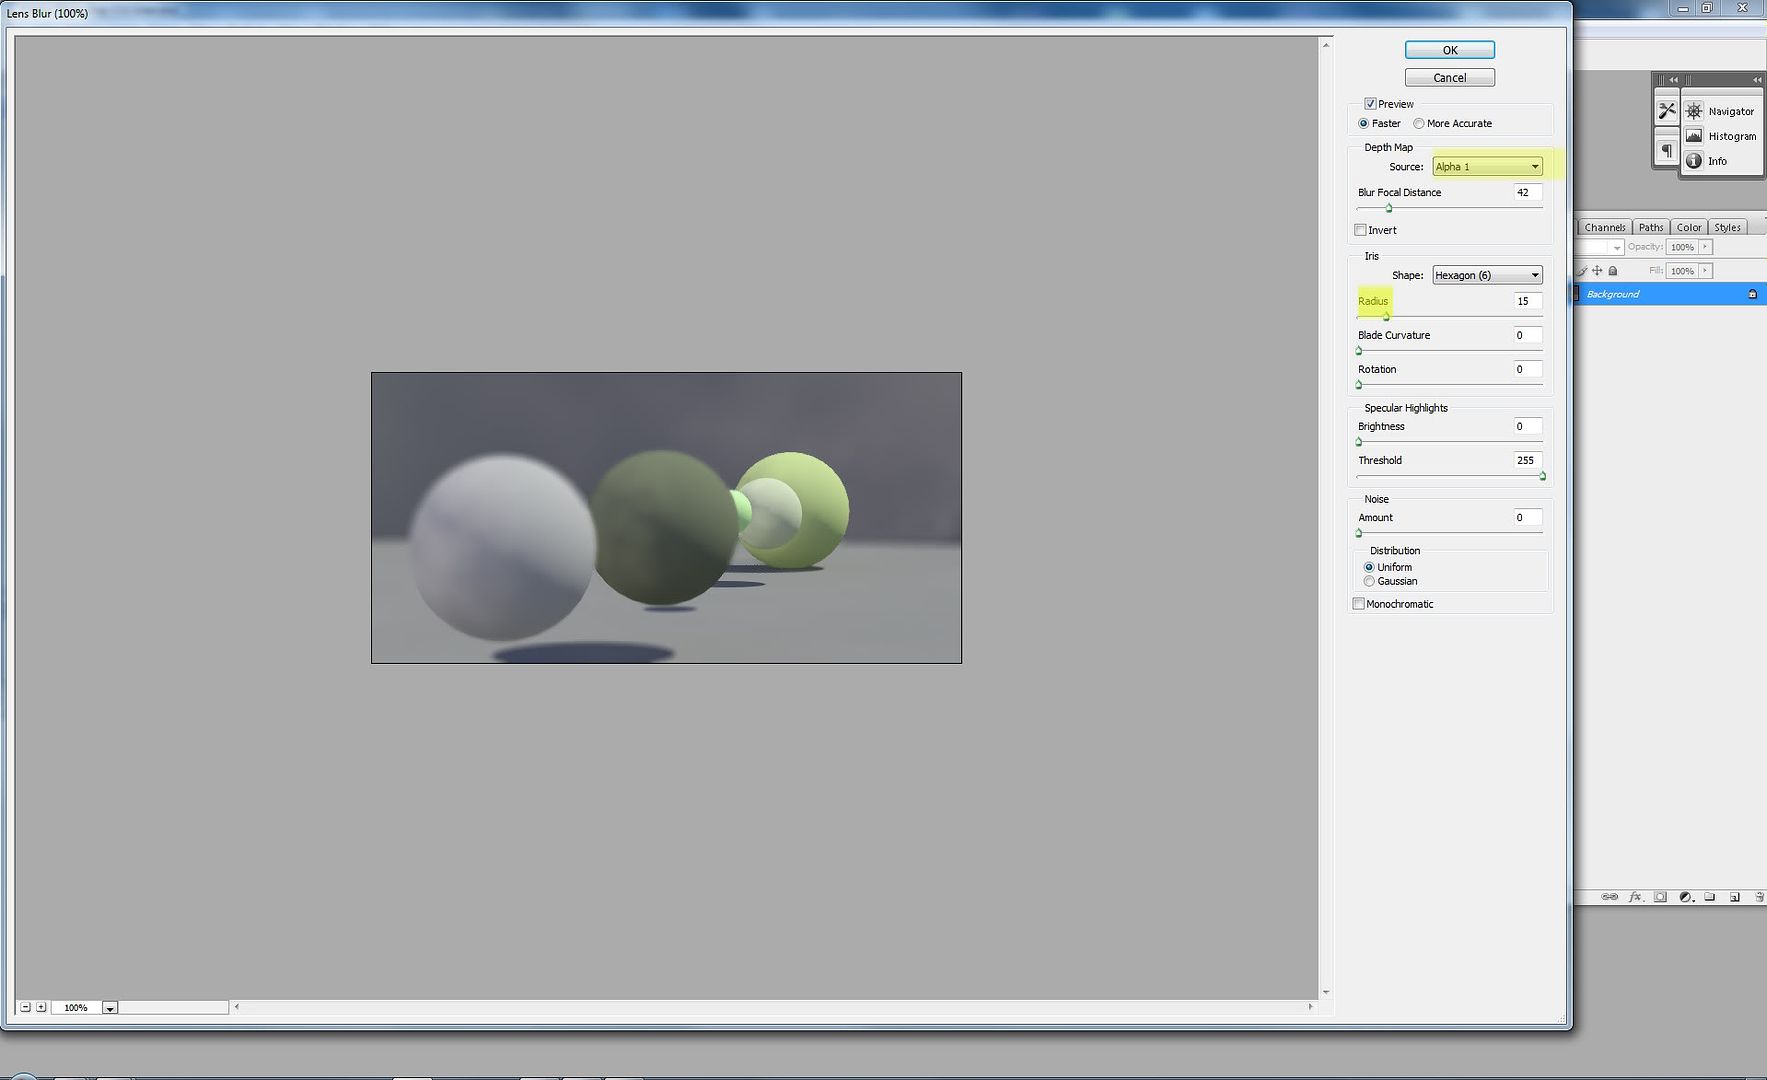
Step 21: Go to Filter, blur, lens blur and search in the depth map , Source your alpha 1, now you can play with the parameters to get nice results.


 Vray Materials Settings


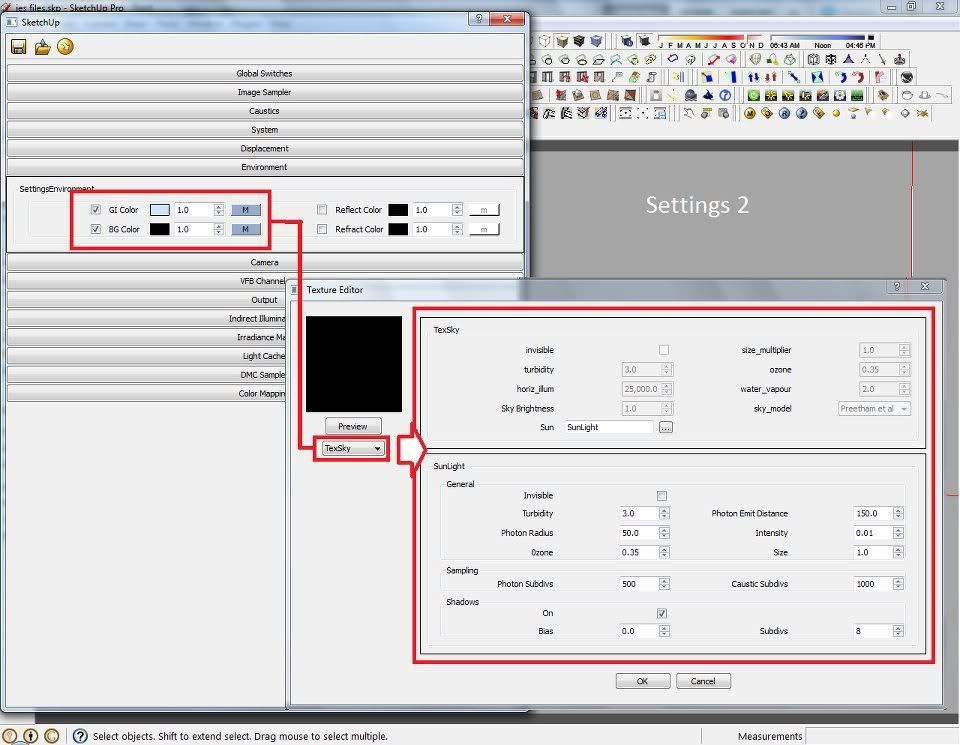
 Lighting Setup and Settings


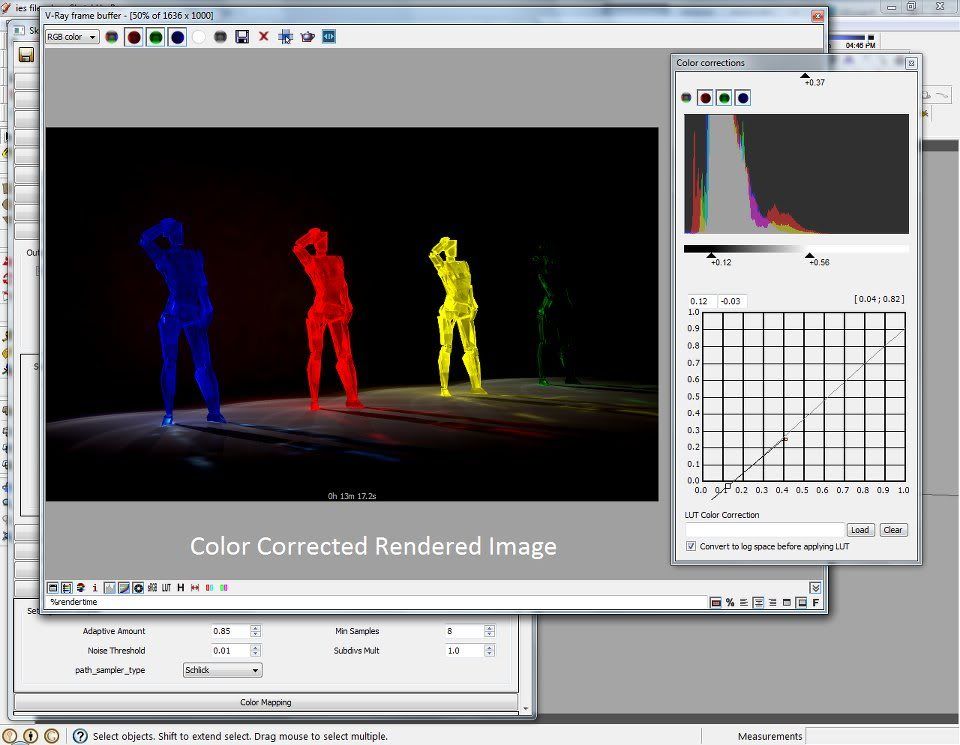
 POST PROCESSING